Step-by-step instructions for pasting inner corners
When decorating, the main problem can be uneven walls and the resulting folds in the wallpaper. It is also necessary to take into account that with crooked walls, the joints of the wallpaper panels may diverge.
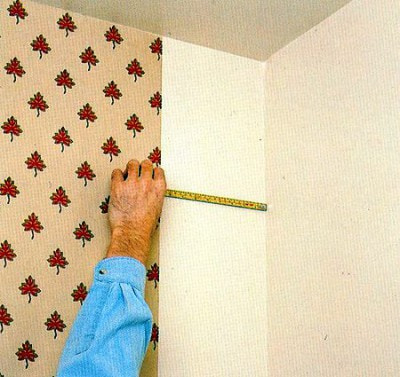
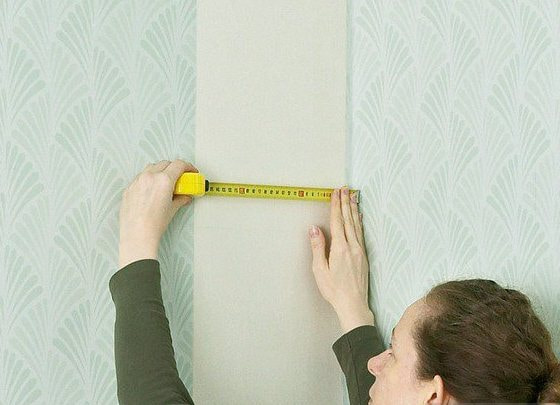
- After pasting the last panel, you need to measure the remaining distance before the inner corner. It is measured from the edge of the pasted panel to the adjacent wall, 10-15 millimeters are added to the resulting figure. If the walls are very curved, the additional figure may be larger.
- A strip equal to the resulting figure is cut off, taking into account the allowance.
- The surfaces are treated with glue. Depending on the type of coating, this may be only the wall or both surfaces.
- The strip is glued independently with the cut side to the wall. The wallpaper should overlap onto another plane.

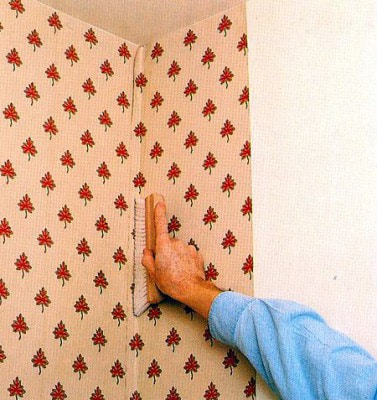
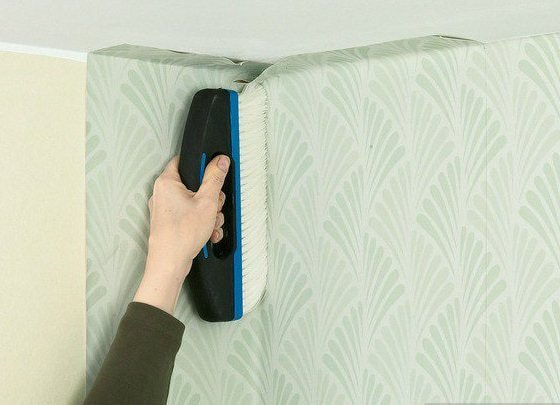
- If the pasted wallpaper is wrinkled, you need to make several small cuts perpendicular to the folds.
- A vertical line is drawn on the adjacent wall using a level or slope. The distance from the corner is equal to the width of the previously cut strip, excluding additives.
- The surfaces are coated with glue, after which the covering is glued to the wall with the even side facing the marked line. The cut side goes onto the adjacent wall.
- If the covering is thick, the wallpaper is cut along the overlap line.
How to glue an outer corner (external)?
The protruding corner should be pasted over in the same way as the internal one, but there are some small differences that should also be taken into account when working.
- The distance remaining from the pasted wallpaper to the adjacent wall is measured. 20-25 millimeters are added to the resulting figure.
- The segment is cut off taking into account the added 20-25 millimeters.
- Before gluing, the surfaces are treated with an adhesive composition.
- The even edge should be glued to the wallpaper already fixed to the wall, the side cut by hand “goes” onto the adjacent plane.
- If necessary, make small cuts in the place where the wallpaper overlaps another wall, smooth it out and press it against the wall.
- Draw a vertical strip on the adjacent wall at the distance of the just pasted cut strip plus 6-10 millimeters.
- After applying the glue, apply the strip to the wall with the flat side to the marked line, overlapping the edge of the already pasted strip.
- The joints are coated with glue and smoothed with a roller. After which the top layer is cut along the ruler and the two layers are joined together.


What to do if the corners are uneven?
Uneven walls are a common problem in old houses. Before you start gluing the finishing coat, it is advisable to do some preparatory work and tidy up the surfaces. If the corners are visually even and do not require major repairs, it will be enough to go over them with a hard cloth, removing small irregularities and dust. If the irregularities are visible to the naked eye, it is better to do some work before you start gluing the wallpaper.
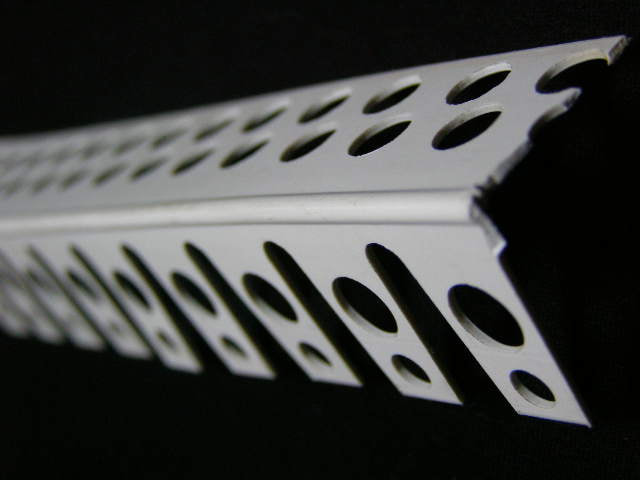
- When carrying out finishing putty work, a plastic corner is inserted and fixed with a putty mixture. They can be purchased at a hardware store.
- After drying, the surface is leveled with putty or plaster.
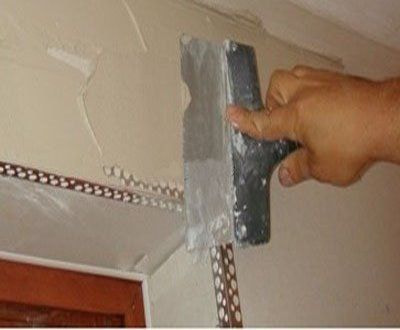
- After drying, the walls are treated with a primer.
- After the work is done, the finishing can be glued to the walls.
Features of pasting with meter-long wallpaper
Wide canvases are convenient because they allow you to complete the finishing with fewer seams on the surface. They are more difficult to glue, but the result is worth it.
- Most often, meter-long wallpaper is made with a non-woven base and vinyl coating, they are much easier to glue. However, there are also wide paper products.
- When working with non-woven meter-long products, glue is applied only to the wall.
- Wide wallpaper requires preliminary surface preparation.
- To glue the corners, you need to cut the canvas into pieces and glue them overlapping. After that, the excess top layer is cut off.
- After applying the strip to the wall, there is still some time left to level the covering by carefully moving it.

How to join in the corners?
It would seem that such a trifle as gluing the corners in a room can completely ruin the entire job if done incorrectly. And if the wallpaper also has a pattern that needs to be adjusted, then you should approach the finishing responsibly.
- The strip is glued in such a way that it overlaps the adjacent side. The width of the overlap should not be more than 5 centimeters.
- Using a plastic spatula, align the corner.
- The next segment is glued with an overlap.
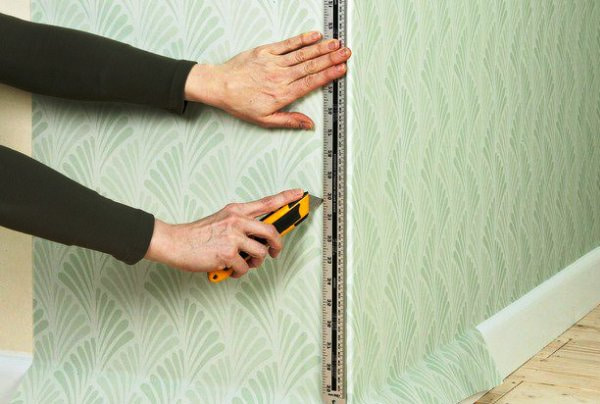
- In order to trim the excess overlap evenly, a ruler is applied to the middle of the overlap and the excess edge is cut off with one movement of a stationery knife. To ensure that the cut strip is even, it is worth using a level.
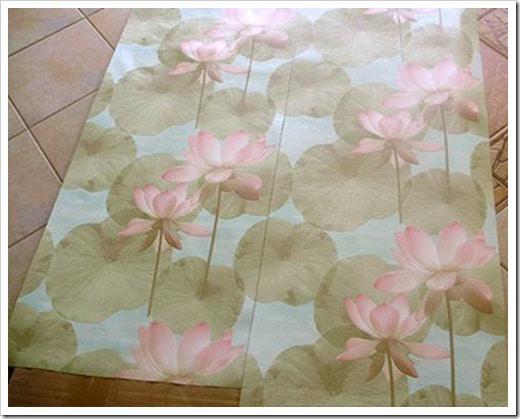
How to fit the pattern in the corners?
It is important that the pattern is continuous and even around the entire perimeter of the room. To do this, you need to correctly align the pattern and cut off the excess.

- The strips are also glued with an overlap. An allowance is left on both walls.
- Using a plastic spatula, press the wallpaper to the corner.
- After gluing the second strip, trim the wallpaper according to the pattern. This method applies to wallpaper with a small pattern. For a large pattern, trimming along the edges may be required.
Before gluing, you must first prepare the material for work by spreading the covering on the floor and studying the pattern. The segments are cut after selecting the pattern by height.
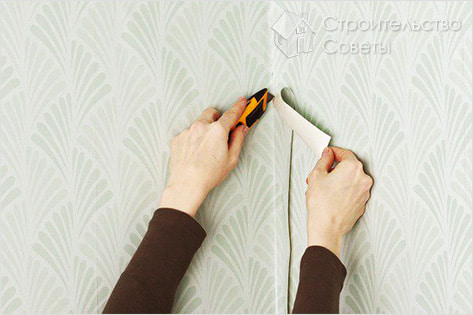
Features of cutting wallpaper in corners
In order to get a perfectly even seam in the corner, you need to correctly cut off the excess.

- After the wallpaper is pasted to the wall, apply a straight metal ruler, it can also be a spatula or a rule. To make the cutting line straight, you can use a level.
- Use a sharp stationery knife to cut off the excess along the edge of the ruler, after which the top layer of wallpaper will come off.
- Carefully pry up and take out the bottom layer of wallpaper, remove it in the same way.
- The sheets are coated with glue and pressed tightly to the corner. As a result, they fit tightly together for coverage.
Gluing wallpaper in the corners is not that difficult, but it requires special care and accuracy. Today, there is a finishing method that allows you to do the work without any joints at all, namely liquid wallpaper. They are applied in an even layer and do not require such complexities as adjusting the pattern, width, accuracy in rounded places and other nuances.
Now reading:
- Patchwork tiles for kitchen and bathroom: design ideas and 50 inspiring photos
- 10 unusual options for wall decor instead of a painting that will surprise you.
- Creative Ways to Organize Toys in a Kids Room
- Comprehensive Guide to Buying a Used Opel Vivaro
- Olive shade in the interior: more than 70 photos and design ideas