In the realm of home improvement, few things are as crucial yet overlooked as the installation of a vapor barrier on your ceiling. While it might not be as glamorous as selecting the perfect yellow wallpaper for your living room, it plays an indispensable role in safeguarding your castle from the relentless foe that is moisture.
Understanding the Purpose of a Vapor Barrier
Much like a watertight seal on a submarine, a vapor barrier is designed to prevent moisture from seeping into undesirable areas. In colder climates, it keeps warm, moist air inside from turning into condensation in the attic. Conversely, it helps maintain the integrity of the ceiling structure in warmer areas.

Key Considerations in Selecting Your Vapor Barrier
Material Matters
Choosing the right vapor barrier is akin to selecting the perfect car, as detailed in the Comprehensive Guide to Buying Used Opel Karl Cars. Your choice might seem trivial but can have a profound impact.
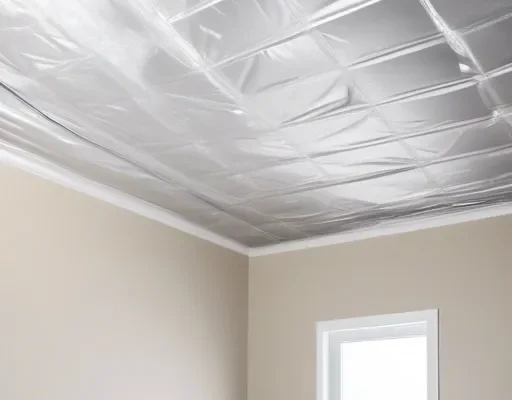
- Plastic Sheeting: Commonly made of polyethylene and cost-effective, yet its impermeability can sometimes trap moisture if improperly installed.
- Foil-backed Products: These offer excellent thermal resistance and work well in attics, albeit at a slightly higher cost.
- Paint-on Barriers: A non-traditional option that works well for existing structures needing a retrofit.
Permeance and Performance
Permeance is the measure of a material’s ability to allow moisture vapor to pass through it. Selecting a vapor barrier with the appropriate permeance for your climate is essential for its effectiveness.
Installation: The Devil is in the Details
Imagine preparing a gourmet meal: meticulous attention to detail can define triumph from disaster. Similarly, installing a vapor barrier demands precision.
Pre-Installation Checklist
- Inspect for existing moisture issues.
- Ensure all electrical components are moisture-resistant.
- Gather the necessary tools: utility knife, staple gun, and moisture-resistant tape.

Step-by-Step Guide
- Layout the Barrier: Unroll your vapor barrier, cutting it to size while maintaining a generous overlap between sheets.
- Secure in Place: Use your staple gun to attach the barrier to ceiling joists, ensuring staples are placed no more than 12 inches apart.
- Seal the Seams: Apply moisture-resistant tape to seal joins and secure the edges of the barrier.
- Inspect Your Work: Check for any gaps or poor seals that could allow moisture ingress.

Installation Pitfalls: The Common Missteps
Too Tight or Too Loose?
Just like choosing a dishwasher that fits perfectly in your kitchen, the right balance in your vapor barrier’s tightness is crucial. A tight fit can strain the material, while a loose barrier can sag, creating moisture traps.
Not Accounting for Natural Expansion
An often-overlooked factor is the natural expansion and contraction of building materials. Allowing for slight accommodation can prevent unwanted tears.

The Verdict: An Impeccable Vapor Barrier for a Resilient Home
Overall, the installation of a vapor barrier is more than an ancillary task—it is a fundamental component of your home’s structural health. By understanding your needs, selecting the right materials, and executing the installation with care, you ensure that your sanctuary remains a bastion against the elements.