What is decoupage?
The word “decoupage” comes from the French “découper”, which means “to cut out”. This term refers to a special technique for decorating items by applying illustrations, patterns from pieces of paper, and various decorative elements. The surface is covered with paints and varnish, producing various visual effects.
Decoupage was first used in Germany in the 15th century. At that time, people began to decorate furniture with pictures cut out of newspapers. However, decoupage became widespread in Europe in the 17th century. Artists and manufacturers began using it to imitate expensive inlays. Over time, decoupage has become a mass hobby and today it is applied not only to furniture, but also to small items: plates, boxes, bottles, etc.
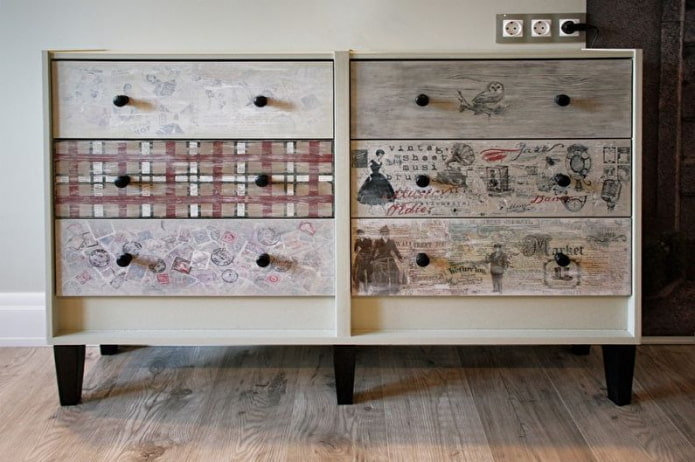
What tools and materials will you need?
To master the decoupage technique, you should prepare the basic tools in advance, with the use of which the work process will become easier and more interesting. Therefore, you need to buy:
- synthetic brushes for covering surfaces with different compounds and drawing a pattern;
- palette knife (or small spatula) for applying wood filler and structural pastes;
- foam sponges for painting products;
- sandpaper for grinding.
Also, auxiliary tools are necessary for creativity, which will significantly facilitate the work process. For example, you will need containers for mixing paints, napkins, scissors for cutting, etc.
The basic consumables are decoupage cards – thin sheets with illustrations that are glued to surfaces. They can be replaced with rice paper or napkins, which is sometimes much easier.
In addition, various compositions will be needed for creativity:
- acrylic primer;
- plastic paste for modeling;
- paints on different bases depending on the chosen technique;
- glue (heat-resistant, PVA, etc.);
- protective varnish.
The choice of materials for work largely depends on the type of product and the decoupage technique. For example, when decorating a plate, you will only need paints and varnish, and to decorate a bottle with an aging effect, you should additionally take plastic mass and structural putty for wood.
Basic techniques and techniques
There are 5 basic methods and many decoupage techniques. Most of them do not require special skills and are easy to master. However, there are several types of decoupage that require knowledge of the basics of working with color and shapes, which is not an obstacle to mastering them. You can learn about this method of creativity by watching master classes on decorating simple things: plates, bottles, boxes.
Classic direct decoupage
It is recommended to master the art of decoupage with the classic method. It involves directly gluing the image to the surface of the product and covering it with a protective layer of varnish.
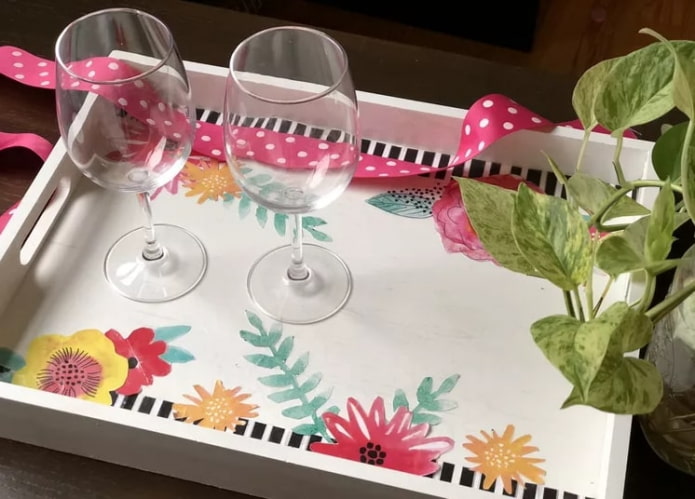
Materials and tools:
- tray blank;
- acrylic spray paint (white);
- Mod Podge glue-varnish;
- decoupage card (napkin or rice paper with a pattern);
- scissors;
- wide brush.
Decoupage stages:
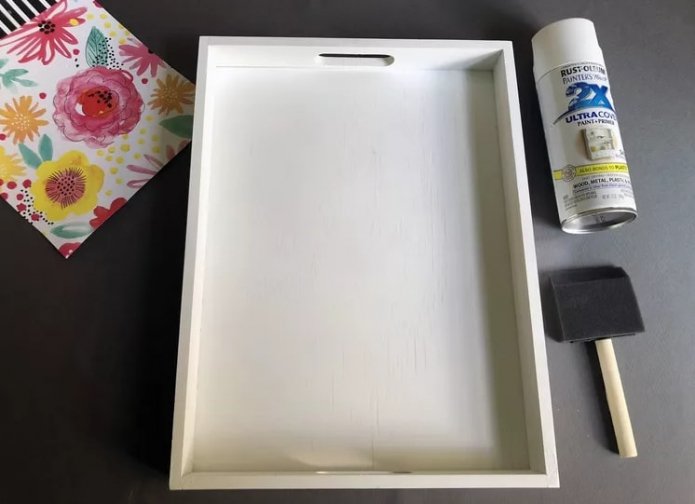
- Prepare the tray by cleaning it from dust and dirt. Then the surface is covered with white spray paint and left to dry completely.
- Select a decoupage card to your taste and carefully cut out the illustrations along the outline.
- Place the fragments of the plot on the main board of the tray. The drawings can be in any area and also intersect with each other.
- Decorate: apply glue varnish to the selected area of the tray, apply the illustration, previously moistened with water. As the base dries, carefully watch for bubbles on the paper, if necessary, carefully pierce them with a needle and smooth them out.
- When the composition is complete, the surface of the product is covered with glue varnish.
- The tray (and especially the bottom board) are allowed to dry well, after which it is ready for use.
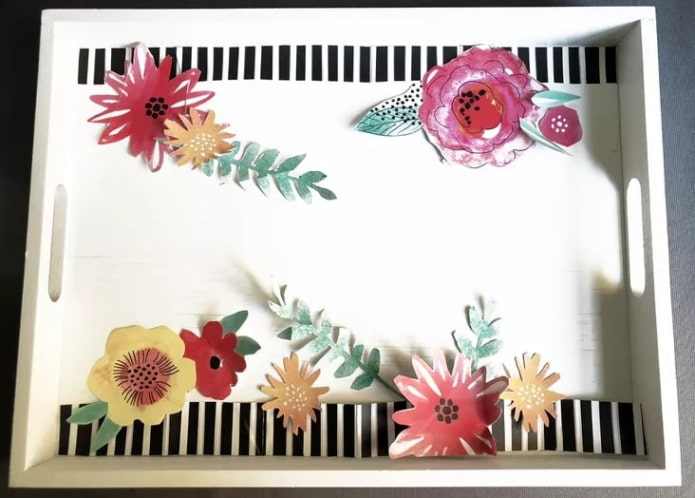
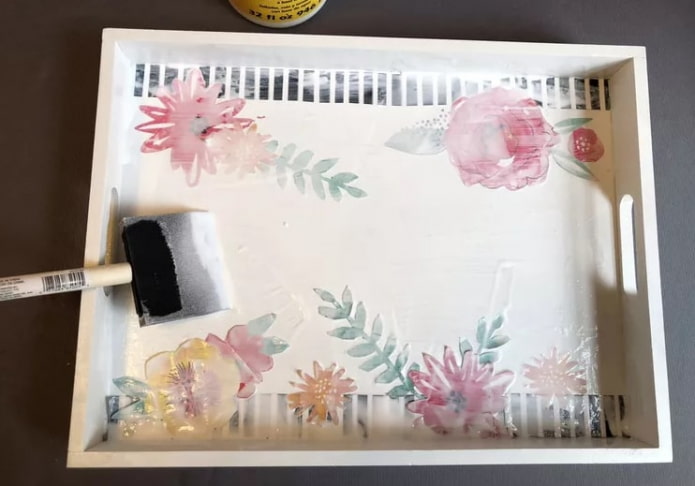
The classic method is carried out not only by gluing a decoupage card (napkin or rice paper with a pattern), but also by transferring patterns from photo paper or transfer sheets.
Reverse
Reverse decoupage involves performing the steps in reverse order. It is used when decorating transparent glass items (jars, glasses, bottles). Thus, the pattern on the surface is covered with a layer of glue, paint, varnish and is visible only from the back (behind the glass).
You should prepare:
- glass bottle;
- napkins with illustrations;
- PVA glue;
- acrylic paints (white, colors of your choice);
- acrylic varnish;
- acrylic glass outline;
- medium-width brushes.
Decoupage sequence:
- Choose a napkin with a large pattern and carefully tear off the desired fragment with your hands.
- Apply a layer of PVA glue to the area of the bottle where you plan to place the picture.
- Place the napkin face down and align it.
- Apply a second layer of glue on top, making smooth movements of the brush from the center to the edges. Then I leave it for a few hours, allowing it to dry completely.
- The treated surface is covered with white acrylic paint twice. Before applying the second layer, dry well so that the composition lies evenly.
- If desired, apply a pattern over the painted area using direct decoupage.
- Use colored acrylic paints to decorate the pattern along the edges.
- Using a stationery knife, remove excess paint from the side of the “window”.
- Coat the surface with the pattern with glossy acrylic varnish and leave to dry at room temperature for 24 hours.
- Decorate the edges of the “window” with decor: dot painting using a contour on the glass.
- Apply 2 more layers of acrylic varnish to the surface at intervals of 24 hours.
- Fill the bottle with water, which creates a lens effect.
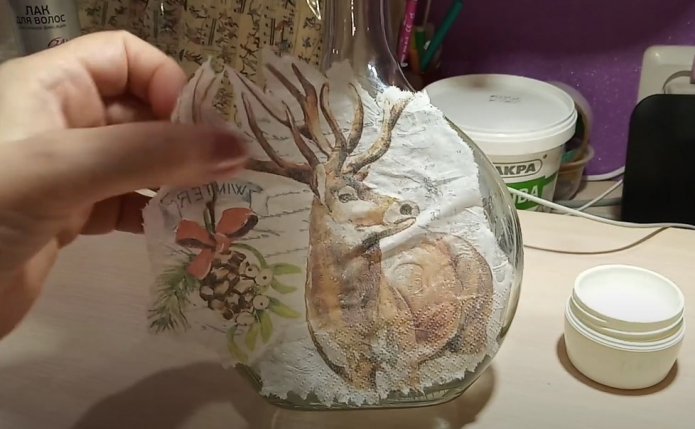
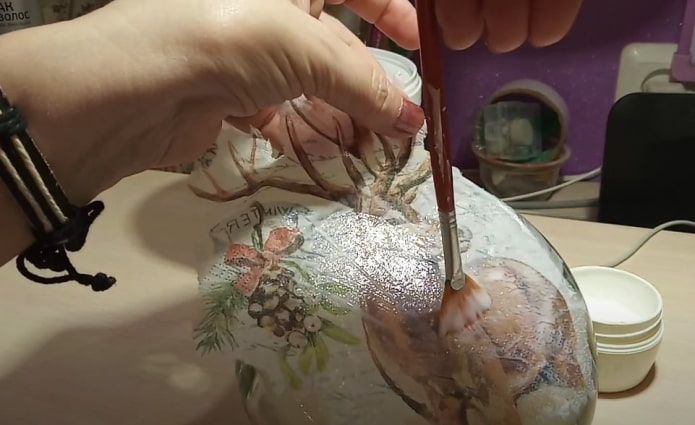
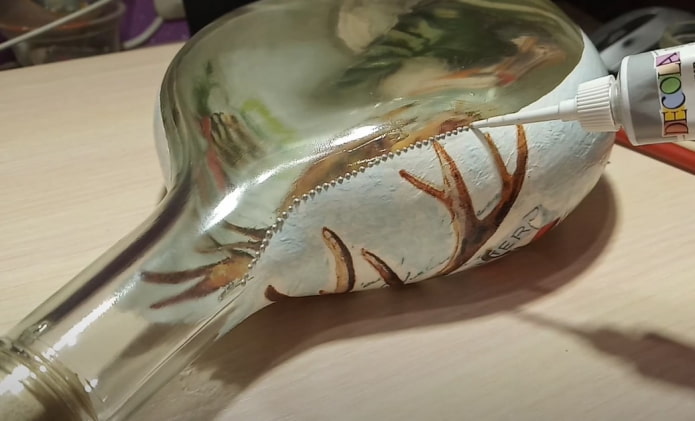
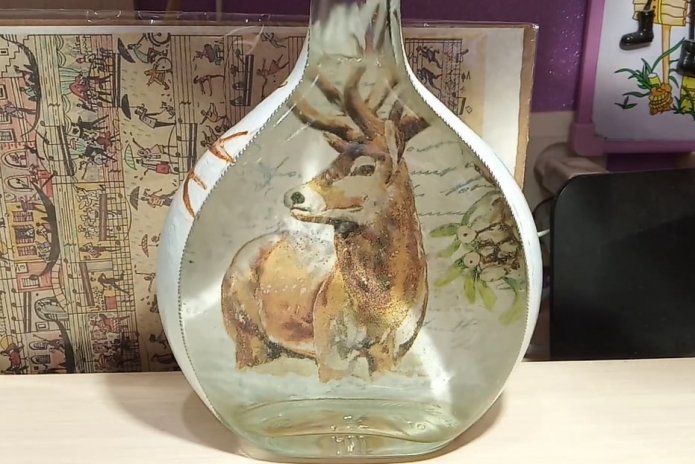
When decorating an item using the reverse method, the pattern can be applied to the inside of the item. In this case, it is necessary to use vessels with a wide neck.
Artistic, or Smoky decoupage
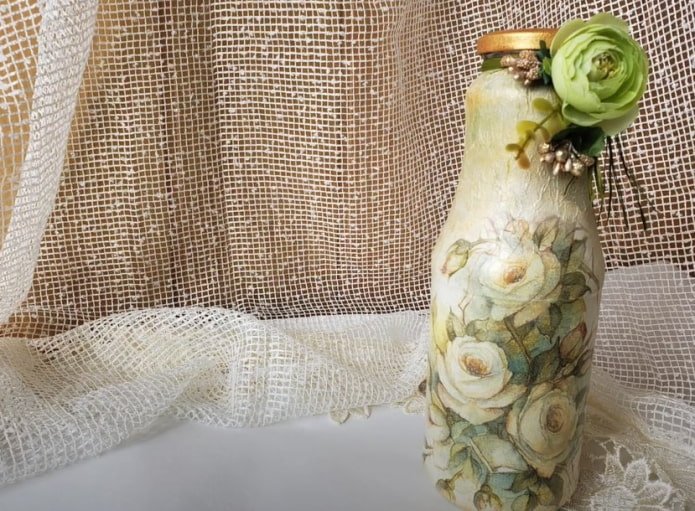
Artistic decoupage involves creating a full-fledged drawing on the surface of the product. The main techniques used are shading the background, creating shadows, and contrasts. This approach helps to hide flaws and get a high-quality artistic image.
Materials and tools:
- glass bottle;
- napkins with illustrations;
- white napkins;
- acrylic paints (white, colors of your choice);
- acrylic varnish;
- PVA glue;
- foam sponge;
- art brushes;
- decorative elements (for decorating the bottle).
Decoupage stages:
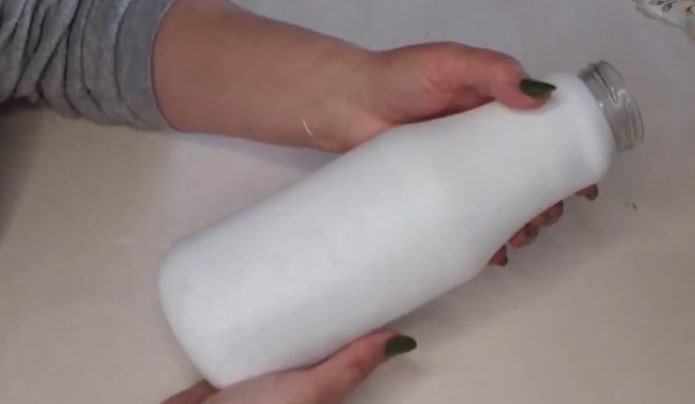
- Rinse the bottle well, removing any remaining labels and glue. Then degrease with any alcohol-containing agent.
- The surface is covered with a layer of acrylic paint and dried.
- A thin napkin is glued to the areas where the drawing is not planned. The material is crumpled so that large relief folds remain.
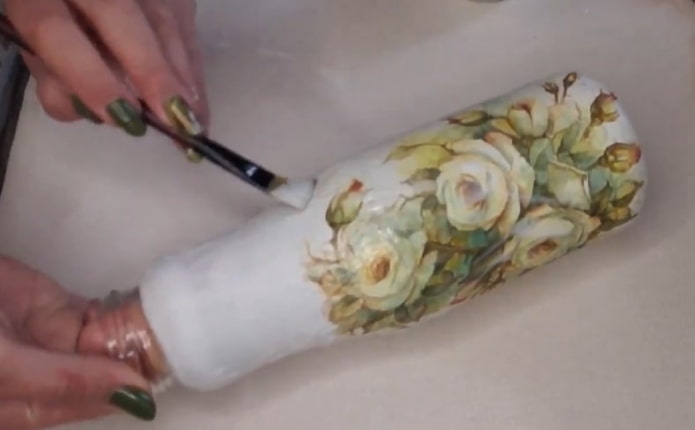
- The napkin with the illustration is moistened with water from the back side and placed on the flat surface of the bottle, carefully smoothed. Coat with glue and dry.
- Coat with a protective layer of acrylic varnish and leave at room temperature for 24 hours.
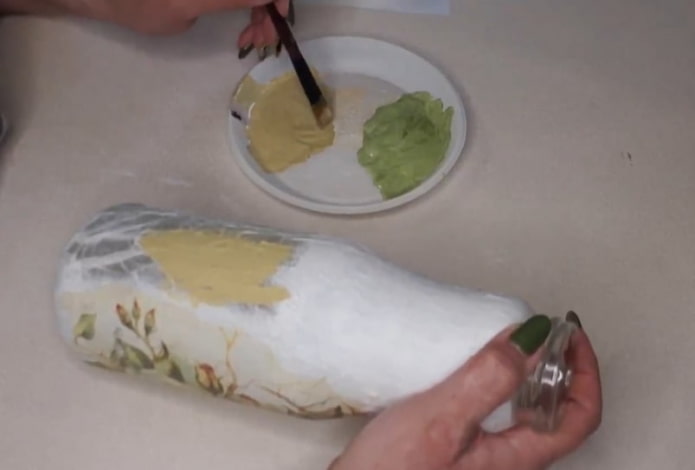
- Paint the folded surface with colored acrylic paints so that the background harmonizes with the main drawing.
- Emphasis is emphasized by carefully blotting the surface with a sponge with paint of a lighter color than the main background.
- Shading the edges of the illustration so that it blends with the background. Dry.
- The surface is covered with a protective acrylic varnish and left for 24 hours until completely dry.
- The bottle is decorated with decorative elements.
Volumetric
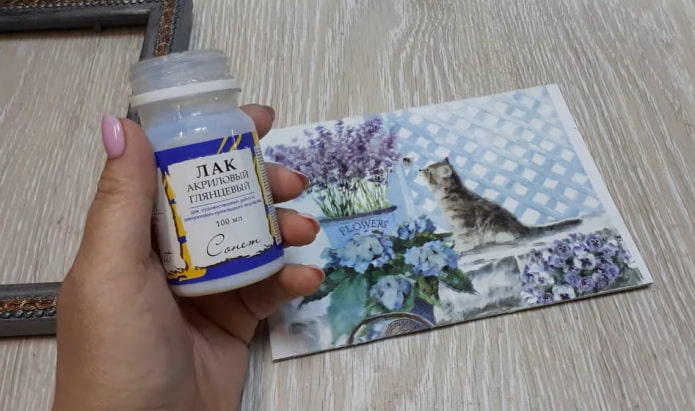
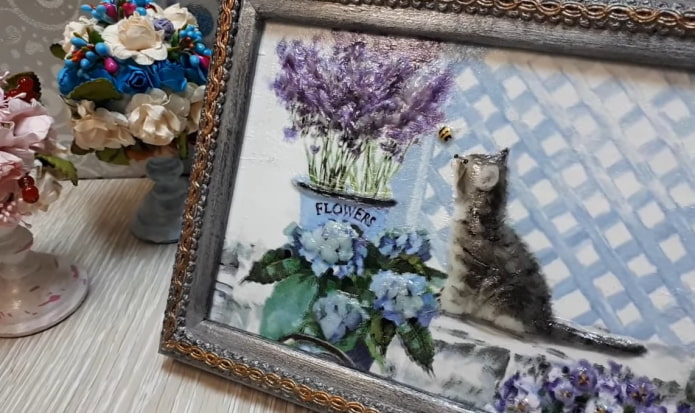
The 3D decoupage technique involves decorating items in several layers, each of which is secured with varnish. This method will allow you to quickly and easily obtain original three-dimensional images without having any special skills.
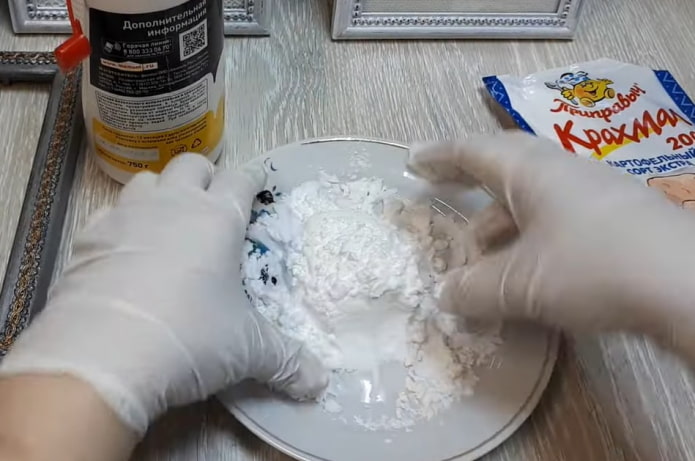
Components of the plastic mass for modeling:
- potato starch;
- PVA glue.
You should prepare:
- an illustration in 2 copies (on a napkin);
- a photo frame corresponding to the size of one picture;
- acrylic paints (white, colored of your choice);
- acrylic varnish;
- PVA glue;
- a household hair dryer;
- a stationery knife;
- scissors;
- medium-width brushes.
Decoupage sequence:
- The cardboard is painted with white acrylic paint and well dry.
- Mix potato starch and PVA glue, forming a dense plastic mass.
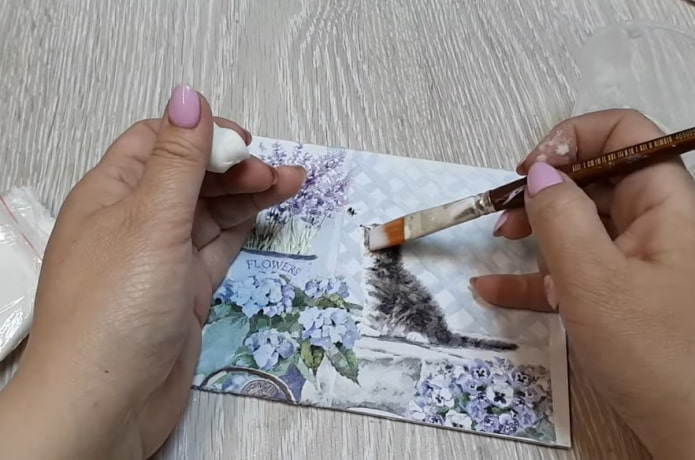
- Smear the cardboard with PVA glue and apply the first illustration. Dry.
- The areas that need to be given volume are carefully smeared with glue. Self-hardening mass is applied on top.
- The desired figures are formed, carefully aligning the edges.
- The surface of the picture is covered with a continuous layer of glue.
- The second illustration is applied on top and carefully smoothed.
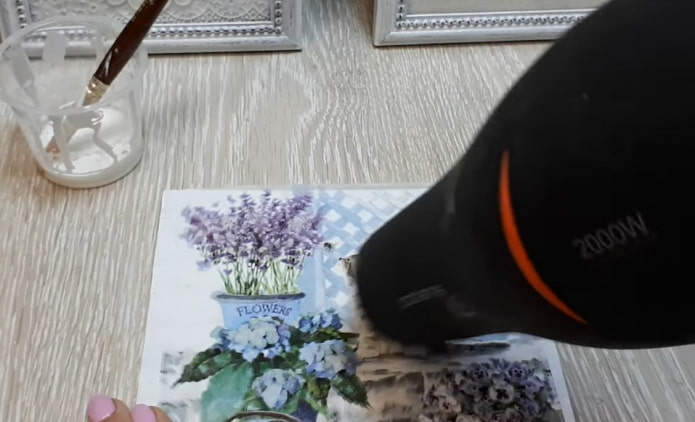
- Dry with a hair dryer.
- The surface is covered with acrylic varnish and wait until it dries completely.
- The desired details are drawn with acrylic paints.
- Small elements can be drawn independently.
- Another layer of varnish is applied and dried.
- The picture is placed in a frame.
Technique Sospeso Trasparente
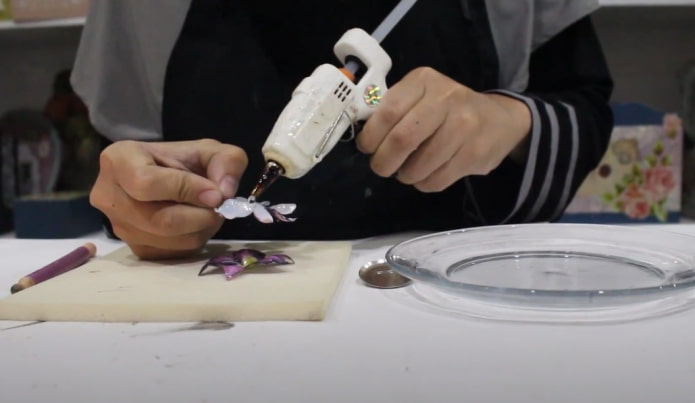
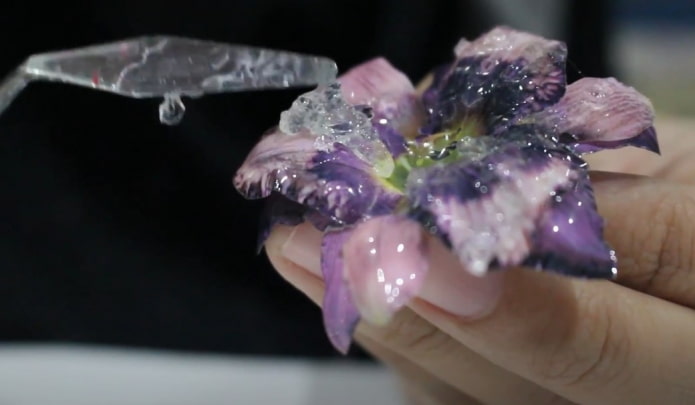
This is a type of 3D modeling technique, first created by the Italian artist M. Allegro. It allows you to get three-dimensional compositions that are used as decoration for various products. Specially developed materials are used in the work.
Materials and tools:
- Sospeso Trasparente thermoplastic film (with a printed picture);
- hot-melt glue;
- latex mat;
- bulb with a round tip;
- tea candle;
- scissors.
Decoupage stages:
- Prepare the thermoplastic film with the pattern in advance. You can buy it ready-made in a specialized store or make it yourself. In the second case, take a clean transparent sheet of thermoplastic material and apply thin paper with a printed image to it using glue. After drying, the film is ready for use.
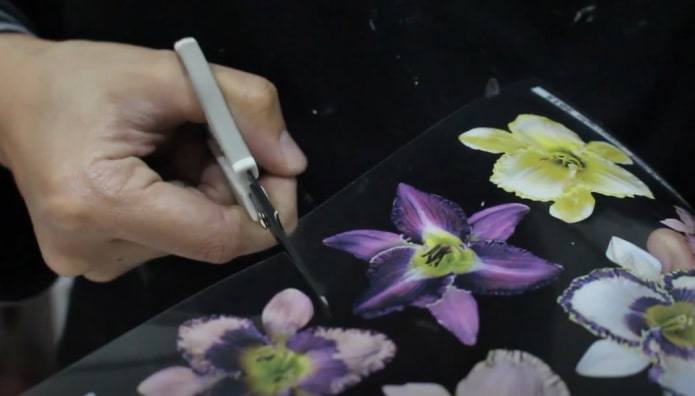
- Cut out the necessary elements strictly along the contour.
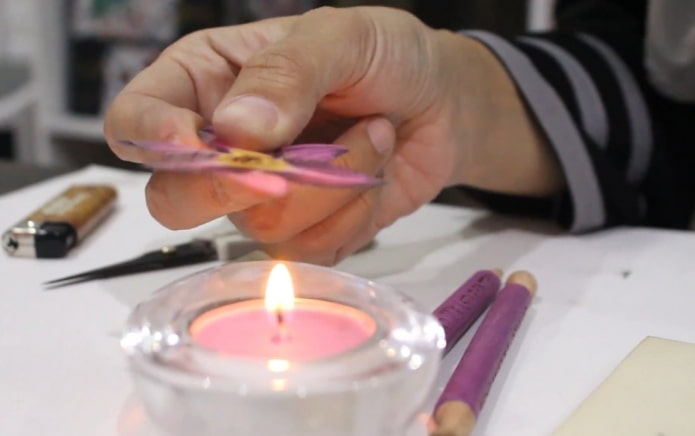
- Heat each element over a candle flame (the area that you want to process immediately). To prevent damage, hold it at a distance of several centimeters from the fire and continuously move it in smooth circular motions.
- Place it on a latex mat face down and begin modeling the three-dimensional image using a bubble. Process the elements in small areas sequentially and quickly, because the film cools down quickly and loses its plasticity.
- When all the elements are modeled, they are combined into a common composition.
- The composition is glued to the selected product.
Decopatches
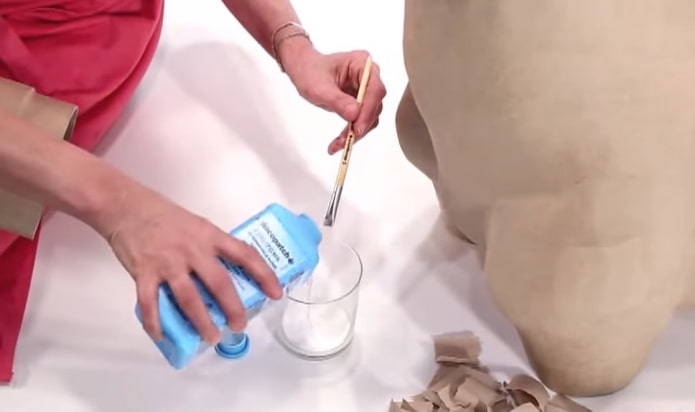
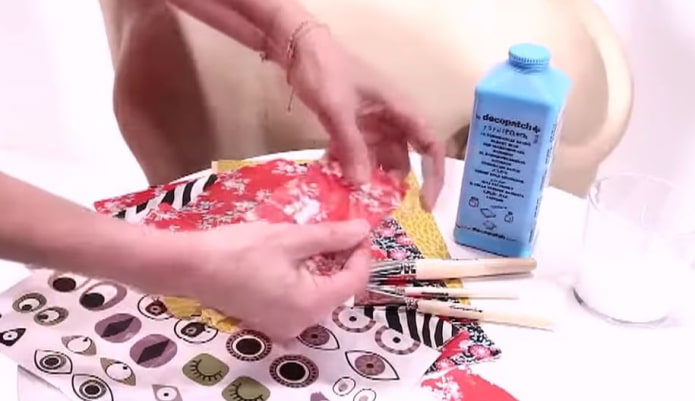
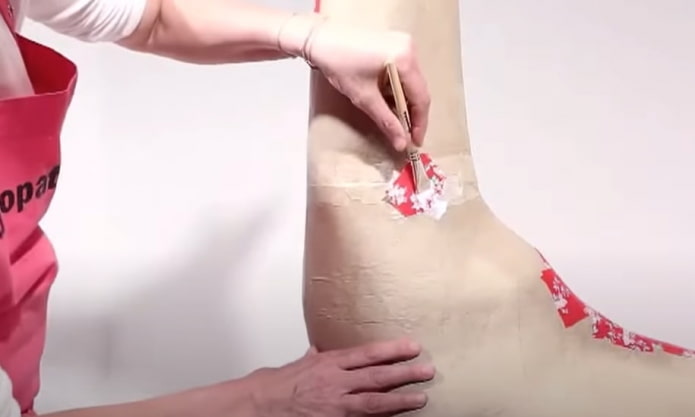
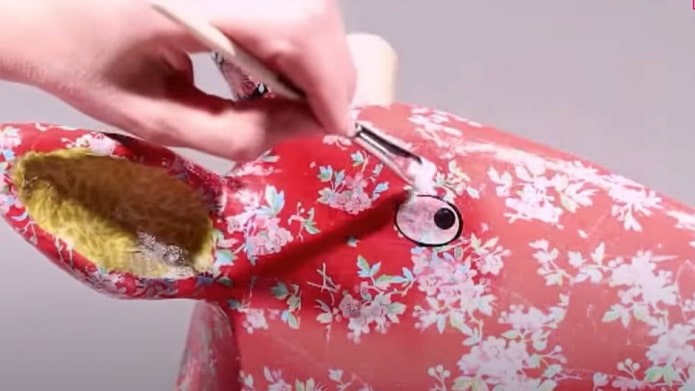
The French technique Decopatch is similar to patchwork: the surface is completely covered with small pieces of paper, forming a single background. This method helps to create bright beautiful things without having drawing skills.
You should prepare:
- papier-mâché sculpture;
- decorative paper of different colors (very thin);
- PVA glue;
- acrylic varnish for wood;
- brushes;
- scissors.
Decoupage sequence:
- Prepare the papier-mâché sculpture. If this is a prefabricated model, then the joints are processed: they are glued with paper fragments.
- Special decorative paper is torn into many small fragments or torn, which is much easier and faster.
- Cut out the elements of the required size.
- Glue the surface of the sculpture with paper fragments, generously greasing them with glue. Pay special attention to the edges, which should be carefully smoothed.
- Coat with acrylic varnish and leave for 24 hours until completely dry.
Gilding technique (gold leaf processing)
Gold leaf is an imitation of gold leaf and is widely used in the art of decoupage of any items. This material does not contain precious metals, but gives surfaces a special beauty and gloss.
Materials and tools:
- tray blank;
- bitumen composition for decoupage;
- sheet gold leaf;
- paste gold leaf;
- special alcohol-based varnish (for gold leaf);
- stencil with a finished image;
- household hair dryer;
- brushes for gilding.
Decoupage stages:
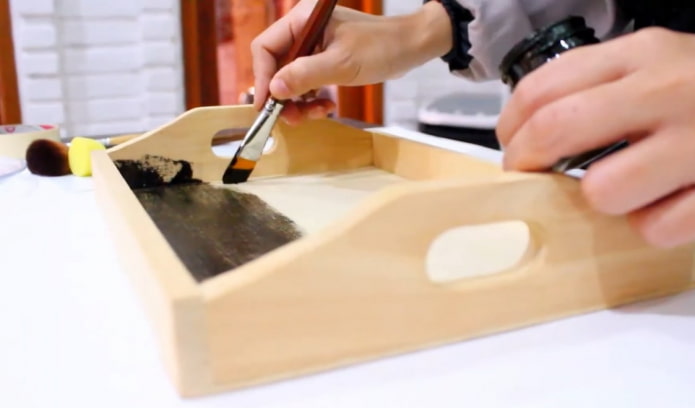
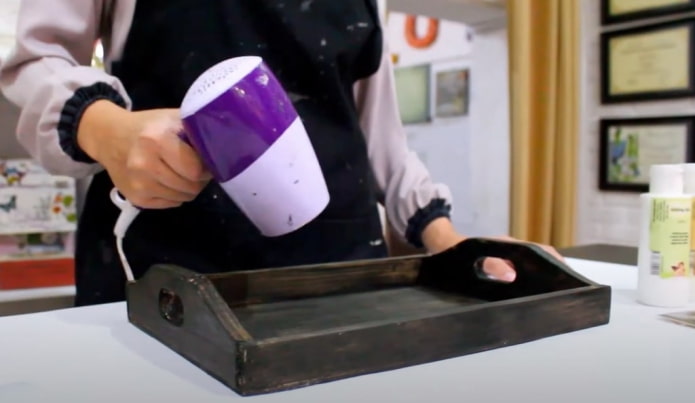
- Cover the tray with liquid bitumen composition.
- Dry using a household hair dryer.
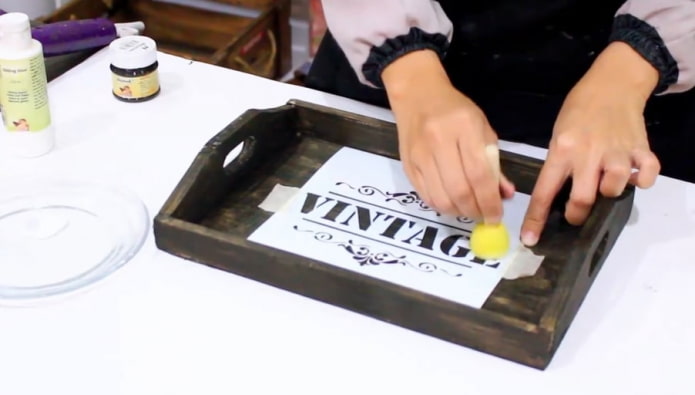
- Apply the stencil to the selected area and fix it with adhesive masking tape.
- Areas to be gilding, coated with special glue and slightly dried.
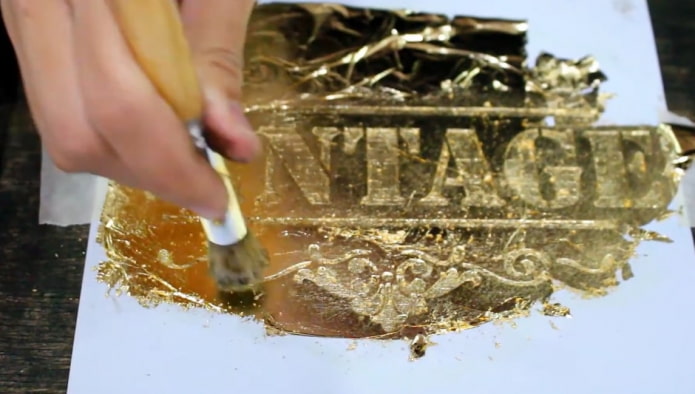
- Place sheet gold leaf on top, carefully straightening it out. The material is very thin, so avoid sharp and careless movements.
- Smooth out the areas with the image with a brush.
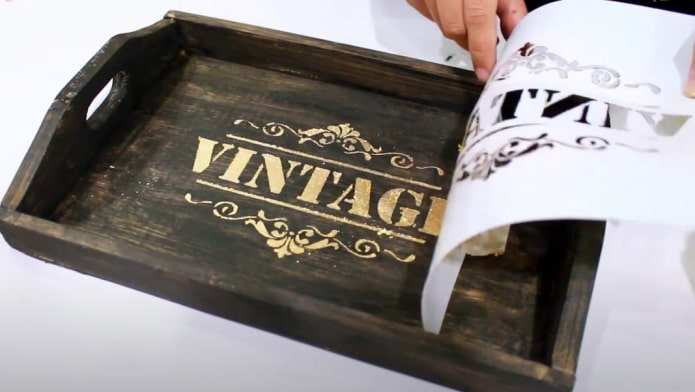
- Remove the stencil and remove gold leaf crumbs with a soft brush.
- Coat the surface with varnish.
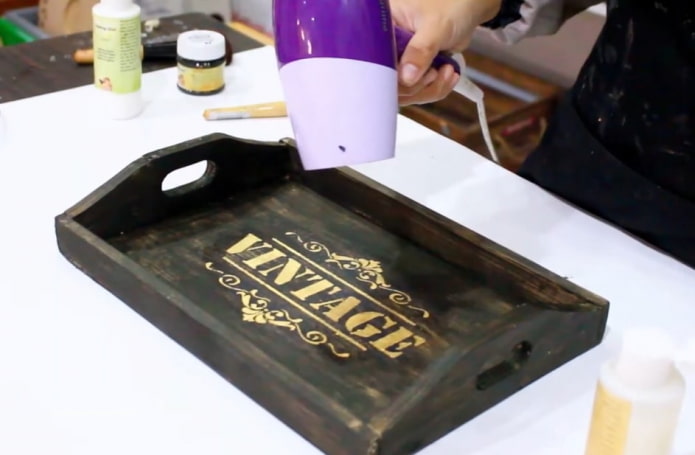
- Dry using a household hair dryer.
- The edges of the tray are treated with pasty gold leaf. You can apply the composition with your fingers or a soft art brush.
- Dry the product.
Crackleure effect
The crackle effect, or craquelure, allows you to visually age things. It is applied to any products (wood, glass, plastic, etc.).
You should prepare:
- wooden box;
- decoupage card (or napkin with an illustration);
- acrylic primer;
- acrylic paints (colored);
- craquelure varnish;
- PVA glue;
- fine-grained sandpaper;
- medium-width brushes;
- clean water.
Decoupage sequence:
- Coat the box with acrylic primer.
- Sand with sandpaper.
- Mix the paint of the desired shade.
- Paint the surface of the box, dry.
- Apply a layer of craquelure varnish and dry slightly.
- The areas where it is planned to create a cracking effect are painted with acrylic paint of the desired shade.
- The previously prepared decoupage card (napkin) is moistened with water from the back.
- Transfer to the lid of the box.
- Glue and dry.
- Coat with acrylic varnish.
- The edges are painted and shaded using a soft foam sponge.
- Coat again with acrylic varnish and dry.
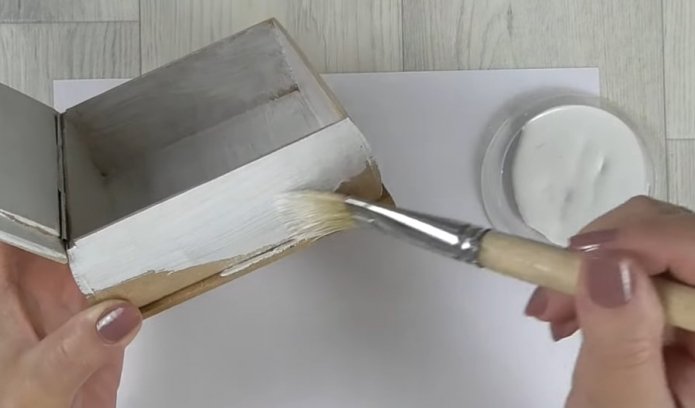
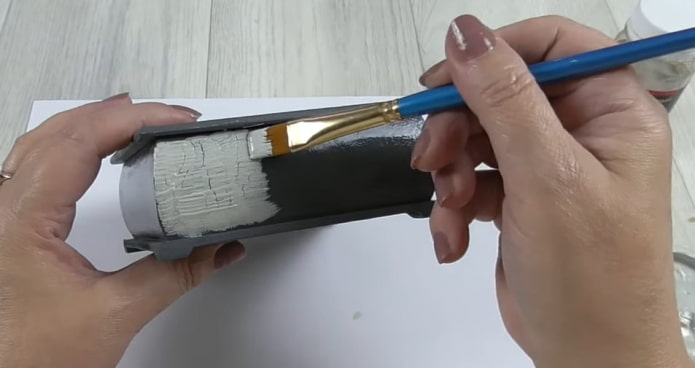
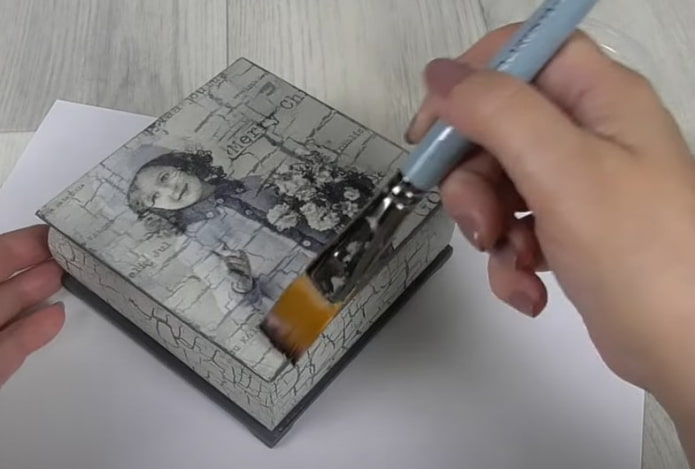
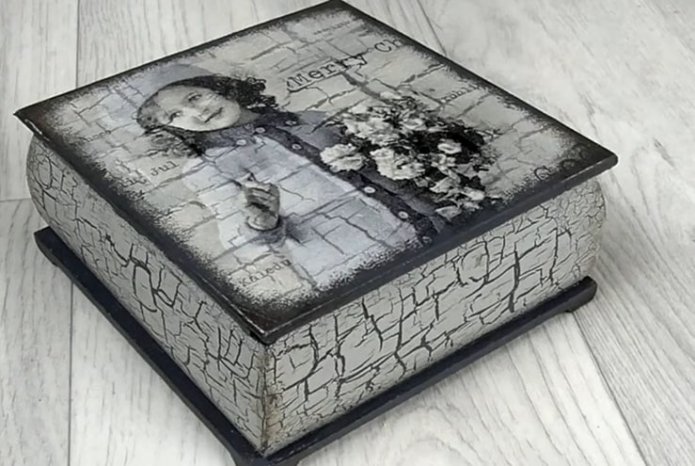
Although this technique is simple, it is better to get acquainted with it by watching master classes. This will help you avoid mistakes that could lead to failure.
Crackle effect (without using varnish)
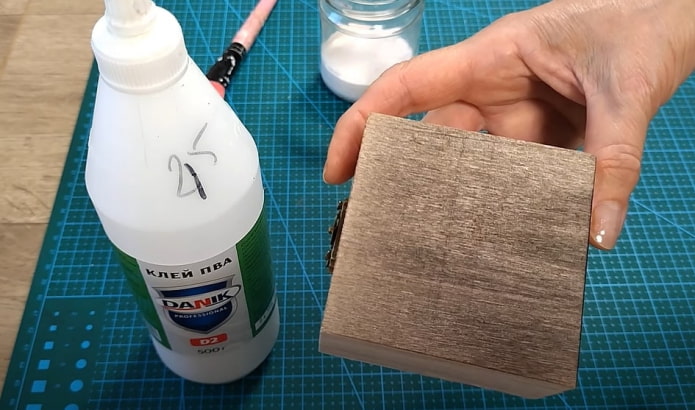
You can get the crackle effect easier: using cheaper materials (PVA glue and water-based paint). The secret is in the correct application and drying of the compositions.
Materials and tools:
- wooden box;
- PVA glue;
- water-based paint;
- acrylic paint;
- water-based varnish;
- soft brushes of medium width;
- household hair dryer.
Decoupage stages:
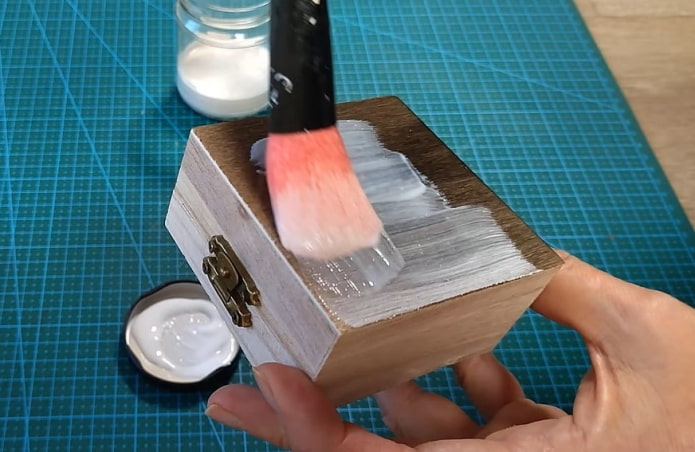
- Sand the box with sandpaper and cover it with acrylic paint.
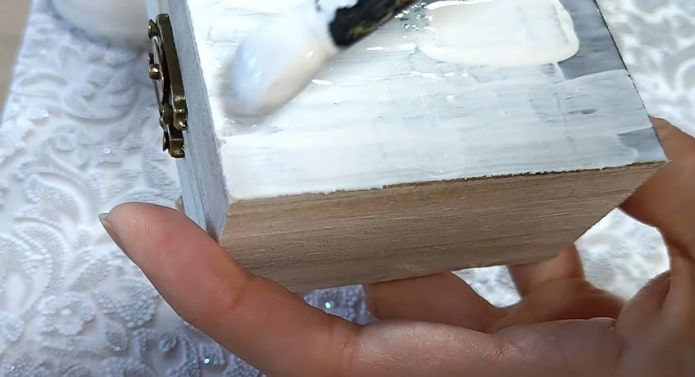
- Apply a layer of PVA glue to the surface of the product in uneven strokes.
- Dry with a household hair dryer. Keep in mind that thick strokes should be covered with a crust, but remain damp inside. Therefore, the hair dryer is turned off after the areas with a thin coating have dried.
- Paint with water-based paint, also leaving uneven strokes.
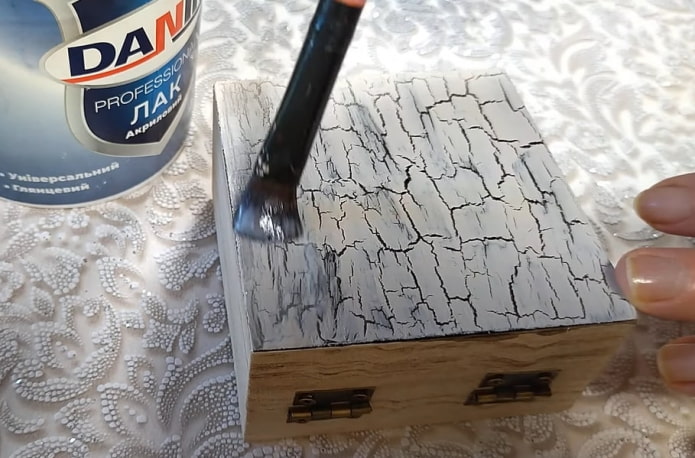
- Dry with a hair dryer, making sure that the air flow does not cause the composition to spread. As a result, cracks appear on the coating.
- Coated with acrylic varnish.
Stone effect
You can age the surface by imitating the stone effect. This is a simple technique that uses 3D modeling and basic painting techniques.
You should prepare:
- glass bottle;
- plastic mass for modeling;
- PVA glue;
- structural paste (or wood putty);
- chalk paints (several options of gray-green shade);
- ultra-matte acrylic varnish;
- figured silicone molds (optional).
Decoupage sequence:
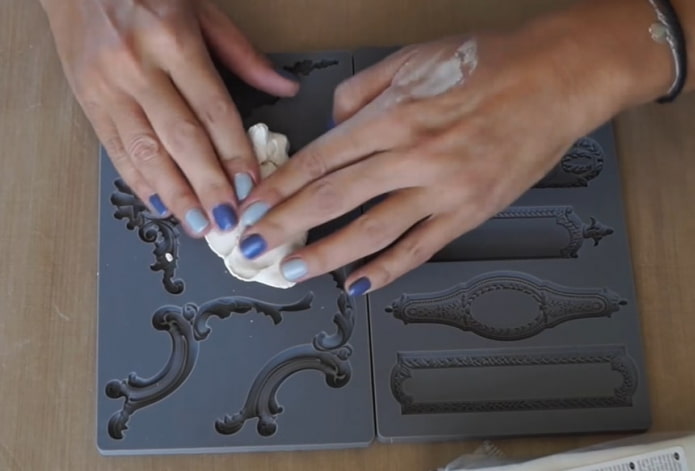
- Place the plastic paste in silicone molds and compact well.
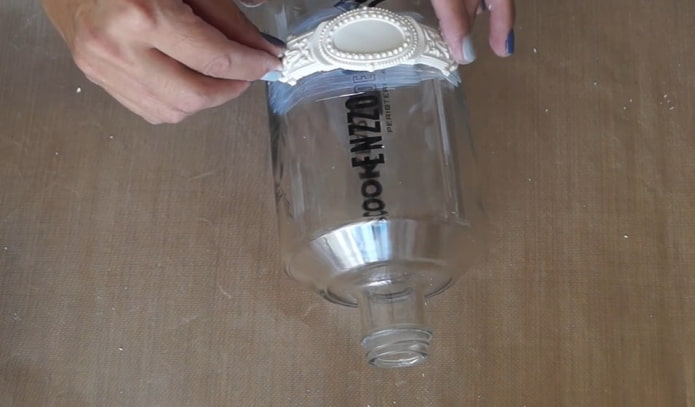
- Take out the figures and glue them to the bottle.
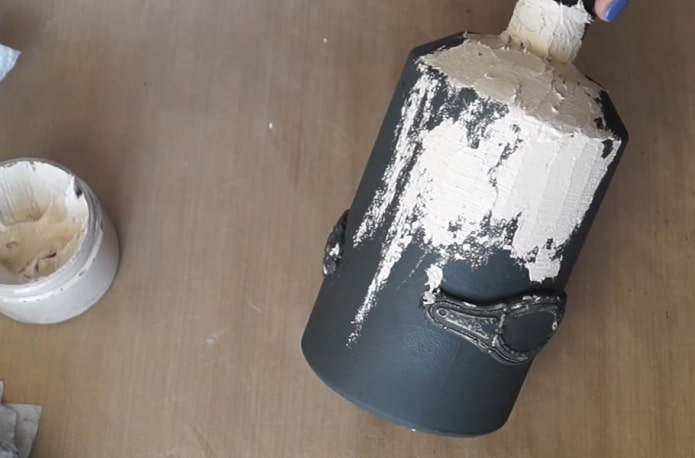
- Coat the product with chalk paint of the darkest shade, using a foam sponge. The volumetric elements are processed with a brush. Dry.
- Structural paste is applied to the smooth surface of the bottle, imitating the texture of the stone.
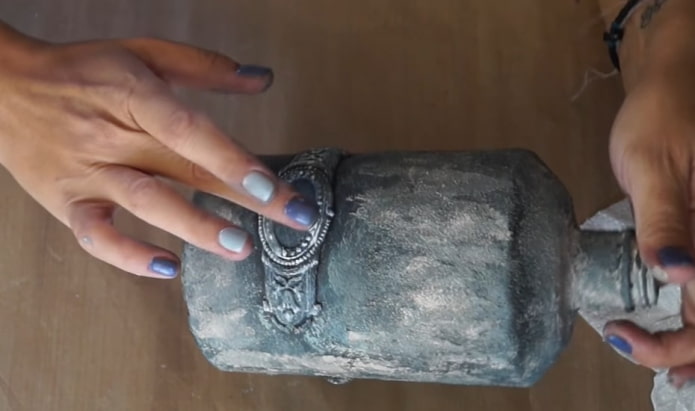
- Using a wide brush, chalk paints of gray-green shades are successively applied with soft tapping movements. If necessary, individual areas are covered with structural paste and painted again.
- Light paint is applied to the edges of the volumetric elements with quick finger movements. Dry.
- Apply ultra-matte acrylic varnish.
- After the surface has completely dried, the stone effect appears.
What styles is it used in?
Decoupage can be used to decorate things in different styles, but today the most popular motifs are Victorian, Provencal, ethnic, country and military. Their distribution is due to current trends in interior design.
Beautiful examples for inspiration
Decoupage can be applied to various items: from simple cutting boards to large-sized furniture. Moreover, the method of its implementation does not depend on the scale of the project.
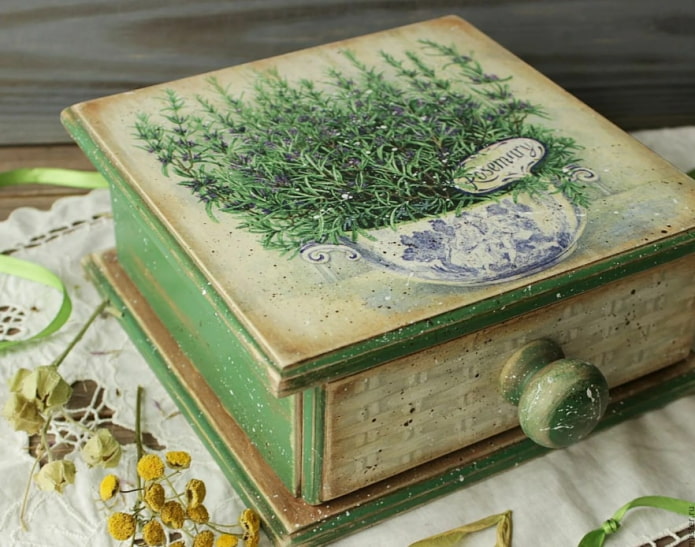
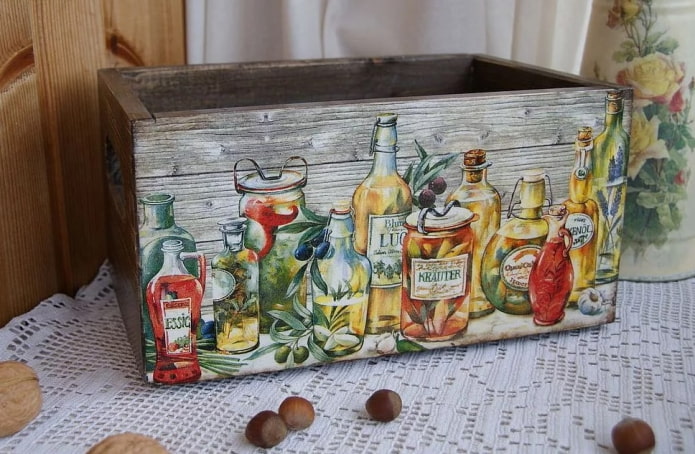
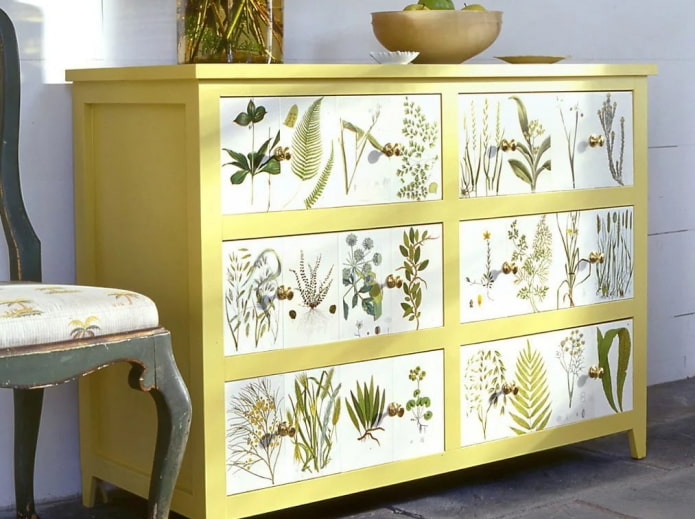
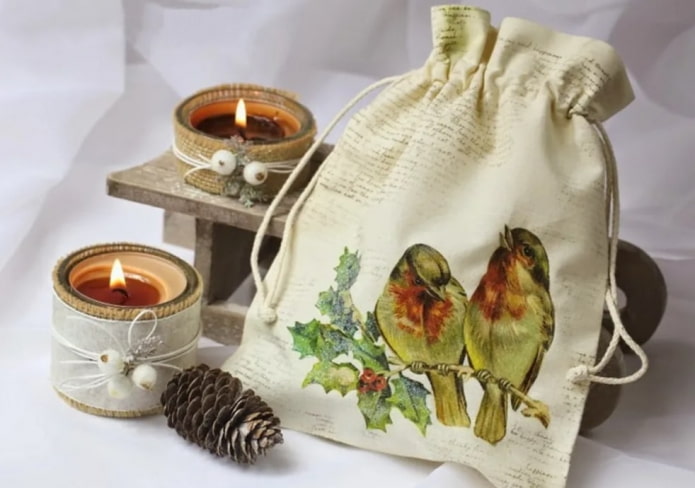
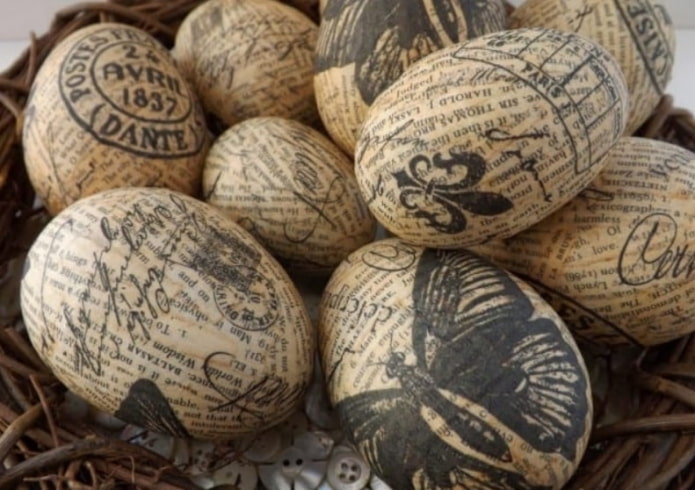
Today, decoupage is most popular in the design of small items and souvenirs. For example, it can be used to create simpler things: plates, bottles, jars and fabric bags. And here you can use completely different motifs for decoupage.
Now reading:
- Comprehensive Guide to Buying a Used Renault Scénic
- 10 Effective Methods to Fight Cat Hair in Your Home.
- Red curtains for windows: more than 70 modern photos and stylish solutions.
- Lilac and purple bathroom interior: more than 40 photos and design ideas
- How unprofitable is a ground floor apartment? Pros and cons in the review.