Furniture and appliance decoration
To give your kitchen a personal touch, you can update its main elements – furniture, dining area, refrigerator. Modern materials for repair will help to cope with even the most difficult tasks, and careful execution will help to breathe new life into furnishings.
DIY furniture handles
Unusual fittings will help to make the kitchen unique, and if they are made by hand, this is especially valuable.

To create furniture handles from epoxy resin you will need:
- special screws (can be removed from old kitchen handles);
- silicone molds;
- decor for filling;
- hot glue;
- epoxy resin;
- bamboo sticks and threads;
- fine-grained sandpaper or quick-drying epoxy resin.
First, you need to make a holder: to do this, clamp the screw between two bamboo sticks and secure them with threads. Glue stabilized moss to the screw. Mix the two-component resin, following the instructions, and pour it into the mold, installing the screw as shown in the photo.

After the resin has hardened, take out the resulting handle. The matte surface must be sanded (so it will become smooth and glossy) or covered with five-minute resin (the ball will become transparent, but with slight irregularities).
You can add dyes to the product, use a more interesting silicone form, come up with your own filling, using gold leaf, dried flowers, beads, etc. Such handles will become the main decoration of the kitchen and will make the set exclusive.


Transformation of a stool
The most ordinary plywood stools found in many kitchens can easily be transformed into designer ones if you use a little imagination.

You will need:
- sandpaper;
- PVA glue or glue-varnish for decoupage;
- brush, pencil;
- scissors;
- paper: coated wrapping paper, wallpaper scraps or a geographic map – your choice.
Prepare the surface to be decorated for pasting: clean, sand with fine-grained sandpaper, remove dust with a damp cloth. Let dry.
Place the stool with its legs up on the back side of the paper and outline with a pencil. Carefully cut out the circle. Apply glue to the seat and press the paper piece, releasing all air bubbles and smoothing out the folds. Wait until it dries completely.


Once the product is dry, it must be protected, because kitchen furniture is exposed to many mechanical influences. Furniture varnish or decoupage varnish is suitable for this. Epoxy resin will protect the stool no less reliably.
Plywood stools are like a blank canvas for an artist. They can be decorated in any convenient way: for example, with acrylic paints, fabric or stickers.


Repainting the kitchen set
Repainting the furniture will allow you to change the interior of the kitchen beyond recognition – with the advent of reliable paints on the construction market, this has become available to everyone. Two main rules will help you to perform high-quality restoration or renovation of a set, as well as a table or chairs:
- Careful preparation of the surface.
- Choosing a good paint.
You will need the following tools and materials for the job:
- screwdriver or power screwdriver;
- hair dryer, if the facades are covered with a film;
- spatula and wood putty, if there are chips;
- primer (alkyd adhesion is best);
- furniture paint;
- roller and brush.
Before priming, all facades must be removed and the handles unscrewed. The film should be removed – it often comes off on its own, but using a hair dryer will go faster. The walls next to the permanent cabinets should be protected with masking tape.
To make the surface smooth, fill the defects with wood filler. Let it dry and sand with fine-grain sandpaper. After that, we cover the kitchen set with a primer in accordance with the instructions.


Apply the special paint with a roller in two or three thin layers. Paint difficult areas (panels and corners) with a brush. After the first layer has dried, we recommend going over the painted surface with sandpaper.
Some paints require a final protective layer in the form of varnish, others do not. To decide on this issue, follow the instructions. In the same way, you can paint a kitchen apron, choosing a composition for painting tiles, or update chairs if you are afraid to start with a large-scale project.
After complete drying, the facades must be returned to their place and screw on the handles. To make the kitchen look lighter and more spacious, some of the cabinets can be replaced with shelves and bright decor can be placed on them.

Refrigerator update
If the appliance is outdated or does not fit into the new kitchen interior, you can update it yourself. Yellowed plastic can be easily washed with a special product for cleaning PVC windows “Cosmofen 10” or covered with durable enamel.
If you cannot get rid of chips or scratches on the doors, the defects can be masked with painting. Acrylic paints or markers will do.
You can completely change the look of an old refrigerator using film and paint. This is described in detail in the master class:
Homemade decor
To decide on large-scale changes to the kitchen interior, you can get inspired by creating simple accessories. Things made with your own hands will make the atmosphere warmer and more cozy.
Hot stand
Kitchen decor should not only be beautiful, but also useful. You will need:
- cork coaster;
- decorative pebbles;
- glue (hot or silicone).


Choose smooth pebbles so that the coaster has a flat surface and does not scratch the pans. Start gluing from the center, then add more pebbles around the first stone, placing them as close together as possible. Let the product dry.


Round Jute Rope Napkin
An original rustic rope napkin can be used for table setting in the kitchen and also serve as a hot coaster. When creating this decorative element, you can choose the thickness of the product, the size, and even the method of its manufacture.
Decorating your kitchen with homemade napkins made of rope or jute is not difficult if you know how to knit. You can also secure the twine in a circle using hot glue. But if there are no other materials in the house except for threads and rope, the napkin is made by simply sewing it in a circle:

To do this, you need to twist the rope into a snail and secure it securely with threads. Using a thick needle, sew the rope, gradually increasing the diameter. Try not to tighten the thread so that the napkin does not become deformed. When finished, hide the end of the jute and iron the finished product on both sides.


Patterned board
If you keep your cutting boards on display, why not decorate them with a pattern, turning standard kitchen utensils into stylish decor element?
To implement this idea, you will need:
- board;
- wood burner;
- paper, scissors and a pencil.
To make a board with a pattern, you need to prepare paper hexagons and, having laid them out on the surface, trace them with a simple pencil. If you are using a wood burner for the first time, practice on unnecessary boards and only then start decorating the kitchen product. After the ornament is ready, wash the board to remove pencil marks.
To fix the result, you can cover the object with wood oil.


Papier-mâché lampshade
Everyone is familiar with the papier-mâché technique – you can get interesting things from paper and glue crafts that are easy to make and durable. To create an interesting lampshade for the kitchen, you will only need paper, water and PVA glue.

You can use old newspapers, toilet paper or cardboard egg trays as the source material. Chop them up and pour hot water over them. After 24 hours, squeeze out the excess water. Add PVA glue in a ratio of 2 parts of the mass to 1 part of the glue.
Apply the finished mixture to any suitable container: an old lampshade, a basin, a deep dish or a large yoga ball.


When the material hardens, remove the lampshade and decorate it any way you like: spray paint the inside with gold or stencil the surface. A handmade lamp with an original design will definitely attract attention and decorate your kitchen.
To get the effect as in the last photo, make colored inserts at the stage of forming the product, while the mixture has not yet hardened.


DIY tray
A board made of soft wood or a piece of thick plywood is like a blank canvas for a creative person. If you want to decorate your kitchen with an original and useful craft, you will like the following idea.
To create you will need:
- a piece of board or plywood;
- 2 furniture handles;
- a screwdriver and screws;
- paints and masking tape for decoration.

The sequence of actions is simple: prepare the board, removing all splinters and irregularities. Decorate it as you wish: with stencil painting, decoupage, or create a graphic pattern using masking tape and paint in two or three colors.

Screw the furniture handles on both sides with a screwdriver or a screwdriver. You can put various small items on the finished tray to make the interior look neater, or use the item for its intended purpose.
If you saw a wooden circle in half (for example, a small tabletop) and make a painting in the form of a citrus slice, as shown in the photo, you can get a bright decoration for the kitchen.


Painting bottles
You can even create interesting vases for fresh or dried flowers from scrap materials. This is an easy way to decorate the kitchen or add variety to the table setting. Choose the decor to match the interior style:
- A striking black and white painting will suit a modern setting. Create a base from acrylic paint, having previously degreased the glass. It is easier to apply a laconic drawing using a permanent marker.
- Painting with stained glass paints with a black outline in the set will allow you to decorate the setting in a Scandinavian or eco-style.


- Bottles covered with copper or gold spray paint will help to decorate a luxurious kitchen.
- You can draw ethnic patterns or flowers using a white permanent marker for glass.
Finished products look best in an ensemble with similar decor. Hand-made painting should be protected with varnish.


Storage box
Many useful items that are often used in the kitchen should be stored beautifully. In this master class, you will learn how to make a wooden box in a farmhouse style – this fashionable trend allows you to feel like you are in a country house, even if you are in an apartment.
You will need two cutting boards, a wooden board, a jigsaw and a hammer, as well as nails and stain. You can decorate the box at your own discretion.
What textile items can you make with your own hands?
Kitchen fabric products, sewn with your own hands, make the decor original. Curtains, soft seats for chairs, tablecloths and runners – textiles fill the interior with warmth and make everyday life more comfortable. We publish the most interesting ideas for creating beautiful little things.
Leaf potholders
Kitchen potholders not only make the interior more homey, but also serve as a useful decoration. The decorative leaf can be used as a coaster for a cup or turned into a potholder – you just need to add a loop to hang the product on the wall.

The leaf is very easy to make: cut out the parts from thick fabric and sew them together. If necessary, add filler – synthetic padding, felt or a piece of terry towel. Turn the sheet inside out and stitch the veins.

Use fabric of different colors to make potholders brighter or double-sided. Remember that kitchen textiles should match each other.


Runners
To decorate the dining area, you can sew an unusual runner or rug. This is a great alternative to a tablecloth that will make everyday meals more special.

Choose a suitable fabric and calculate its quantity. The width of the runner should be equal to 1/3 of the table width, and the edges should hang down by about 25-30 cm. Cut the fabric to size: two outer pieces and one lining (optional).
Sew the pieces together, leaving a small opening on the side of the runner. Trim the corners and turn the runner inside out. Sew the runner around the perimeter again, hiding the holes and sewing from the top.


Iron the finished product. The runner can be of any design: triangular at the edges, multi-layered, patchwork or complemented with fringe. Place a vase of flowers and beautiful plates on the runner to set the table for a holiday or an everyday meal.


Shibori napkins
Shibori is an ancient art of painting on fabric that originated in Japan. Today, this technique is available to everyone – you only need fabric made of natural fibers and indigo dye. After dyeing, you will receive products with a unique picturesque design.

To do this, you need to fold the fabric and secure it securely with ropes or rubber bands. Twist the napkins in any way – accordion, knots, squares. Then place in a container with diluted dye and wait 5 minutes.


Painted blanks should be dried, rinsed again in water and only then unfolded. You can paint towels, aprons, tablecloths in the same way.

Curtains
If you are tired of standard curtains (they take up a lot of space in the kitchen), pay attention to laconic Roman blinds. The product can be sewn with your own hands, fixing it on the wall above the window opening. The idea is easy to implement by watching a short and accessible master class.
Decoration of dishes and storage elements
Cups, plates and even jars for bulk products can look unusual and bring coziness to the kitchen environment. Products created or decorated with your own hands will delight every day.
Painting a mug
Baked paints will help create an individual design for a cup. They are fired in a regular oven at a temperature of 180 degrees, after which the product can be used and washed under the tap.
For work you will need:
- a white ceramic cup without any patterns;
- brushes and cotton swabs;
- baked paints and varnish of the same company;
- alcohol-containing liquid.
First, you need to degrease the surface of the mug – this way the paint will lay down better and hold more reliably.


Apply the outline of the drawing to the outside of the cup. It is better if the paints do not come into contact with food or drinks. Fill the outline with paints using cotton swabs, draw the details. Bake the product according to the instructions for the paints – usually it is placed in a cold oven and baked in two stages for 20 minutes with a gradual increase in temperature.
After firing, the drawing is fixed with varnish for better durability. It also needs to be baked in the oven.


Jars with labels
Printable labels for glass jars are ideal for organizing storage. Most ready-made labels include only the name of the product, while homemade labels can be printed with basic recipes for dishes that use the stored ingredients.
All you need is to make templates according to the size of the jars and print them on kraft paper. Then the labels need to be cut out and glued with PVA. Finished products should be protected with varnish, since kitchen utensils quickly get dirty during cooking.
The jars look great in Scandinavian and country styles. This method of storing bulk products decorates the decor and makes the kitchen interior more homey.


Decorating storage containers
Don’t throw away plastic food buckets and old knitted T-shirts — they can easily be used to make plant pots for houseplants or containers for cutlery:
- Cut the fabric into thin strips and braid them.
- Apply double-sided tape to a plastic jar.
- Wrap the surface with tape.
- Plant a plant.

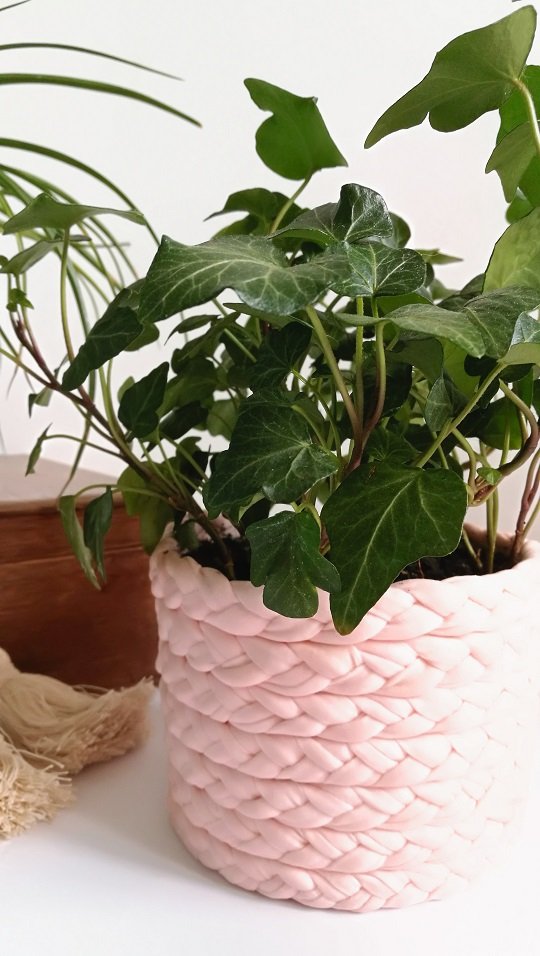
Use jute rope and fringe with tassels to create an eco-style flowerpot. The twine should be secured with hot glue.

Baking Paper Baskets
This master class will show you how to make stylish storage baskets from something that almost every housewife has in her kitchen — baking paper. This craft will please you with its simplicity of execution and economy.
How to decorate the walls?
After renovation, there is often empty space in the kitchen — especially in the dining area. Wall decor will solve this problem. In addition to standard photo frames or paintings, there are many interesting ideas that will highlight the uniqueness of your interior.
Chalkboard
Chalkboards with a coating on which you can write with chalk have become firmly established in household use. You can make such decor for the kitchen yourself. As a base, take a photo frame without glass with a durable cardboard back or use an unnecessary cutting board.
Chalkboard paint is easy to make yourself: you will need 3 parts latex or acrylic paint and 1 part dry gypsum putty (can be replaced with tile grout). Mix the materials, adding a little water. When the powder has dissolved, degrease the surface and coat it in 2-3 layers.
You can write recipes, menus, shopping lists and draw pictures on a chalkboard decorating the wall, as well as leave messages for your household.


Picture made from cutlery
If you don’t If you know what to do with extra spoons or forks, or want to keep memorable items for a long time, create an expressive panel. You will need a 3D photo frame, a background (fabric, scrapbooking paper or wallpaper scraps), cutlery and glue.


It won’t take much time to put together the composition. You need to glue the background to the cardboard, fix the spoons and forks on top and find a suitable place on the wall.


Turn on your creative thinking and place cups on hooks or decorative plates fixed to the wall in frames. Such a panel will definitely not leave your guests indifferent.


DIY Kitchen Shelves
Open shelves are never superfluous, especially in the work area: when the necessary items are at hand, cooking is much more convenient. You can store jars of spices, beautiful dishes, small vases with flowers and other small items on the shelves – this way the walls in the kitchen will not be empty, bringing benefits and pleasing to the eye.
In this video, you will learn how to add shelves to the walls in the kitchen and make unusual false windows from mirrors.
DIY kitchen decor is not only interesting, but also practical. Crafts from scrap materials will decorate empty walls, textile products will add coziness, and paints and glue will help you update old furniture or a kitchen apron on a budget.
Now reading:
- Ideas for using stones in the country: 14 creative examples (31 photos)
- Kitchen to the ceiling: 30 ideas, advantages and disadvantages of modern design.
- Living room design with two windows: 38 ideas and layouts for inspiration.
- Turquoise sofa in the interior: 50 ideas for the living room, kitchen and bedroom.
- 10 Essential IKEA Products You Should Have in Your Home