Woven rug
To create a rug from an old T-shirt or dress you will need:
- any old clothes (T-shirts, dresses, etc.),
- string,
- 4 pieces of wood and several screws.
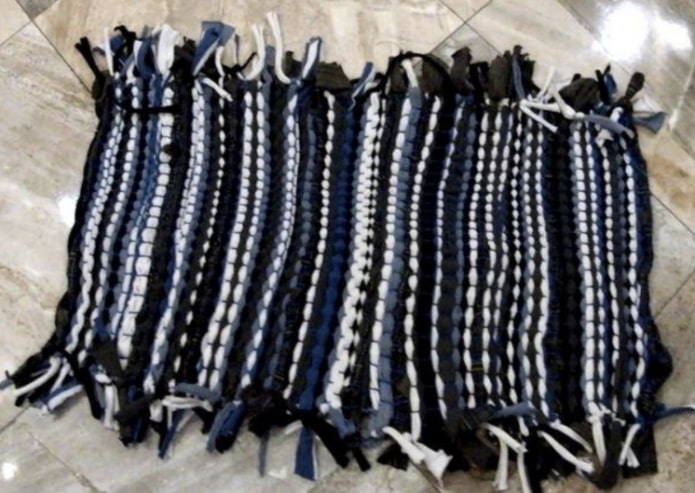
- First you need to create a frame. The size of the frame depends on what you want to do. If you want a napkin, you need a small frame, if you want a small bathroom rug, you need a frame of at least 1 x 0.4 meters.
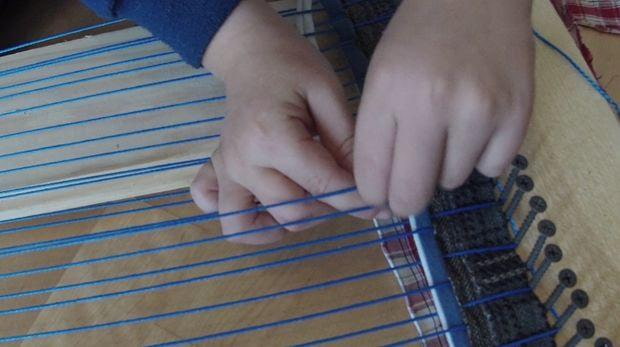
- Take a string, attach it to the first screw on the frame and pull it to the screw on the opposite side of the frame. Do this until there are no free screws left.
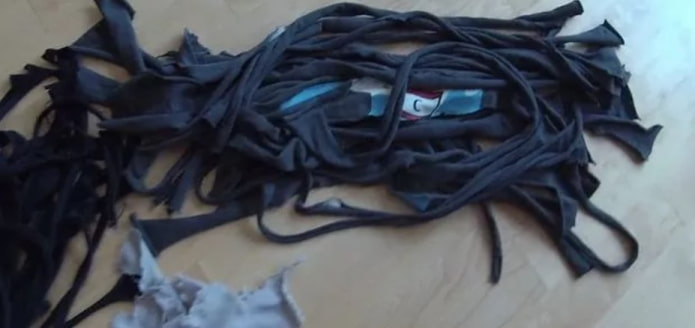
- Now you need to create a material for weaving from old T-shirts and dresses. To do this, you can either cut the fabric into strips with scissors or tear them in your hands. The second solution is recommended. Why? Because tearing is easier than cutting, and tearing will create more even strips without raw edges.
- Then you can start weaving. Start from one edge and move to the opposite one. Take one strip and place it between the threads on the loom in this order: over the thread, under the thread, over the thread, under … etc. If you finish with one strip, take another and start all over again, but in a different order than the previous one, until you reach the edge of the frame.
New Year’s garland
On the eve of the New Year, recycling old clothes can serve as material for decorating your home. Here’s how you can make a Christmas tree garland from woolen clothes.
Multicolored sweaters and woolen dresses with a small pattern work well for this craft. But you can use any other old clothes; if you prefer a more neutral decor, choose sweaters in these colors. However, keep in mind that T-shirts and tank tops have thinner fabric, which can be see-through when stuffed.
- To make balls of different sizes, cut out circle templates from paper. Size from 6 to 9 cm in diameter.
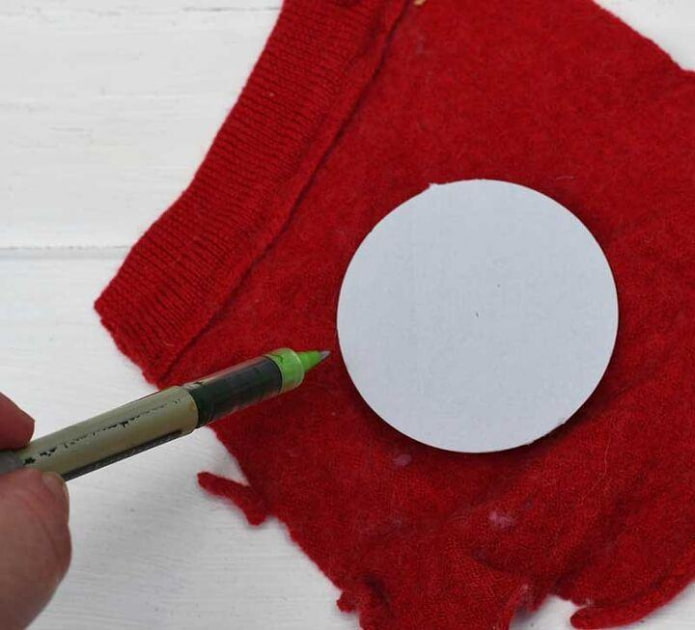
- Place the circle template on a scrap of sweater or tank top and draw around it.
- Cut out several circles from wool of different colors along the outline of the outlined template.
- Thread a strong thread into a needle and sew with a running stitch along the edge of the wool circle. It is advisable to use a thread that matches the color of the fabric.
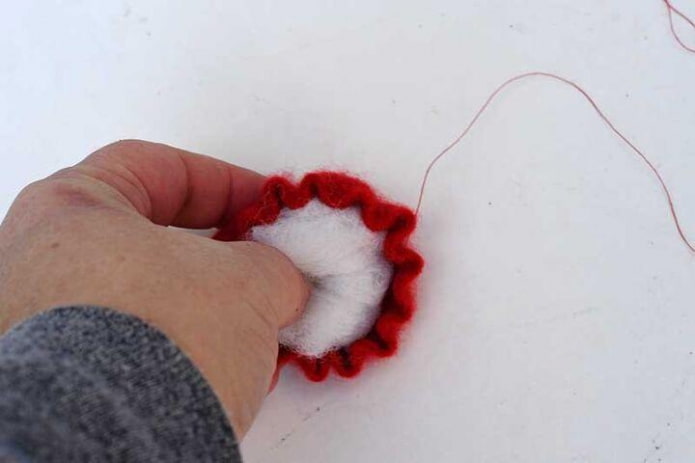
- Pull the thread tightly so that it gathers the circle. Before closing the hole, use your thumb to stuff a small amount of stuffing (such as stuffing from old pillows or cotton wool) into the hole. The tighter you pull the thread, the tighter it will close.
- Continue stitching along the top until the hole is closed, as in the photo below. Then roll the felt ball between your palms to give it a more round shape.
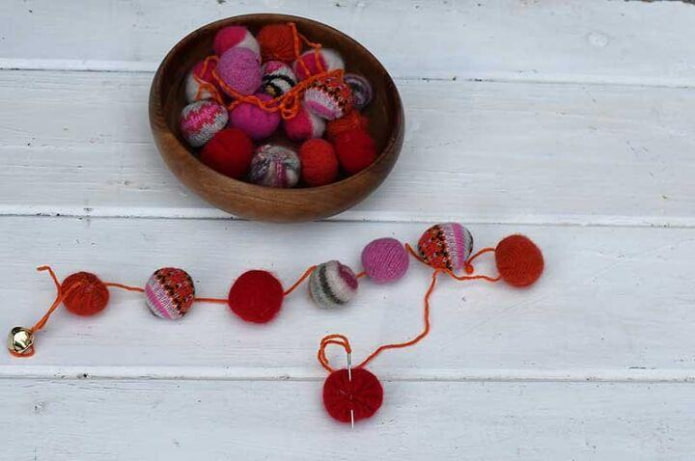
- These balls are so easy to make that each one only takes a couple of minutes. Then string the balls on twine to make a fun Christmas garland.
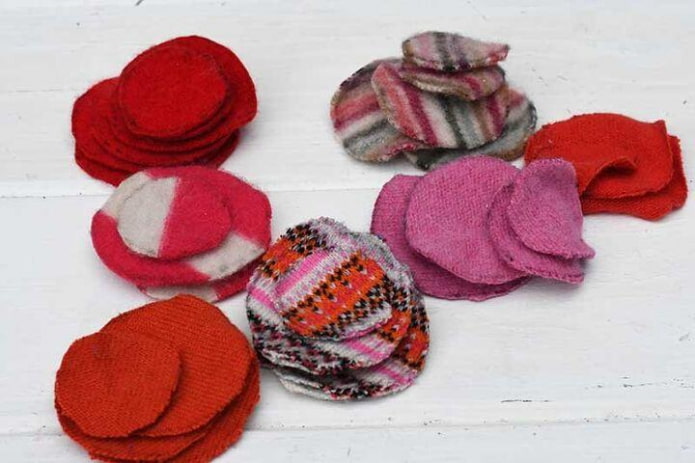
Check out how to decorate your apartment for the New Year.
Oven mitts from old pants and a towel
Make your own oven mitts by recycling old clothes and towels. All you need is a sewing machine, thread and your imagination.
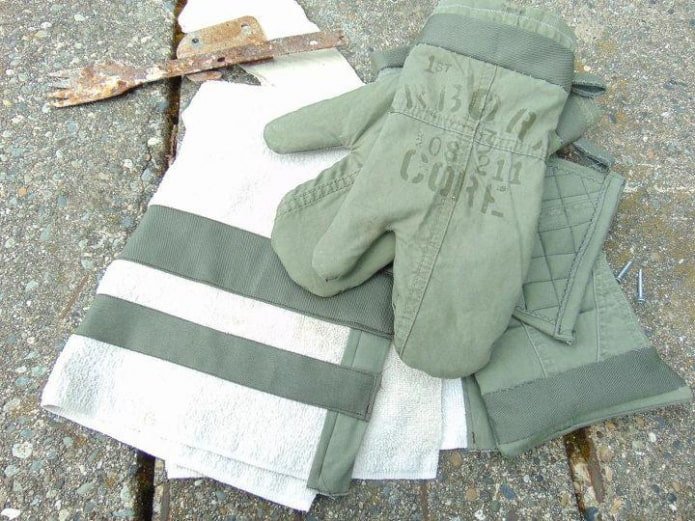
For this you will need a piece of fabric, a pair of pants and a large towel. Old oven mitts will work as a template.
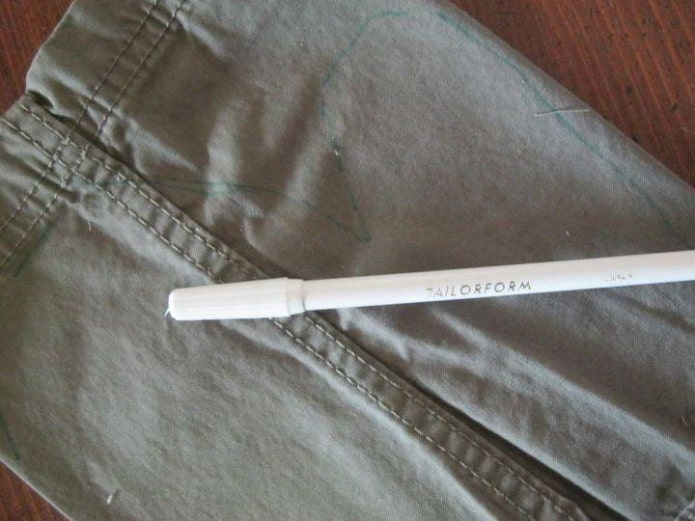
- Draw one mitten on the pants fabric, leaving a large seam allowance, and cut out 2 front and 2 back sides.
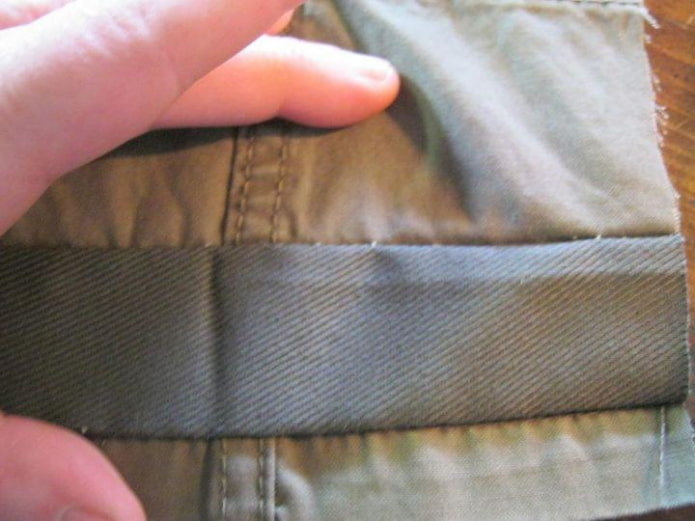
- You can use scraps of clothing to add a pattern on the cuffs, as in the photo below.
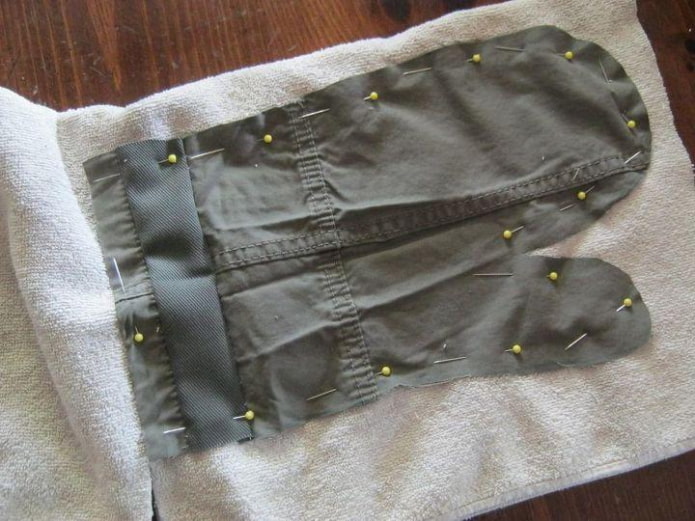
- Then sew each of the 4 parts to a towel, and cut out the halves of the future glove.
- From the scraps of fabric, make a hanger for each glove, and then sew the gloves together.
- The kitchen gloves are ready.
Pillowcase from old clothes
First of all, go through your closet and do an inventory of your things. Put aside any unnecessary dress or shirt. Choose the ones that best suit your interior.
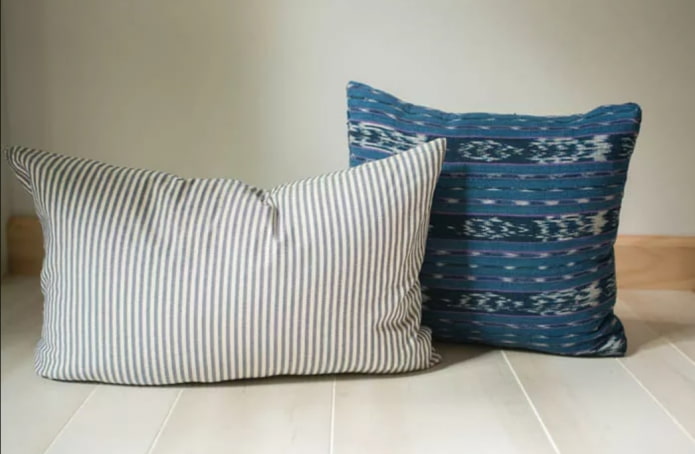
- Once you have chosen the items, decide what size pillow you want. Measure the fabric accordingly. And cut it a few centimeters larger than the shape of the pillow.
- Turn the fabric inside out so that the sides are sewn together from the wrong side. Sew three sides.
- On the last side, fold the edge of the fabric and stitch it.
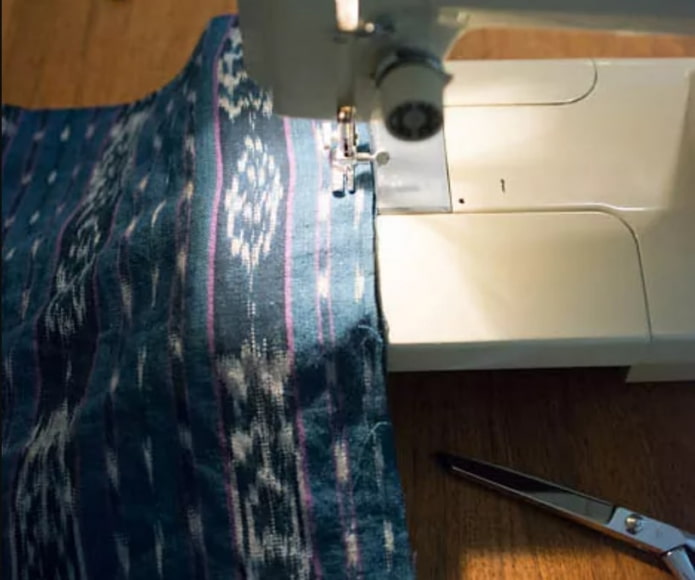
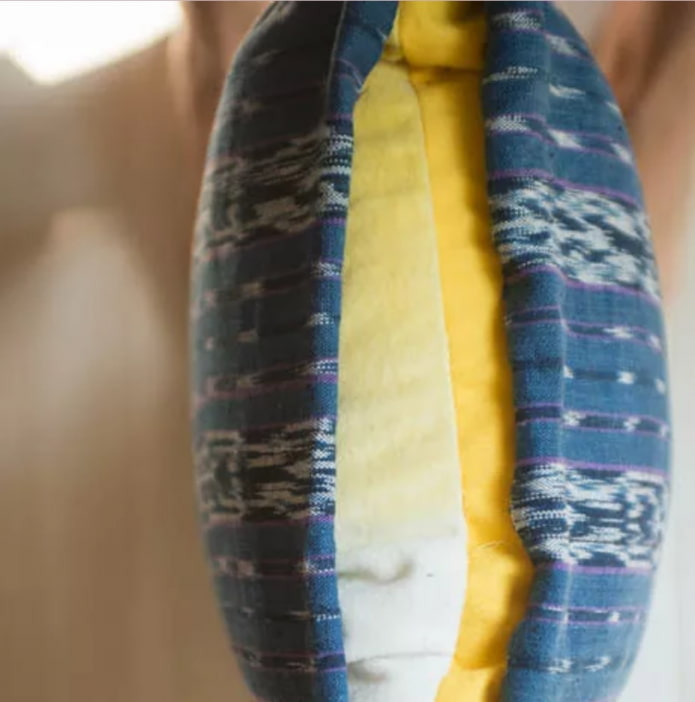
Enjoy your new original decorative pillows.
T-shirt Shopper
Not every old piece of clothing can be turned into a stylish shopper bag – a sweatshirt or T-shirt is best suited. This way you will kill two birds with one stone: you will use an old item and refuse to buy plastic bags.
- The first step is to wash, dry and iron the T-shirt.
- Turn the shirt inside out.
- You will need to sew the bottom of the shirt. This can be done in several ways. Use a sewing machine, hand stitching or fusible fabric – iron and join the fabric together. You can use glue, but it may not be the strongest. The most reliable way to sew the bottom of the bag is on a sewing machine.
- Turn the T-shirt inside out. Use sharp scissors – fabric scissors are best if you have them. Next, cut off the sleeves a little away from the seam so that the fabric remains intact and does not tear.
- Cut out the neck. If it is a little small for the bag, you can cut it a little wider. The weight of whatever you put inside will put pressure on the opening, so be careful not to cut off too much and make the handles too thin.
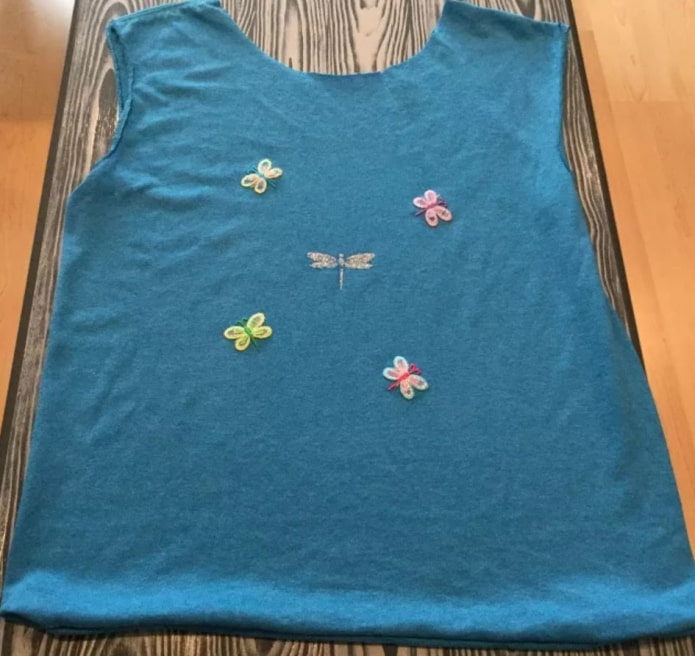
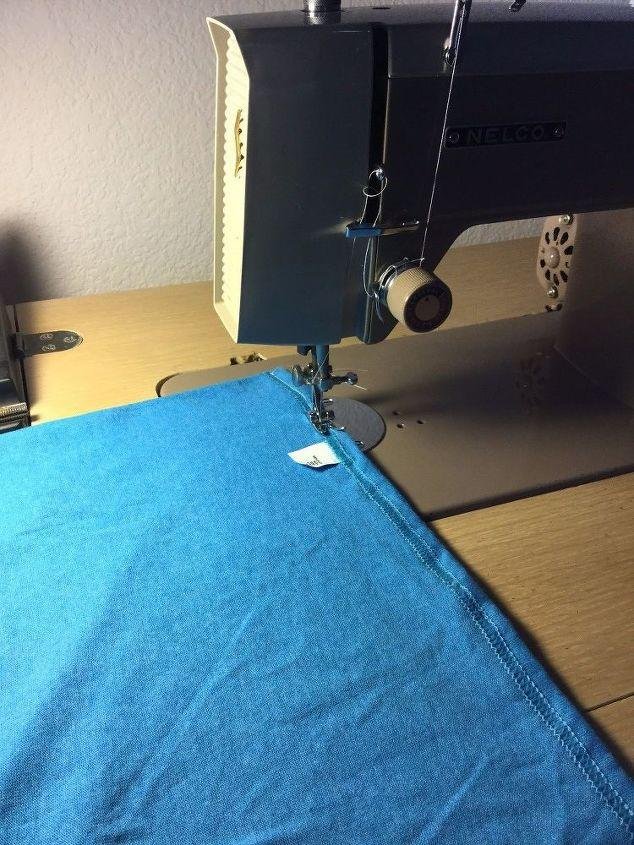
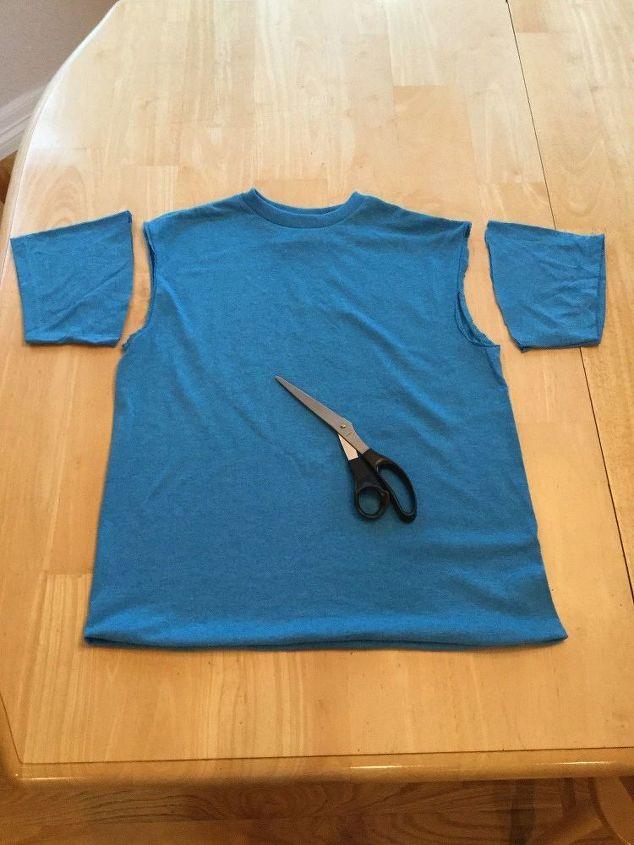
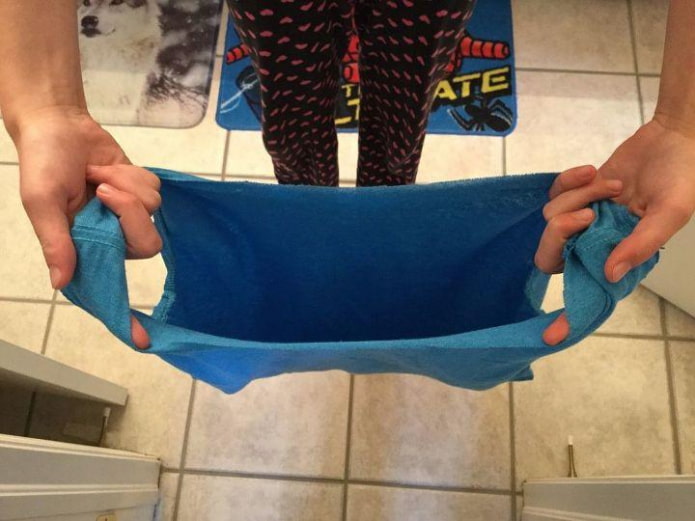
The original bag from old clothes is ready to use. Optional – You can decorate this shopper with a design using paint or fabric markers, patches, beads, etc.
Hand Warmer from Old Gloves and Mittens
You’ll probably have a pair of small gloves or a mitten that has lost its mate. These will make handy mini hand warmers before the cold weather arrives.
- Fill the mittens with rice.
- Sew them together with thread or glue them.
- The mittens come in a variety of shapes and sizes.
- You can also warm them up in the microwave and use them as hand warmers. If you use hot glue, be careful not to get it too hot or the glue will weaken. If this happens, just let it harden again and you’ll be fine.
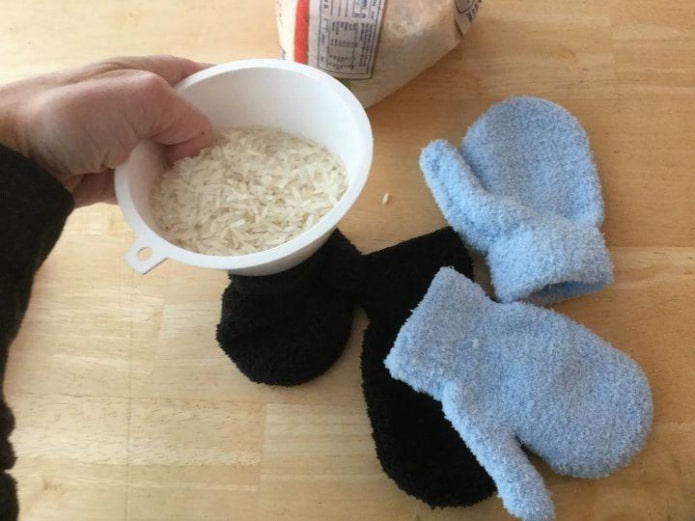
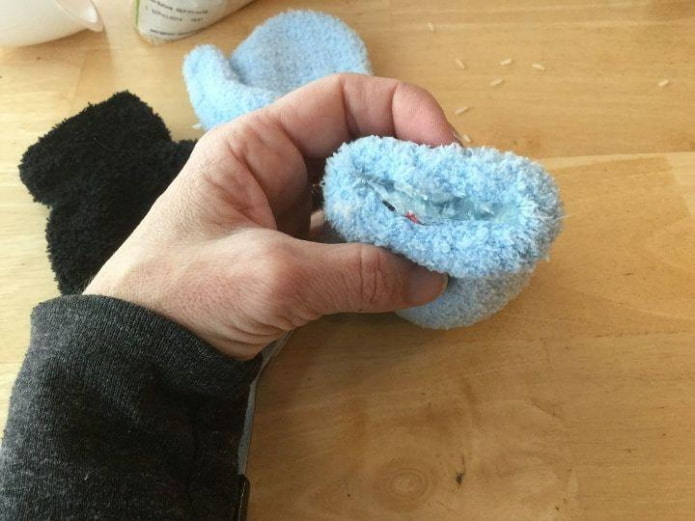
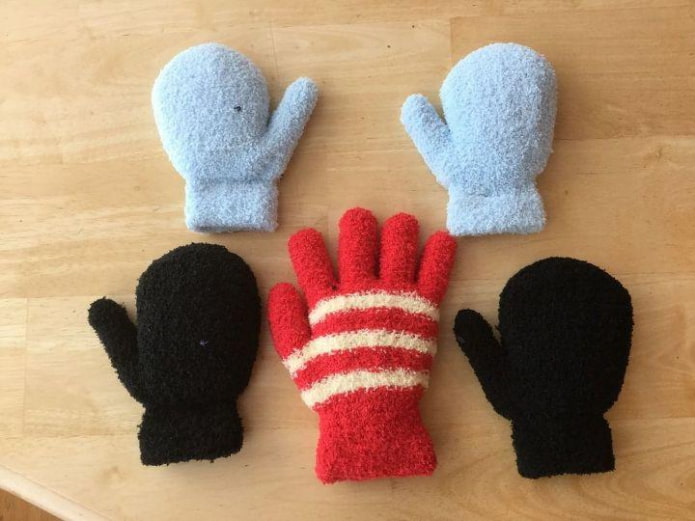

You can also use them as cold packs by putting them in the freezer.
Door Draft Protector Leggings
If your daughter’s leggings get a hole in them, you can use the remaining leg to make a door draft protector.
- First, cut off the top of the leggings, as you will only need the legs.
- Then sew one end of the tights closed in any way you like: by hand, using a sewing machine, or using an elastic band, hot glue, tape, etc.
- Then fill it with rice, beans, sand of your choice, and then sew the other end closed. If you live in a damp climate, you can place the rice/beans/sand in a plastic bag before placing it in the leg.
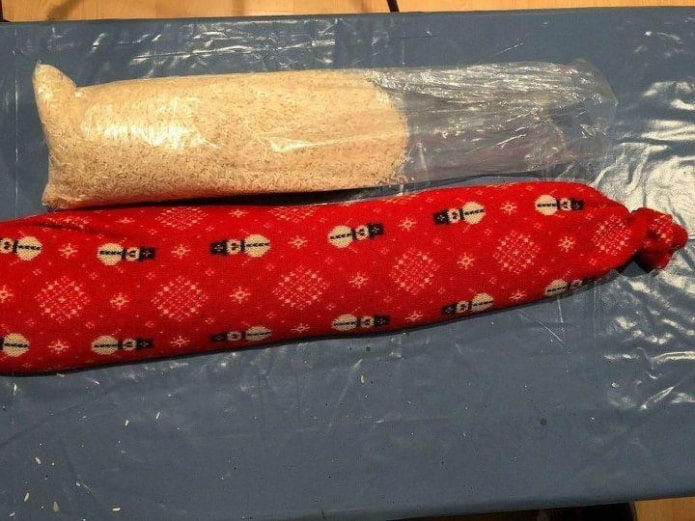
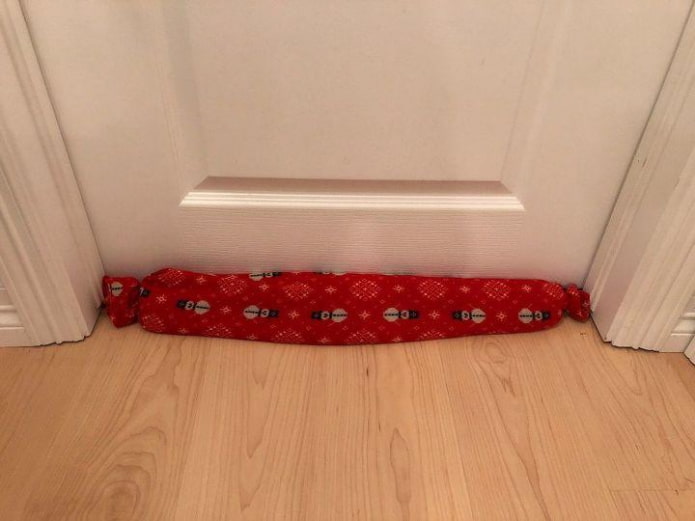
A bright bolster from drafts under the doors is ready.
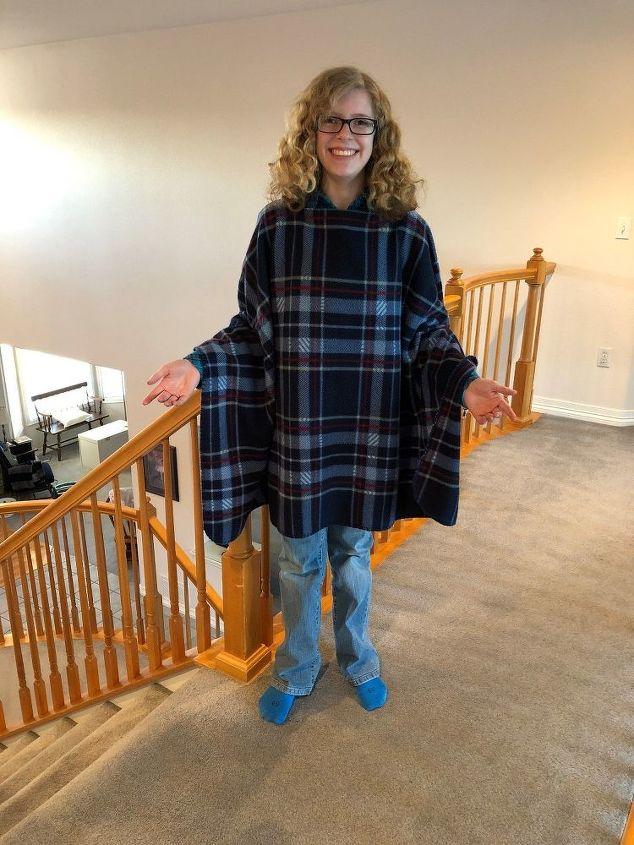
A cape from a warm blanket
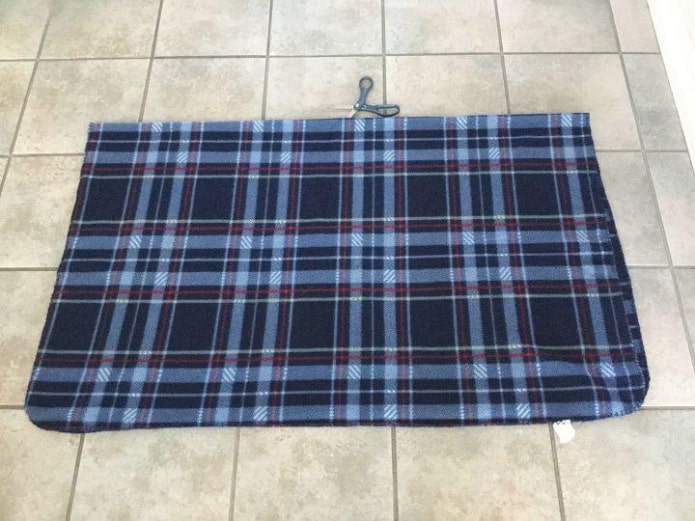
A suitable size of a blanket is 120 x 150 centimeters.
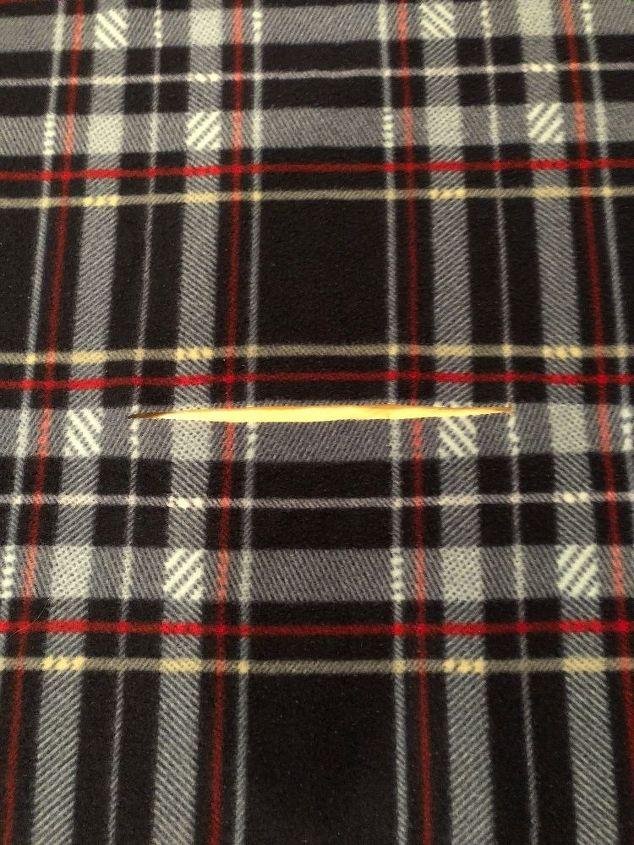
- To start, fold an old blanket in half. If you have a square, you can make it into a triangle shape and get a poncho.
- On the fold side in the center, use scissors to make a slit about 20-30 cm wide.
- Put your head through the slit, and the cape is ready to wear, plus your hands are covered. Such unusual clothing will look great at the dacha on a cozy frosty evening.
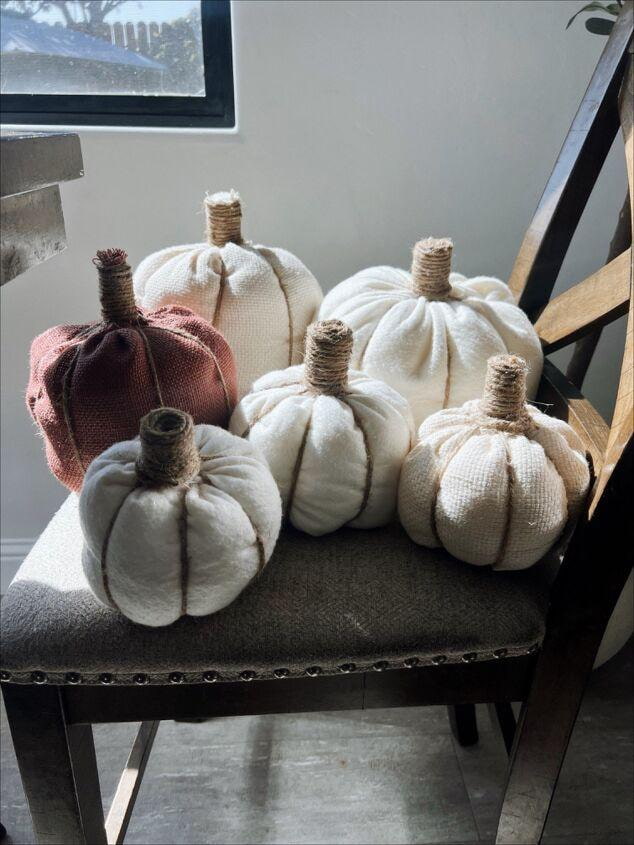
Fabric pumpkins
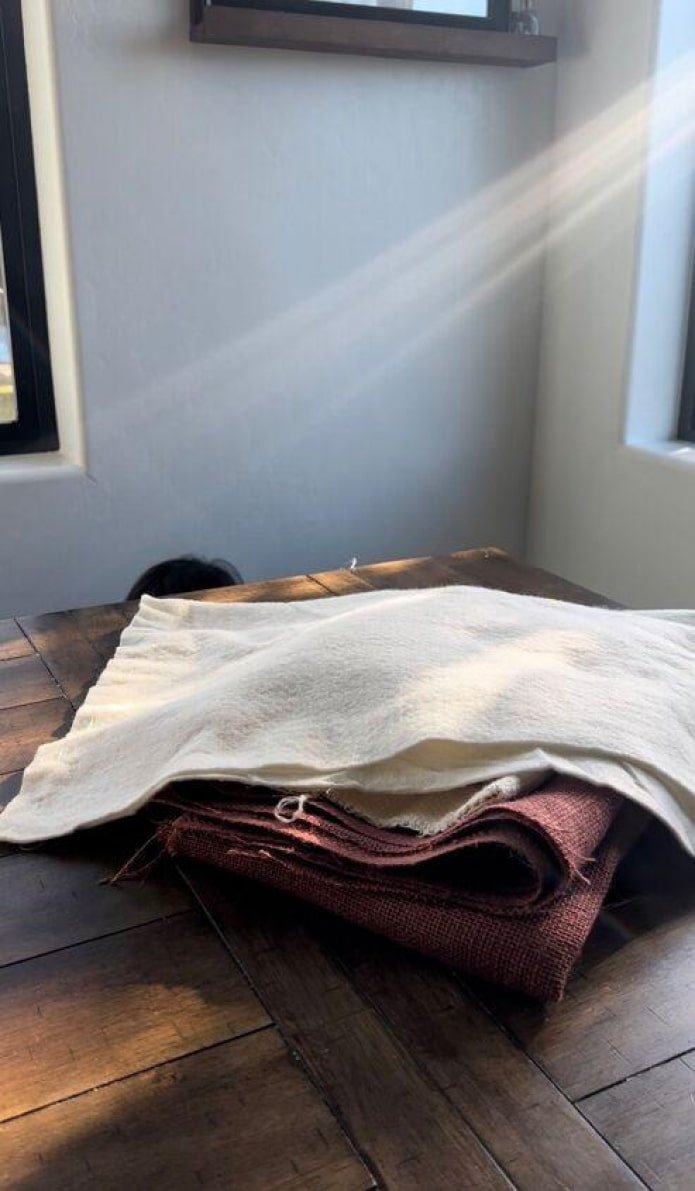
This decoration is more suitable for Halloween, but you have time to practice and hone your skills. You can use almost any old clothes you already have: dresses, pants, trousers or sweaters.
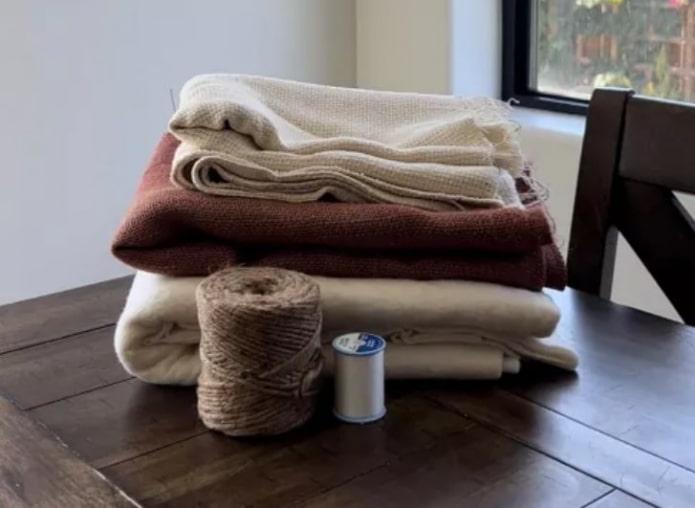
- Cut the fabric into rectangles. Make them the size you want your pumpkin to be. Smaller rectangles will make smaller pumpkins.
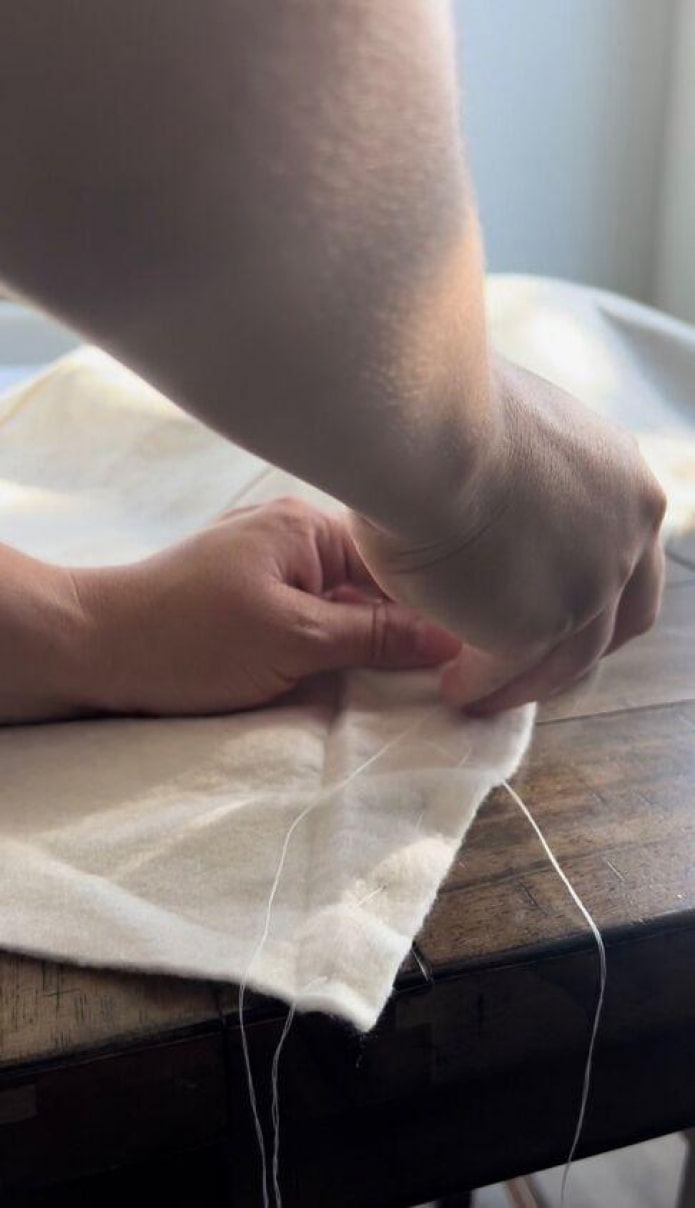
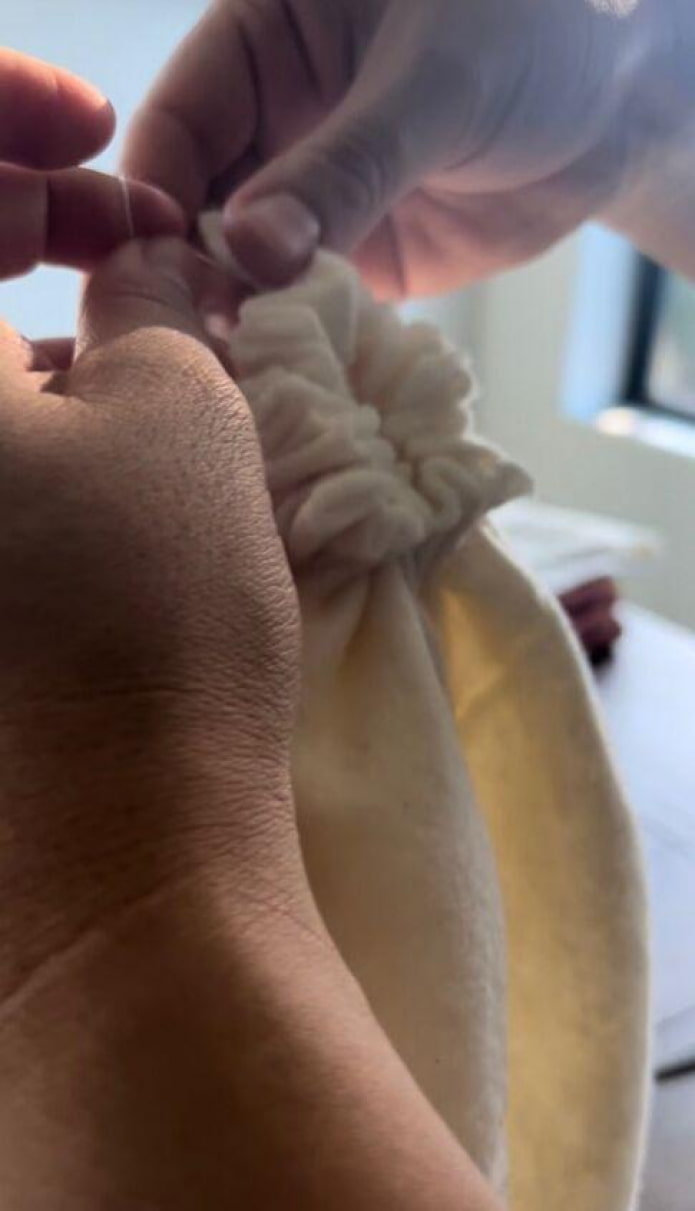
- Make a running stitch on both long sides of the clothing pieces. Leave long enough threads on both sides because you will be pulling on them to close your pumpkins. Once you have finished stitching on both sides, fold the material with the prettier side inward and sew the short side closed.
- Pull the threads on one end of the fabric from the first stitch and tie a knot when you hear it crack. Turn the fabric inside out and you will have something that looks like a small pouch.
- Start stuffing with stuffing or other unwanted clothing until you reach the top of the other end. Do the same with the threads on this end and tie a knot. You should end up with something that almost looks like a pumpkin.
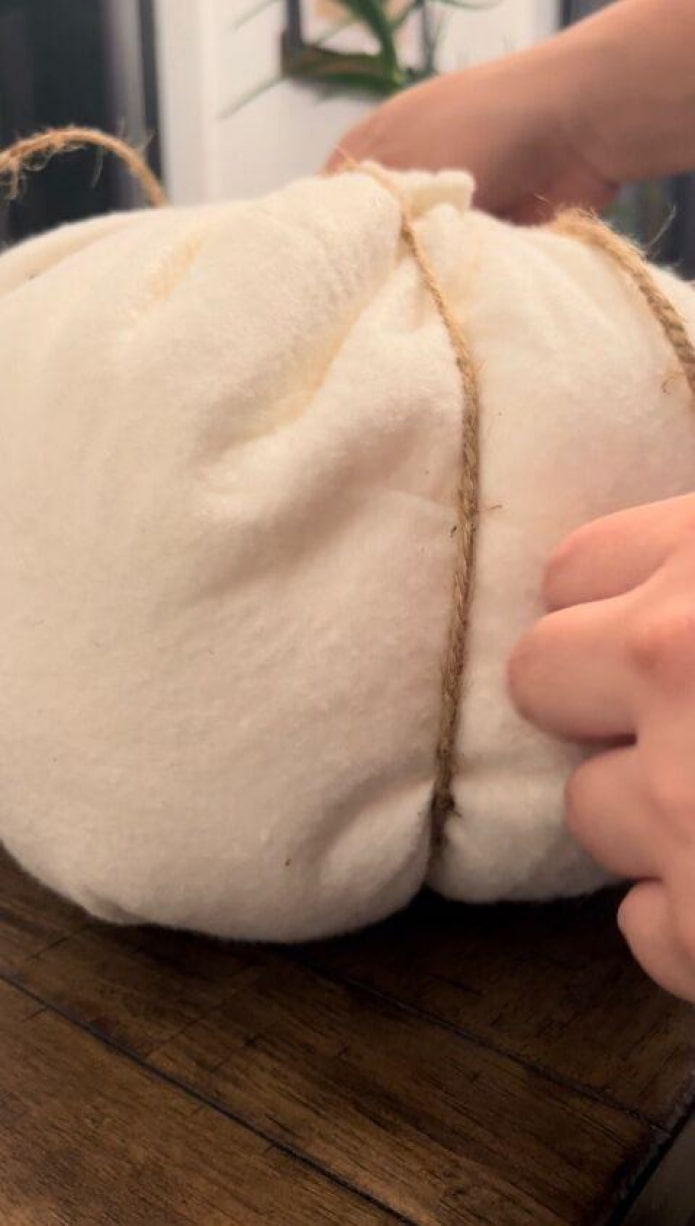
- Take some twine and wrap it around the pumpkin until you have 8 even sections. Tie a knot and cut the end of the twine.
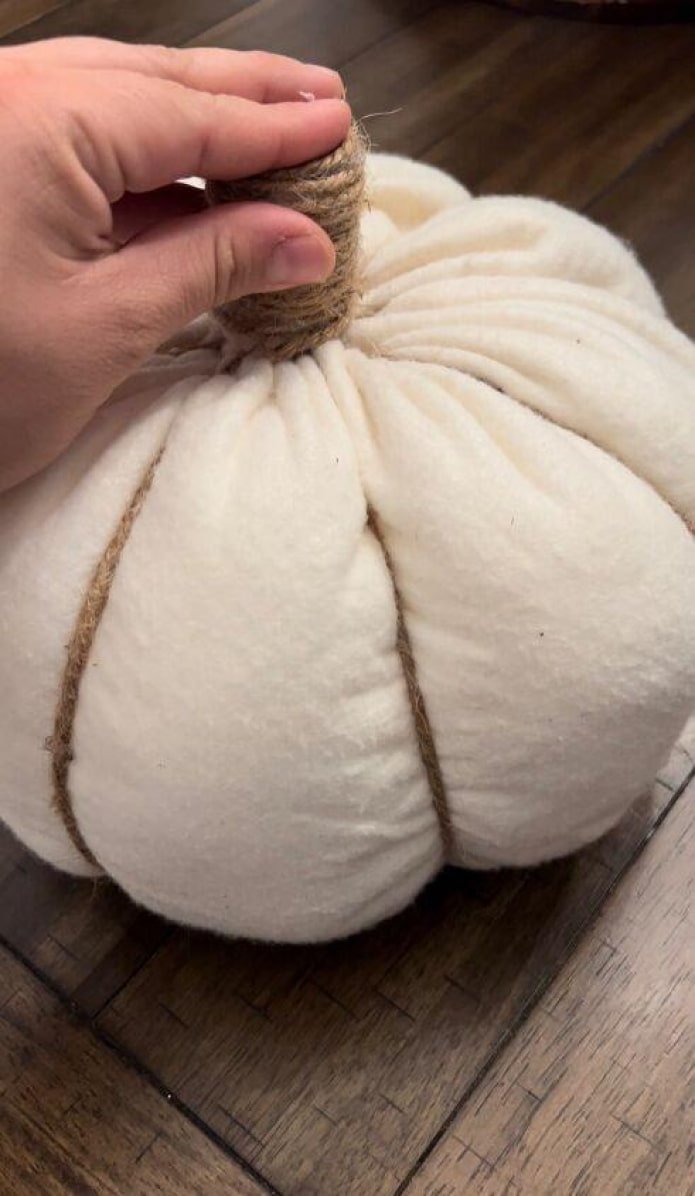
- Make a stem out of leftover material or anything you have on hand that can serve as a stem. You can glue it or sew it on.
- That’s it. Several beautiful fabric pumpkins for decoration are ready.
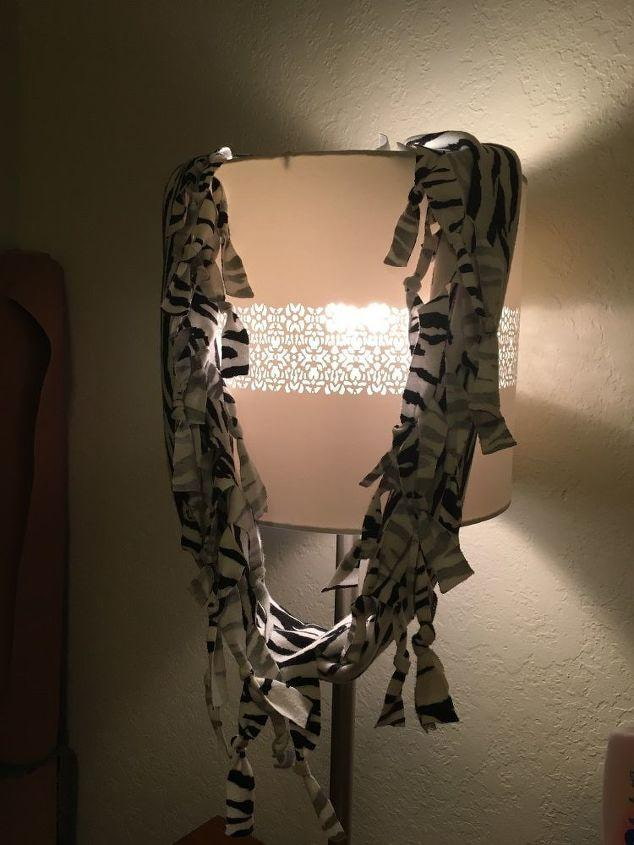
Original lamp decor
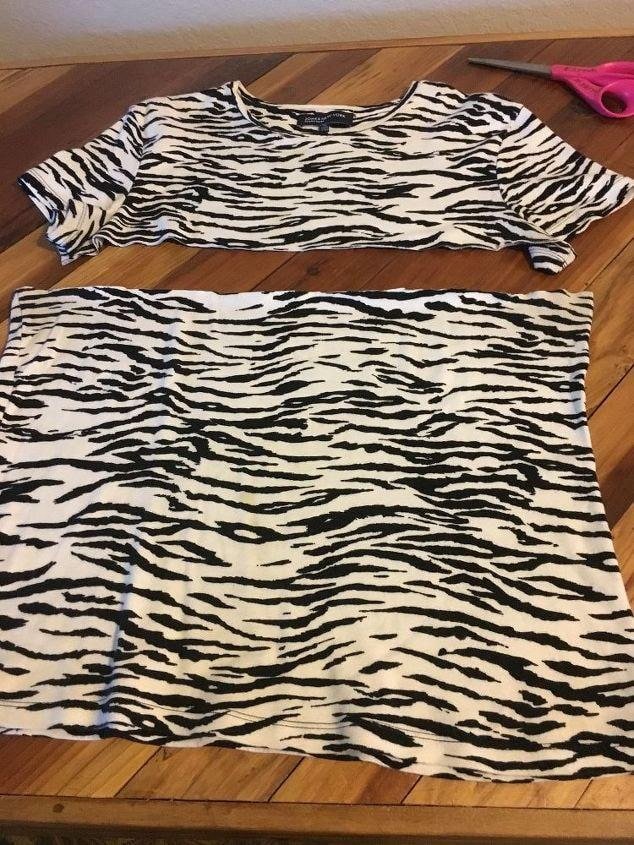
To make such an interior scarf from an old T-shirt, use any colored T-shirt with an interesting print.
- First, cut off the top.
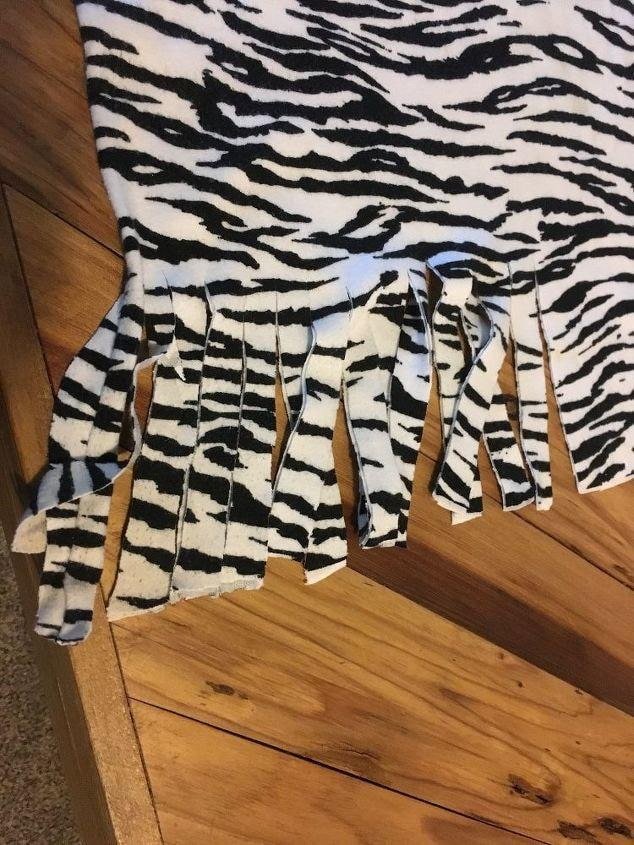
- Then cut strips along the edge, about 1-1.5 cm wide. It is important to cut strips along the entire edge.
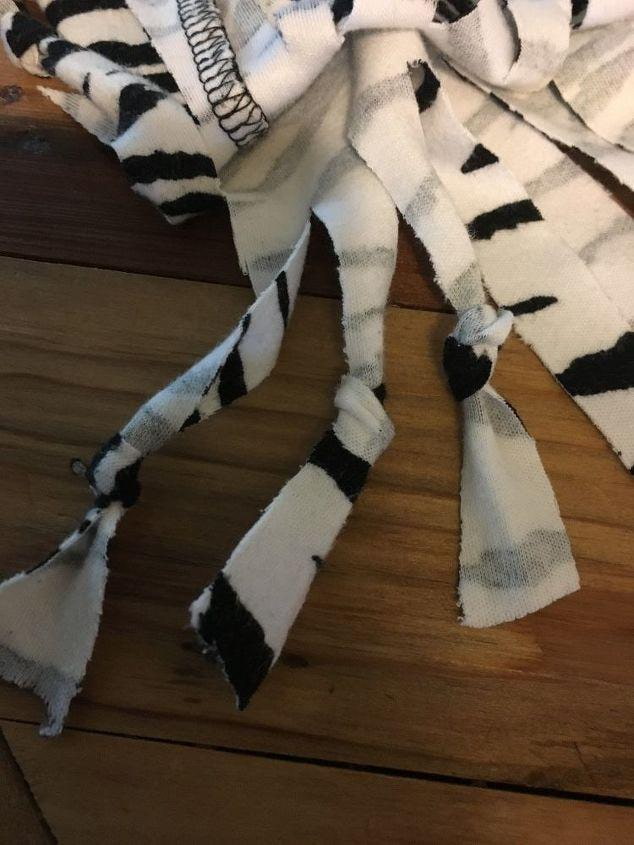
- It remains to make a fringe. You can pull the strips so that they curl. If the material of the T-shirt does not allow you to do this, tie the strips in knots.
- The scarf is ready.
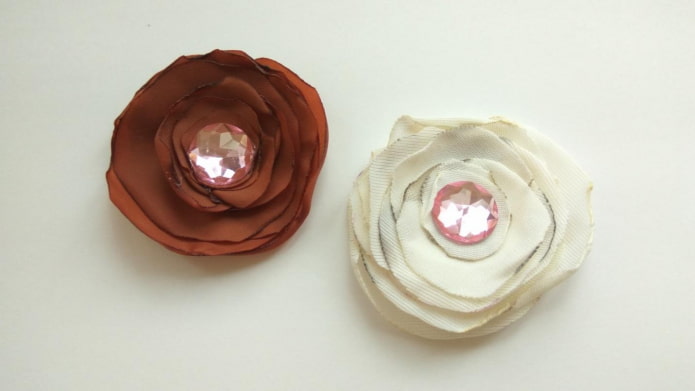
Fashionable flowers
Homemade flowers are always in trend, regardless of the season! They can be placed on a thread and hung from the ceiling to create a “hanging garden” effect, or sewn to various objects, for example, to brighten up boring walls. To implement this idea, you will need any clothes: T-shirts and dresses, scissors, glue and your free time.
- Take a simple material, be it denim, cotton or any other, and then cut off several strips of fabric. We don’t need the stitched edge, you can save it for other crafts.
- Sew them in even circles, making them tighter with each circle until you can’t go any further.
- Then glue the rest of the clothes together, starting at the bottom and working your way up to the last one.
- Then, when the fabric flowers are dry, add them to your pillows, lampshade, or walls to add as much color as possible to the room, or make an applique on cardboard, frame it, and hang it on the wall. Or decorate your bag. An example of flowers is shown in the photo.
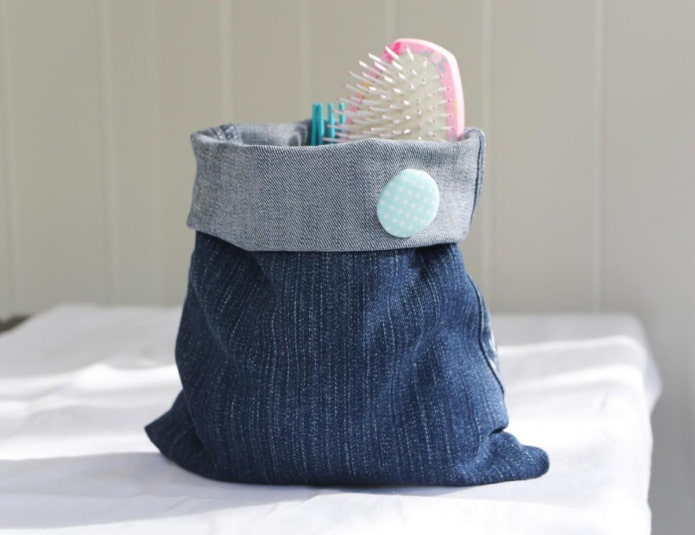
Denim organizer
Old denim items can be a convenient wardrobe item, but at the same time, such clothes are great for other needs. Old jeans have many uses. Another option is to make an organizer with your own hands. To do this, you will need a cut-off pant leg at the knees, which must be secured with stitches.
If you want to be sure that it is sewn evenly and will hold its shape, put a piece of cardboard on the bottom for stability. All that remains is to take your office supplies and throw them inside, and you’re done. A bold, stylish organizer will tidy up your desktop and hold everything you need. This is one of the easiest DIY decor items for your room.
Tip: For a more aesthetic look, roll up the bottom of your pants on a denim organizer and turn them upside down. Use the cut side as the bottom of your improvised stationery tumbler, and you’ll get dual shades that will match any other shade of blue in your home. For a more aesthetic look, you can use a sewing machine to get an even, neat seam.
Sock Monkeys
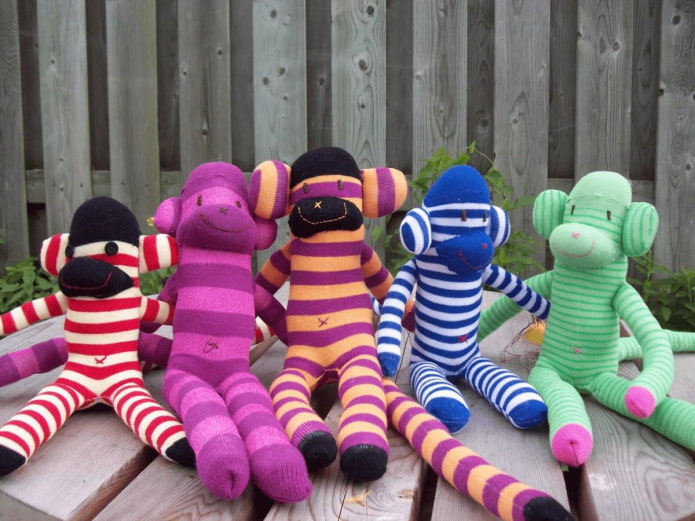
These aren’t so much decorations as they are creative gifts or a way to spend quality time with kids. You will need a traditional sock monkey pattern (there are hundreds of them and you can download them for free from the Internet) and some old socks to make your own little monkey.
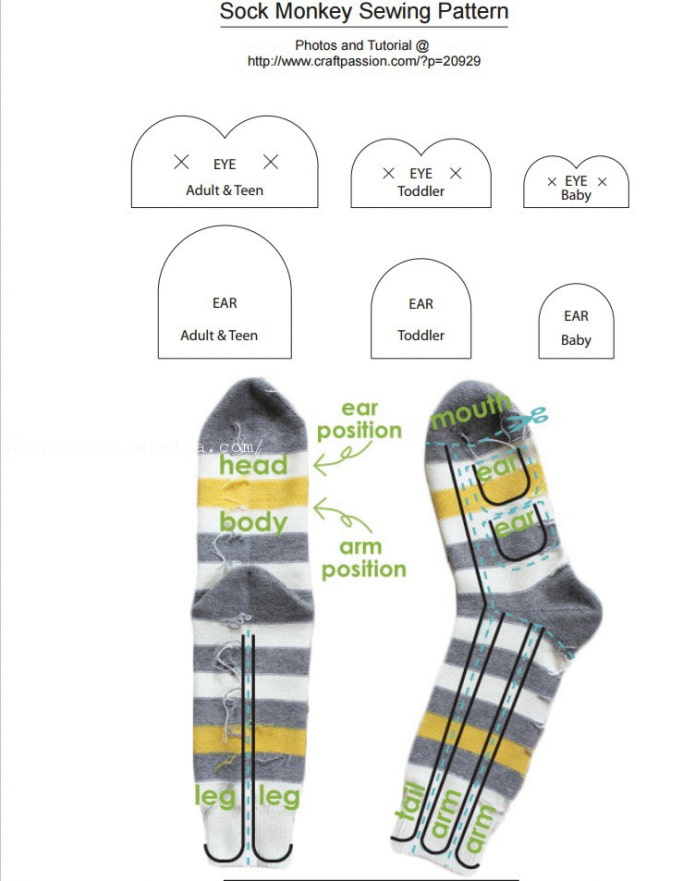
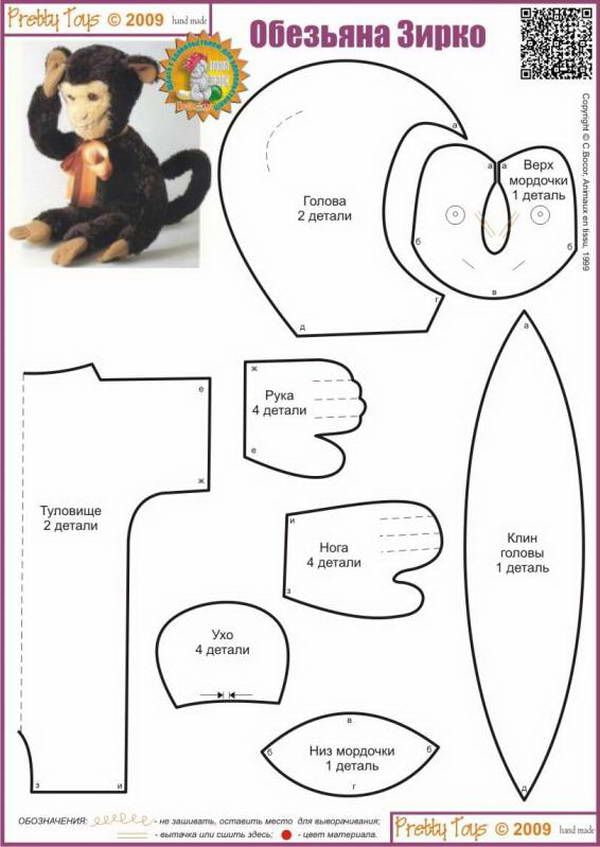
You can use any colors and fabrics, and it will still look good. In addition to monkeys, there are many patterns for other animals – all you need is some unnecessary clothes and desire.
Comfortable pillows
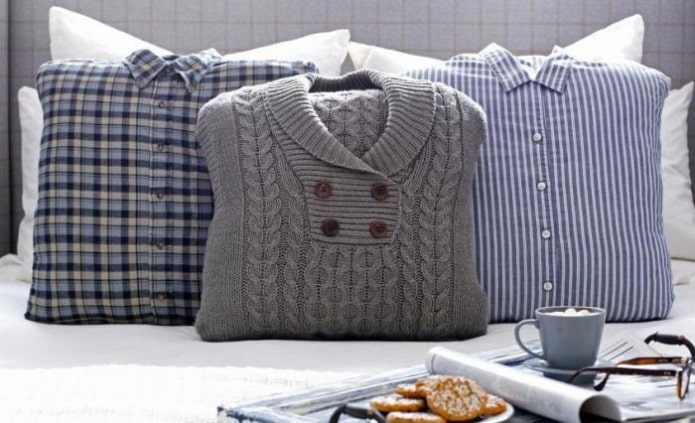
Use old things: a sweater or a knitted dress to create a pillow for a chair or bench. If the clothes you are covering are larger, you will need to make a double pillow. To do this, choose two sweaters that will go well together, or use a knitted dress. Sew them into a cover and add some stuffing to give them volume.
See our article for a selection of DIY pillows.
Original Rugs
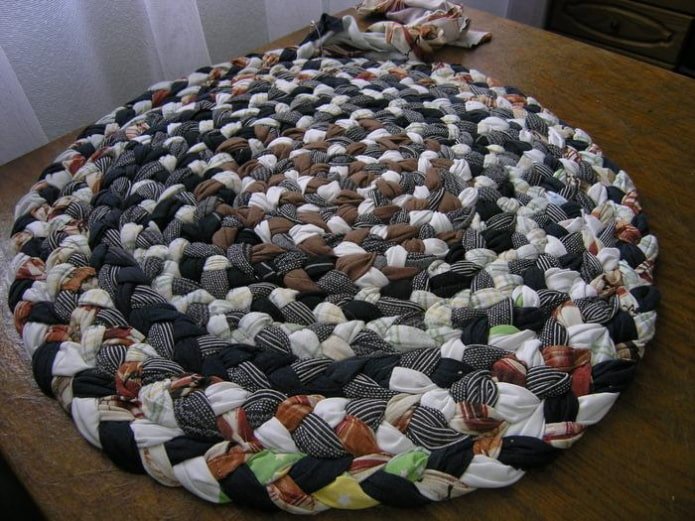
Old summer T-shirts and thin dresses can be used as rugs. T-shirt fabric is the best choice for this design because it stretches well and is inexpensive. All you need is scissors, a crochet hook, and some old clothes.
- Cut your old clothes into strips. Make sure they are long enough to stretch and start braiding them. If necessary, support the ends by placing something heavy, like a textbook, under them.
- Once you have braided a strip about four inches long, you can turn it.
- Start winding the rug as you go, remembering to press the starting knot into the braid and tuck it in so that it hangs off to the side.
- When you reach the end of one strip, tie another and continue until you have a rug and have used all the fabric.
Tassels and Pom-Poms
Luckily, old knitted dresses and blouses have an endless number of uses. You can cut clothes into strips and tie them into decorative tassels that can be connected into a whole garland. The trick is not in the making, but in the tying, but it is not that difficult.
There are several videos on how to make tassels from scraps of clothes, and they all have their own interpretations of how to tie and sew them together to get the right rope. You can also make tassels from leather scraps. Leather tassels can be used not only for interior decoration, but also for stylish bag decor.
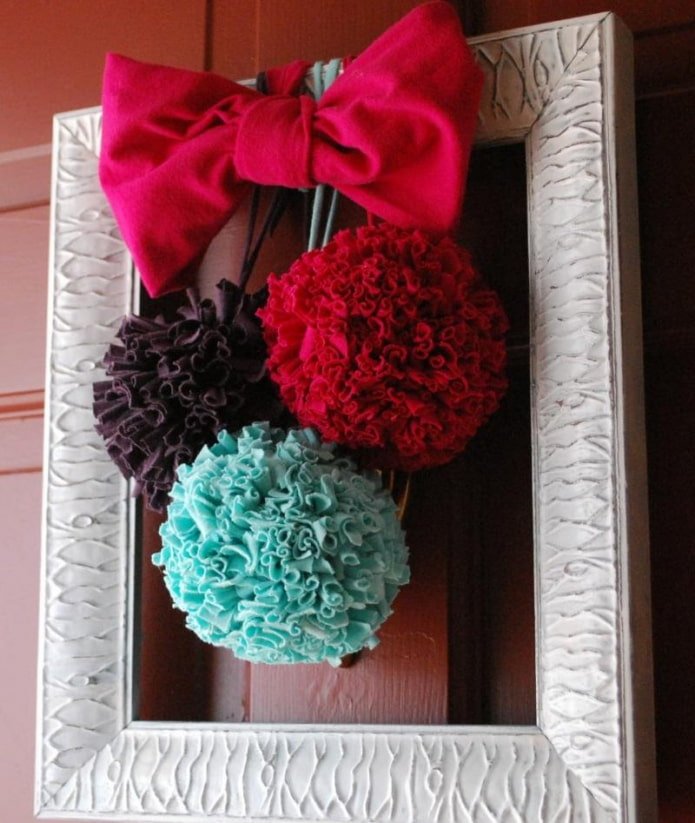
Another option is to make stylish pom-poms from scraps of thin summer clothes (shorts, dresses, skirts, etc.). You will need yarn cut from old things and a cardboard donut.
- Wrap the donut with thread, threading it through the center of the cardboard.
- Then take the yarn threads and thread it through all the loops, pull them together in the center of the donut and tie.
- After that, cut the outer edge and you have a ready-made pompom.
- Adjust it a little so that it fluffs up and you can use it in the decor of the room, or as a stylish keychain or bag.
An example of using pompoms is in the photo below.
Tights lampshade
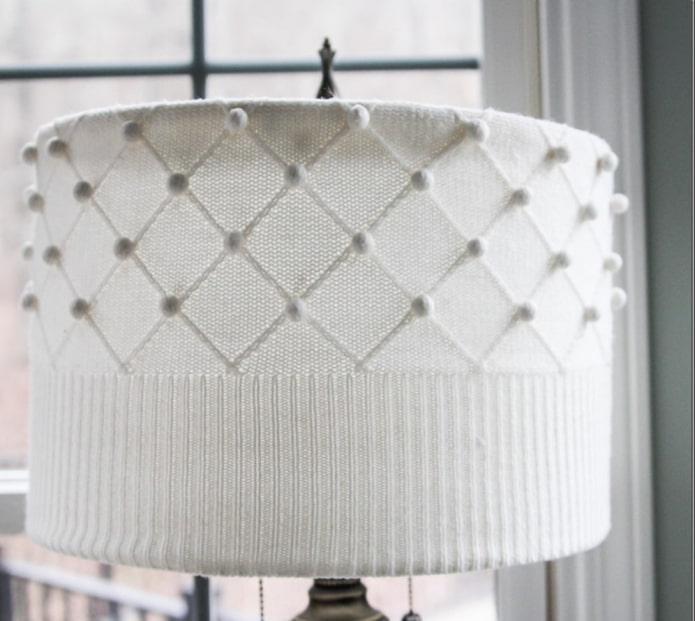
If your tights are torn or your cute leggings are beyond repair, it’s time to accept it. However, this wardrobe item can be turned into an original lampshade for a boring lamp. Tights can be stretched to a certain extent, which allows light to shine through when they are stretched enough.
Lace, colored and patterned tights can add a cheerful mood to a simple lamp. You can use this method for themed decor (Halloween, Christmas, etc.). If you don’t have a lampshade, try making a wire frame and covering it with fabric, as in the photo below.
Quilted Blanket
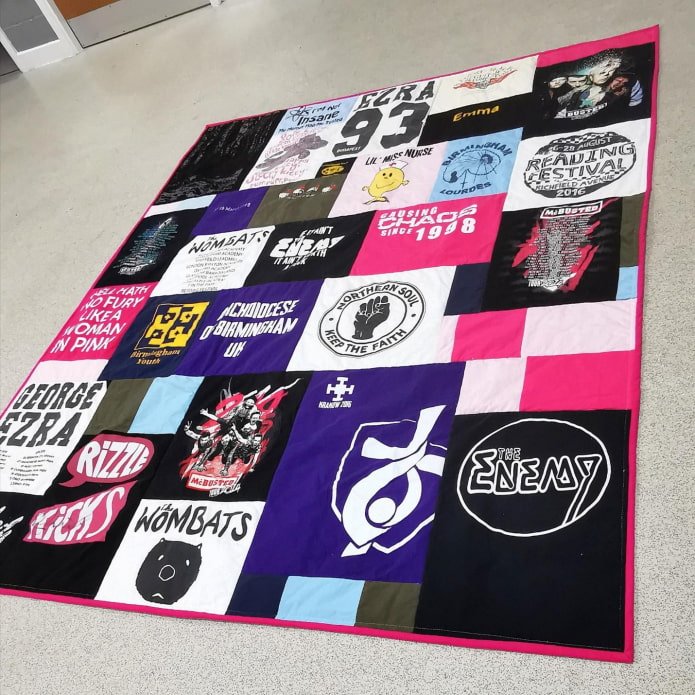
If you have a lot of old dresses with interesting prints, you can make a memorable patchwork quilt out of them. This is a popular idea that is easy to implement.
- You will need to measure the dimensions of the bed to understand the size of the future blanket.
- Next, measure the smallest item and cut a square out of it. This will be the size of one patch.
- Then cut out squares of the same size from other T-shirts and sew the squares together using a sewing machine.
- Sew a lining at the bottom to hide unsightly seams and make the blanket thicker.
Blanket from old sweaters
A blanket can be made not only from old dresses, but also from old sweaters or trousers. This way you will get a warmer and cozier blanket and will find a useful use for clothes that have long gone out of fashion. Here you can do without a sewing machine. Detailed instructions on how to do this are in the video below.
Umbrella Cover from Old Jeans
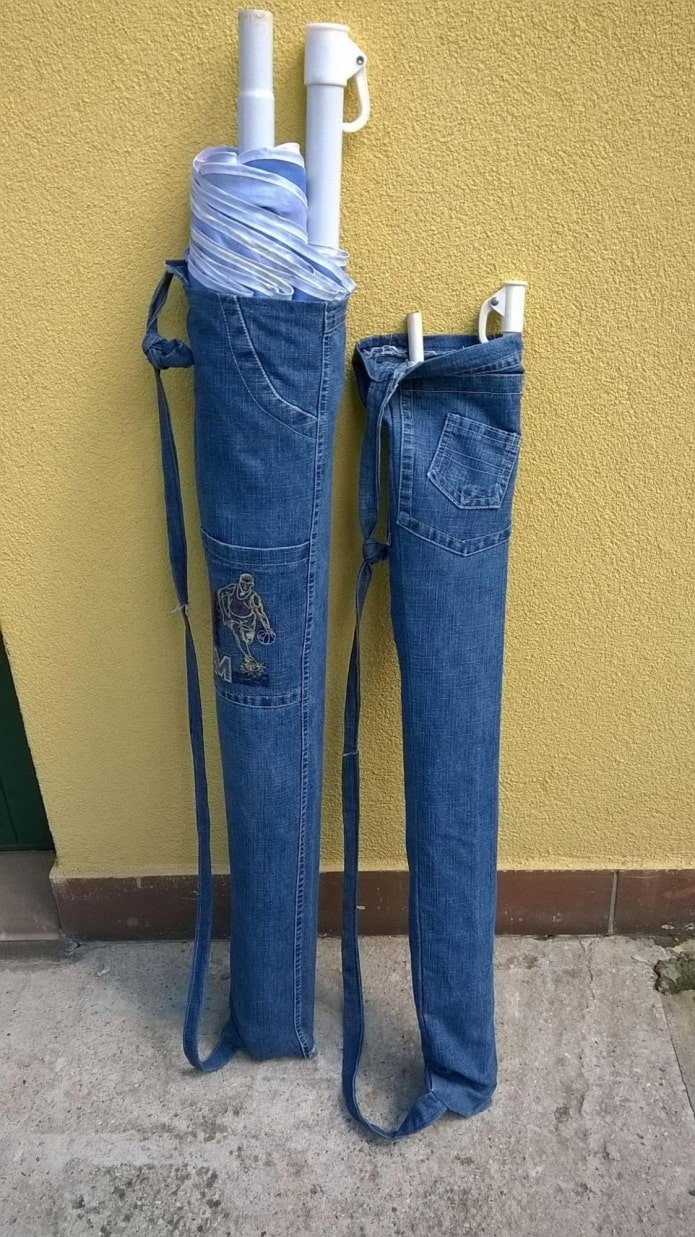
A pant leg from old fashioned jeans is almost a ready-made version of an umbrella cover. They are thick, durable and stylish. Cut off the pant leg or unravel it along the seam, and then process the edge with a sewing machine.
You also have to sew up the bottom of the pant leg and sew on a strap for convenient storage and carrying of the umbrella, as shown in the photo. If desired, you can decorate the cover with additional elements: stripes, beads, fabric flowers, pompoms, etc.
As you can see, there are many options for reusing old clothes. You can do this with children to develop their imagination or simply devote your free time to creativity to relax and relieve stress. In any case, it will have a positive effect on you and the environment.
Now reading:
- 10 Effective Methods to Fight Cat Hair in Your Home.
- Red curtains for windows: more than 70 modern photos and stylish solutions.
- Lilac and purple bathroom interior: more than 40 photos and design ideas
- How unprofitable is a ground floor apartment? Pros and cons in the review.
- Your Ultimate Guide to Buying a Used Porsche 718 Boxster