Features of installing skirting boards to a stretch ceiling
There are special skirting boards that have protrusions for fastening directly to the mounting profiles to which the stretch fabric is attached. However, the choice of such models is quite limited, so most of the skirting boards produced are attached with glue.
Why can’t you glue the ceiling skirting board directly to the stretch ceiling? There are at least five reasons for this:
- The stretch ceiling is made of polyvinyl chloride film, which is quite thin and can sag under the weight of the skirting board;
- Solvents included in the adhesives can damage the film or even make holes in it;
- It is impossible to glue skirting boards to a stretch ceiling, since the film is not fixed rigidly and can easily change its position – a reliable adhesive bond is not formed under such conditions;
- When drying, the glue will create tension, which is unlikely to be uniform – the ceiling sheet will “lead”, it will form folds, wrinkles;
- If it is necessary to remove the skirting board, the ceiling sheet will inevitably be damaged.
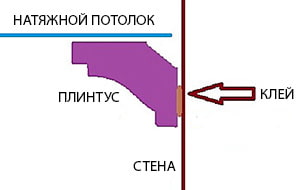 In order to glue ceiling plinth to stretch ceiling, that is, to the wall underneath it, and not be afraid that it will quickly come off, it is better to buy plinths with the maximum possible width of the surface adjacent to the wall – this will ensure reliable adhesion and the plinth will hold well. The length of the plinth generally depends on the shape and size of the room. The most common skirting boards are 1.3 m long, although in larger rooms you can also use two-meter models.

Important: When buying skirting boards, take all the required quantity at once, and make sure that the batch number is the same, otherwise individual parts may differ in shade.
Calculating the number of skirting boards
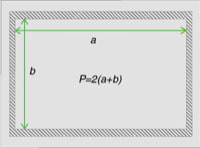
Check whether you have enough skirting boards. The calculation is simple: you need to add a reserve for the corners to the total length of the room’s perimeter (approximately 10 – 20 cm for each corner). The resulting figure is divided by the length of the skirting board (standard length is 200 mm) to find out the required quantity.

Installing a skirting board for a stretch ceiling
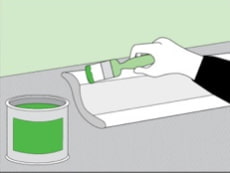
Usually, any additional elements that serve as decoration are first fixed in place, and then painted, if necessary. However, there are some subtleties here: if the baseboard is located close to the canvas, it can get dirty when painting, so it is recommended to paint first and only then begin installation.
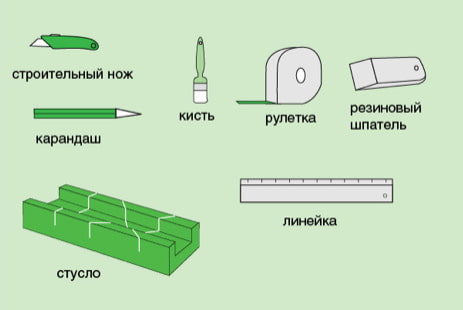
Before attaching the baseboard to the stretch ceiling, you need to purchase tools for this work:
- A stationery or construction knife;
- A measuring tool (ruler, tape measure);
- A spatula (preferably rubber or plastic);
- A pencil;
- A brush;
- A miter box (to get even joints in the corners of the room).

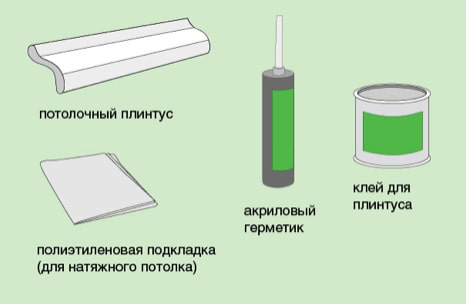
In addition, you will need the following materials:
- Skirting board;
- Glue for skirting boards (selected taking into account the material from which it is made);
- Sealant (preferably acrylic);
- Polyethylene lining (food wrap).

To attach the skirting board to the stretch ceiling, you will also need a stepladder and a napkin to remove excess glue. Start with the preparatory operations. First of all, protect the stretch ceiling from accidental scratches and stains. To do this, attach a thin cling film to it around the entire perimeter of the room.
Tip: To qualitatively and beautifully connect the baseboards in the corners of the room, you can buy special figured “corners”. If suitable “corners” are not available for sale, they are made using a special tool – a miter box – and an ordinary sharp knife.

A miter box is a rather rare tool, it is not necessary to buy it “for one time”. A homemade miter box can be made from three boards, constructing something like a tray from them, the inner part of which should be equal in width to the width of the baseboard. Then arm yourself with a protractor and cut a hole in the sides of the tray at an angle of 45 degrees.
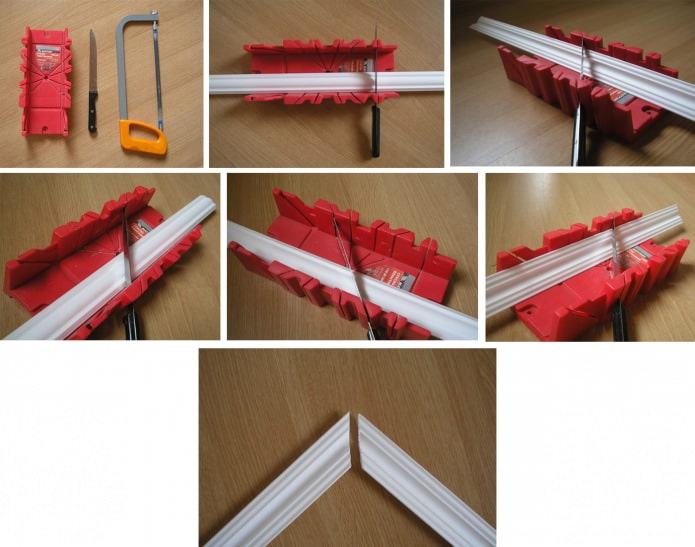
To glue the plinth to the stretch ceiling, you need high-quality glue. It is better if it is transparent (in extreme cases – white). One of the main requirements for glue is that it should not darken over time. Most often, the glue Moment is used for such work: “Installation” and “Superresistant”, as well as “Titan”.
How to glue a ceiling plinth to a stretch ceiling: work order
Preparatory work
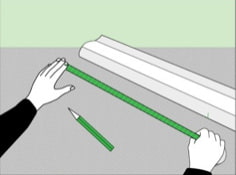
- Lay the ceiling plinth on the floor along the walls. Place two plinths along the long walls, and one along the short walls. Place the plinth pieces cut to size in the remaining spaces. Try to ensure that the parts that you cut yourself go to the corners of the room, and those that were cut at the factory are joined in the center – they will give a perfectly even joint.

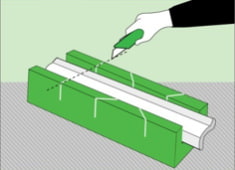
- Cut the corner pieces with a miter box so that they fit together evenly.

- Lay the plinths out on the floor again and check how accurately they fit in place. If necessary, make corrections.
After completing the preparatory work, you can begin installation directly on the wall.
Important: You need to start work from the corner opposite the entrance to the room.
Installation
- Before gluing the skirting board to the stretch ceiling, apply it to the walls without glue, check the joints.
- Mark the wall with a pencil, indicating the joints and the lower edge of the ceiling skirting board.
- Use a polyethylene lining (cling film) between the ceiling sheet and the skirting board.
- Grease the wide side of the ceiling skirting board with glue and wait a couple of seconds – this is necessary for the glue to begin to set.

- Attach the skirting board to the wall, using the pencil markings as a guide, and press for a minute. After that, use a napkin to remove any excess glue.
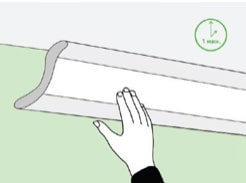

- The next skirting board is glued in the same way, it is applied to the one already glued. In addition to the wide part, it is necessary to coat the ends of the baseboards with glue.
- Continue gluing the baseboards around the entire perimeter until the work is finished. After the glue has set a little, you can remove the film from the ceiling if you do not plan to paint the skirting boards.
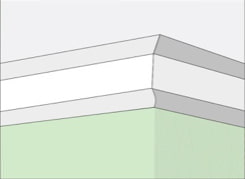

Important: You can start painting ceiling skirting boards only after the glue has completely dries. For information on drying time, see the glue packaging.
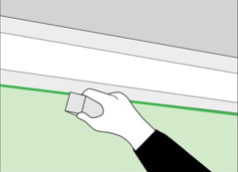
After the glue has completely dried, it is necessary to fill the gaps between the wall and the skirting board using a sealant and a spatula.

Now reading:
- Bans on refrigerator magnets: 8 arguments for and against.
- Classic American Muscle: The Ford Mustang Experience
- Curtains with floral patterns: more than 60 photos and ideas (rose, poppies, sakura, peonies)
- 10 effective methods for finishing door slopes in an apartment + 40 photos for ideas
- Your Complete Guide to Buying a Used Ferrari