Shape matters
A wooden chest is essentially nothing more than a rectangular box with a lid. The shape is determined only by the design of the latter:
- Semi-cylindrical items were more often bought by representatives of the wealthy classes of the population, since they were rarely used as a multifunctional piece of furniture. They were decorated with a scattering of precious stones, gold or silver jewelry and paintings.
- Teremok – a special shape of the lid made it possible to create the most convenient storage space in the chest, for example, for small valuables in the upper part, and larger ones in the lower tier.
- The headboard is a small box with a beveled top and several sections. Such chests were often used as a travel box, in which things collected for a trip were transported, and their special shape allowed them to always be with you – with your head resting on a pillow.
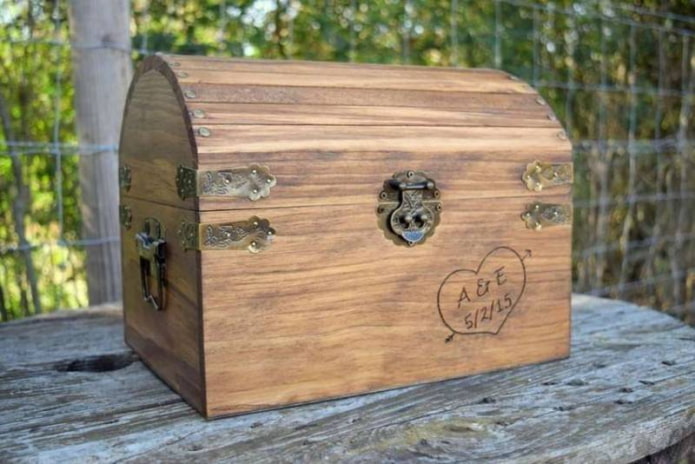
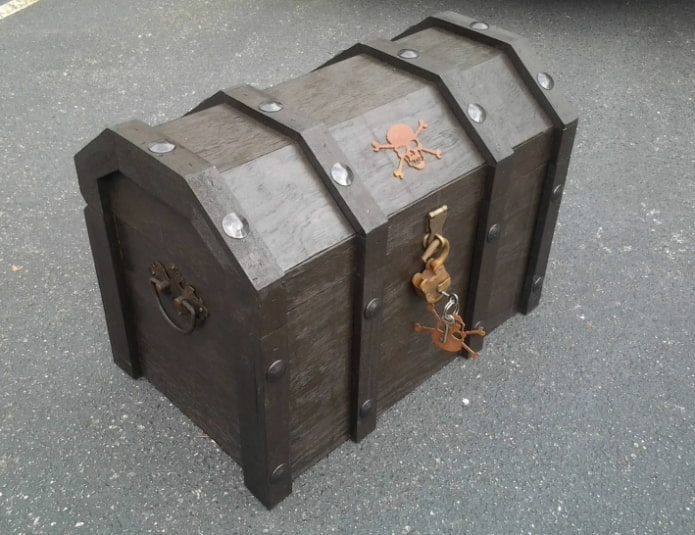
Interesting! Secret pockets and a double bottom are an integral part of any chest. They were used to store money, documents, important papers and jewelry. If you put something like this in a child’s room, the child’s joy will know no bounds!
Suitable materials
Of course, you can create a box of the desired shape from thick multilayer cardboard, but the service life of such a product is, at best, several years, and only if it is used exclusively for the purpose of complementing the interior with bright things. Therefore, to make a wooden chest with your own hands, it is advisable to use the following:
- Plywood is the most common budget option. The material can be of any thickness, it is easy to cut and assemble. The main disadvantage is that the product will look unpresentable and is unlikely to please with an extraordinary design.
- Furniture boards are distinguished by high strength indicators and a complete lack of reactions to temperature changes or humidity. They are made from various types of wood and have an impressive weight. To use the boards in work, you must have experience in carpentry.
- A combination of plywood and furniture boards. With the right approach, this combination will allow you to create a unique hand-made product with a durable structure and an attractive appearance.
As an option, wooden blocks of small thickness can also be considered, but you need to understand that such products often require preliminary treatment with special compounds against fungus and mold. It is also important to take care of the water-repellent impregnation.
Detailed description of the work
Making a chest will not take much time and effort if you follow the instructions that were compiled specifically for those who want to create beautiful and functional products with their own hands. At the decoration stage, you can be guided by personal preferences and use original decorative elements.
Pirate chest for a child’s room
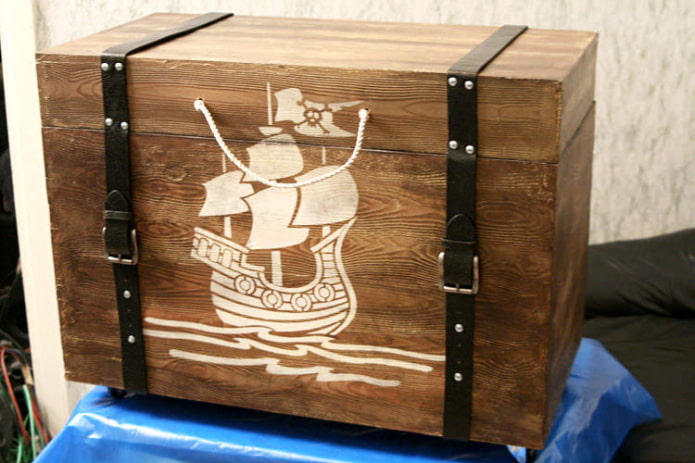
This piece of furniture can become the central element for children’s games and fun, as well as a place to store everything that little rascals love to throw on the floor. To begin, we collect everything that might be useful to us:
Materials
- Furniture board
Tools
- Jigsaw
- Spatula for cutting wood
- Drill with a special “Feather” attachment
- Brushes
Wood processing compounds
- Putty
- Two-component glue
- Glue for gold leaf
- Gold leaf
- Acrylic paint (black, white, brown and caramel)
- Flour, milk
- Decorative beeswax
- “Gold” powder
Fittings
- Furniture rollers
- Door hinges
Decorative elements
- Rope or rough twine
- Stencil with the image of pirate attributes
- Leather belts
The last item of the table can be changed based on personal preferences or the wishes of the child. So, let’s get started:
1. Cut out the furniture board according to the markings so that the walls and the bottom have tenons at the joints.
2. Connect all the elements, not forgetting to treat the attachment points with two-component glue.
3. We treat the box inside and outside with plaster and give the composition time to dry completely.
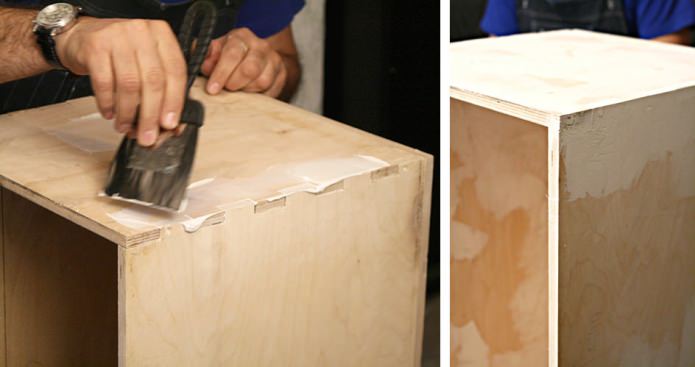
4. We cover the workpiece with caramel paint, and then with brown (only the outer part of the chest), having previously added flour and milk to it to create a special effect of application. We go over all surfaces with abundant strokes, and then scrape off the paint with a special spatula. Then the wood will acquire an interesting pattern.
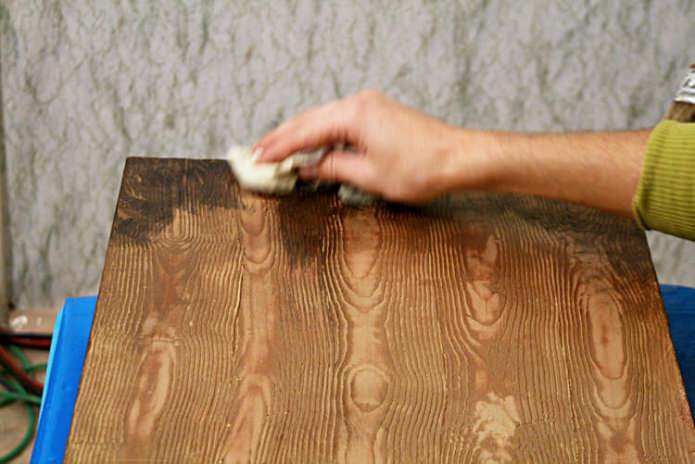
5. Apply the stencil to the outside of the lid and paint the free space with the desired color.
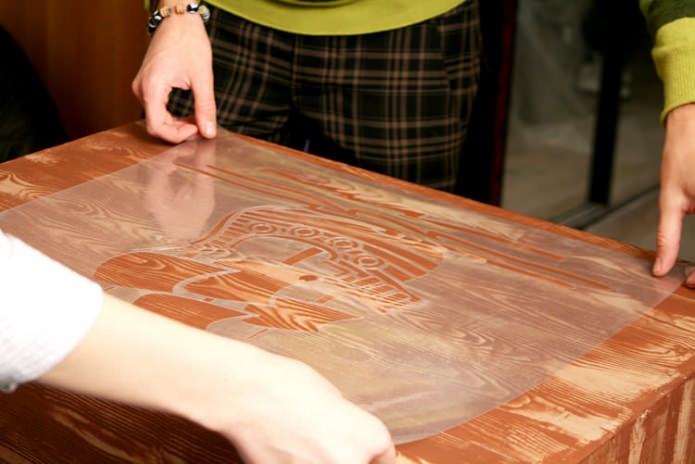
6. We generously coat the reverse side with glue for gold leaf and apply gold leaf.
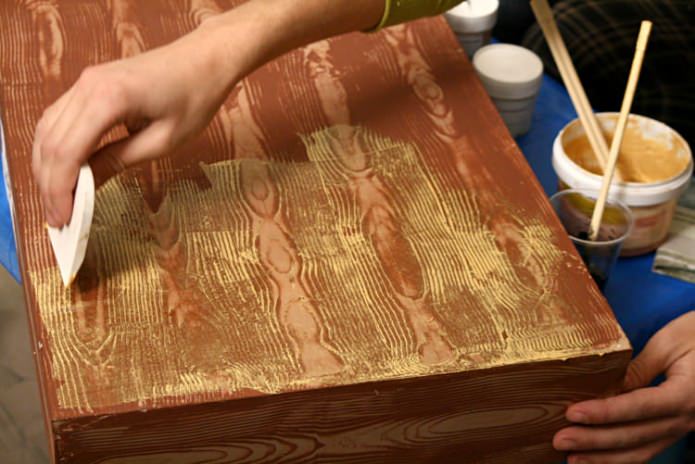
7. We attach the rollers to easily move the chest around the room or house, and the hinges to open the lid.
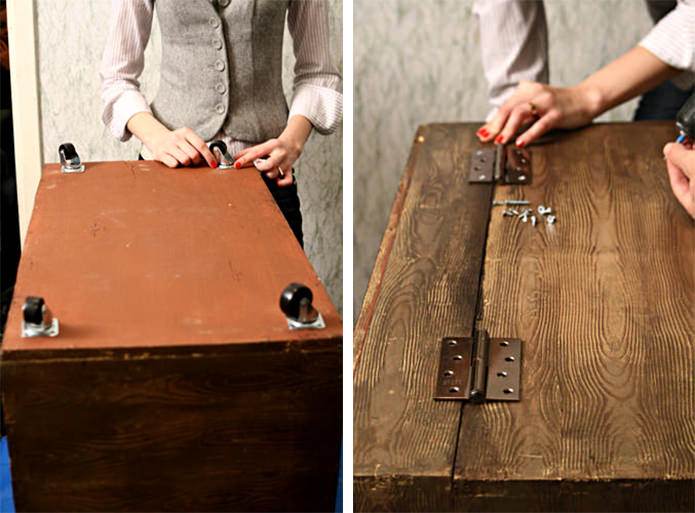
8. The final stage is attaching the decorative elements – handles and straps.
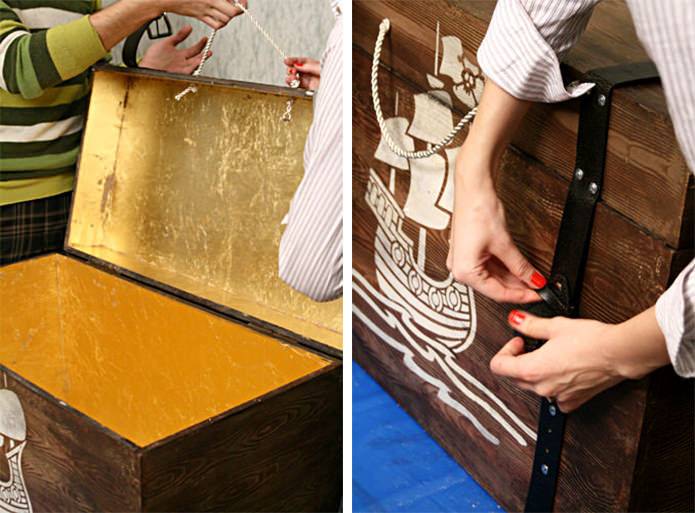
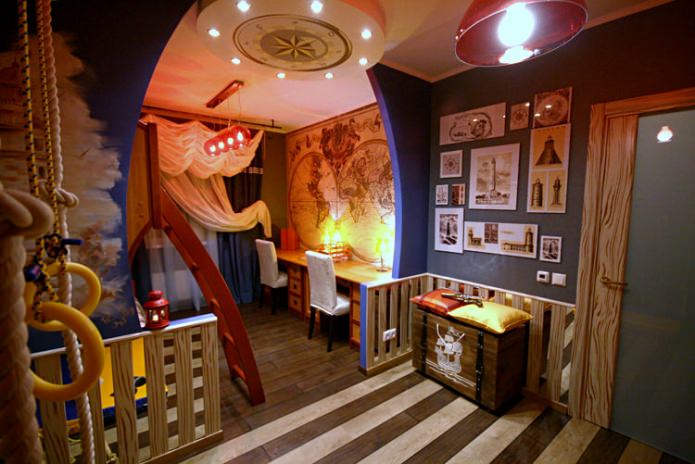
Note! The rectangular flat lid turns the homemade pirate chest into a multifunctional piece of furniture. For example, if you buy or sew pillows for it, you can turn it into an original seat or a bedside ottoman.
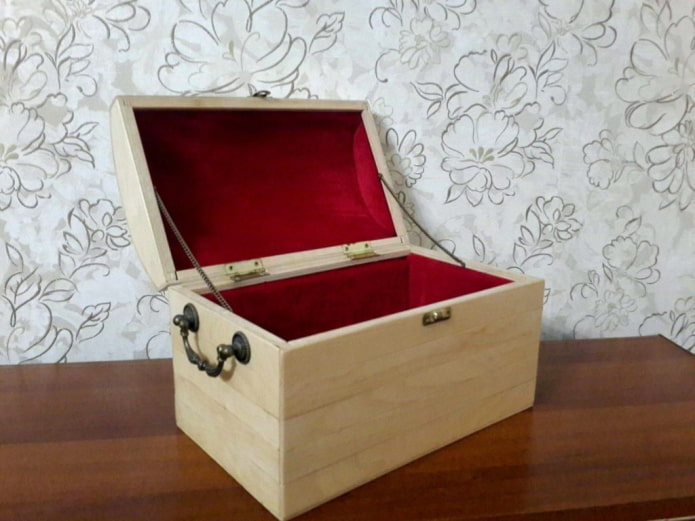
A small chest for storing jewelry and ornaments
Such a gift for a woman will be the most pleasant and memorable, because it is made with your own hands and is very useful in everyday life.
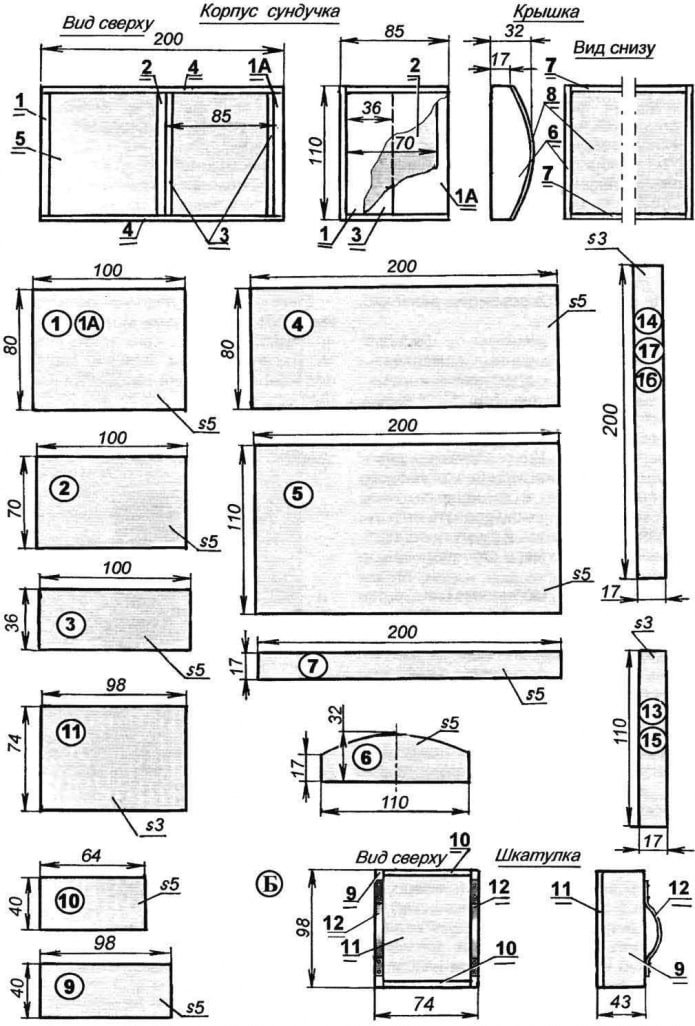
- Wooden blanks are cut according to a previously created sketch with specified parameters of the length, width and height of the future product.
- Small legs are cut out from waste materials if desired.
- Guided by the drawing, it is necessary to drill holes for fastening the parts of the structure with self-tapping screws.
- All elements are coated with epoxy glue and connected to each other, self-tapping screws are inserted to secure the result.
- The fittings are mounted.
- The surfaces are sanded and treated with special compounds to protect the wood.
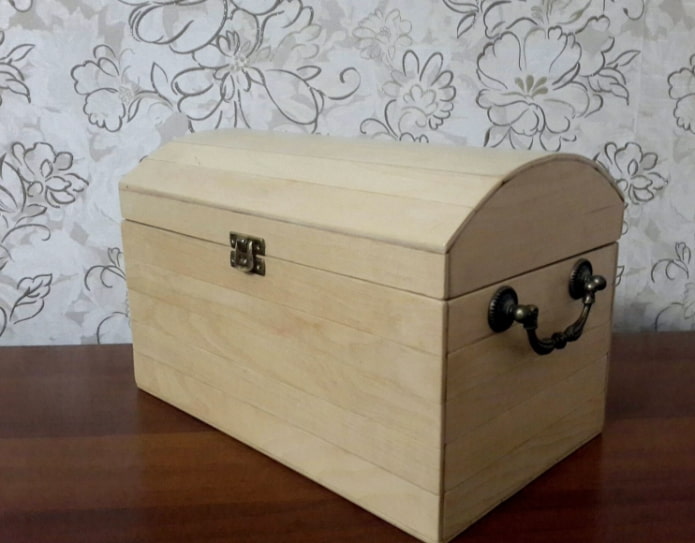
If you strictly follow the instructions, you should end up with a small wooden blank with or without legs. There are a huge number of ways to further decorate, but we offer an option for decorating using the imitation antique technology. It is simple and understandable for any beginner:
- All surfaces are treated along the wood grain with a special metal brush. As a result, the softer fibers will be worn out, and the hard stripes will acquire a relief structure.
- The wooden boards, from which the chest will subsequently be made, are covered with an antifungal composition. When completely dry, several layers of primer of different shades are applied. The alternation of green, brown or walnut creates the feeling that this product has been passed down from generation to generation and has become a real family heirloom.
- After all the manipulations have been carried out, the components (lid hinges or a handle) are attached to the structure, and the inside of the chest is covered with fabric.
- The screw heads can be hidden using small strips of leather. Such straps are a worthy replacement for expensive forged metal decorations. To make the decor look presentable and appropriate next to artificially aged wood, the leather is nailed to the box using upholstery nails with decorative heads. You can add beautiful buckles.
Attention! You should choose only those nails that are shorter than the thickness of the walls, lid and floor.
Chest made of wooden beams and boards
Before you start making the chest, you need to lay out everything you might need for the job on the work surface:
- Beams for the frame, boards for sheathing and plywood for the interior;
- Hardware: padlock, hinges, metal staples and strips for decoration;
- Antiseptic compounds for processing materials;
Step-by-step instructions
Before you start sawing the beams and boards, you need to make a drawing of the future product indicating all the important dimensions of the elements.
1. We cut the material with a jigsaw or a saw.
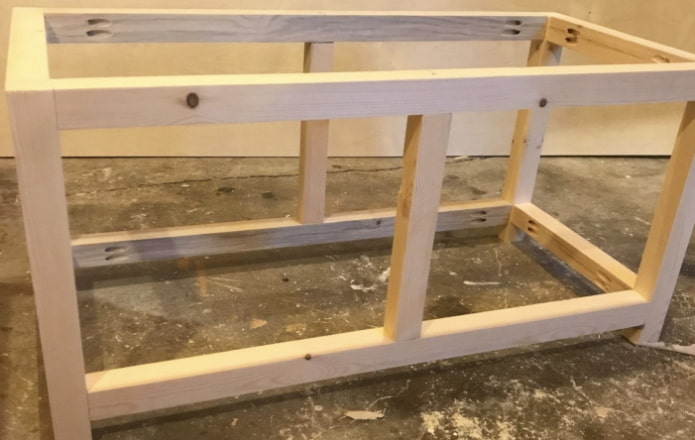
2. The cut areas should be sanded with sandpaper. This will minimize the risk of getting splinters and other injuries when working with wood.
3. We apply a special antiseptic compound that will prevent the formation of fungus or mold. We take a break, waiting for the protective layer to dry completely.
4. Connect the wooden beams using the “tongue and groove” method, generously coating the joints with two-component glue for reliability.
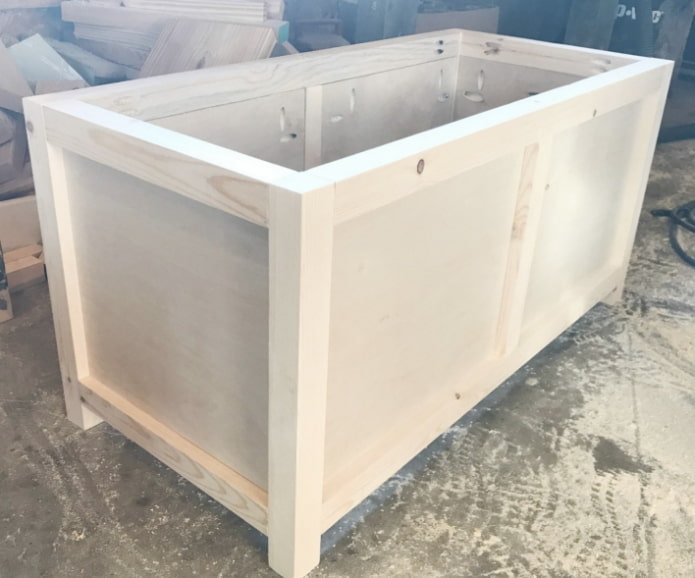
5. The frame is sheathed with plywood sheets of the required size. All elements should fit tightly against each other without large gaps.
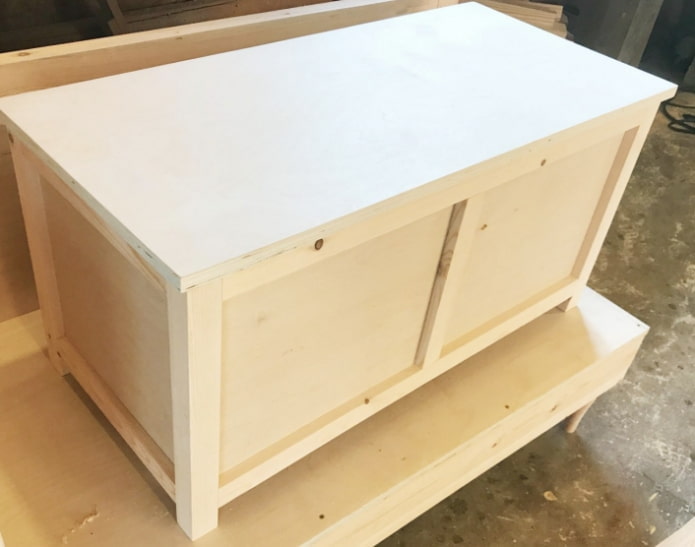
Let’s start making the chest lid. The convex rounded version is quite difficult for a beginner and requires the craftsman to have certain skills and knowledge in carpentry. Therefore, it is better to knock down a rectangular flat lid, which, by the way, has many functions in everyday life – it can act as a tabletop, a seat and even a shelf for various items. It’s simple – take a sheet of plywood or a furniture board and cut out the required lid dimensions from it.
Interior decoration is the next stage, which should be given special attention. Prepare a thin brush and paint all the interior surfaces in the desired shade. This coating will help the wood withstand temperature changes and humidity fluctuations. You can also use fabric that will be attached to the plywood using metal staples.
On the outside, you need to paint the chest with stain, varnish or simply burn it with a blowtorch.
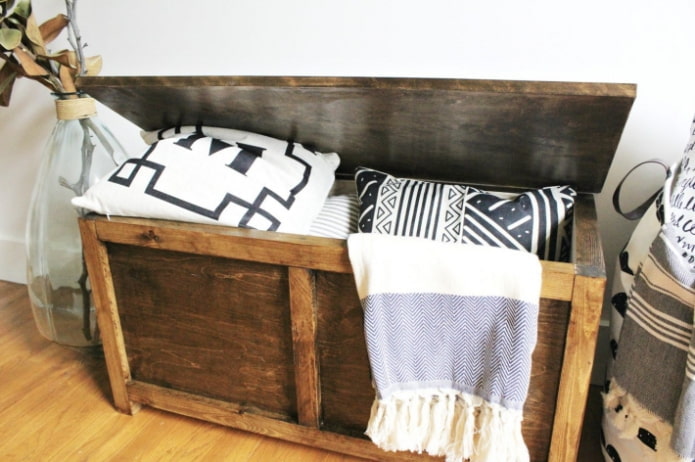
If you find this chest boring, then after all the layers have completely dried, attach the awnings, metal plates for decoration, furniture rollers, handles on the sides. In general, all the fittings that the chest should be equipped with.
Video instructions for making a chest from scrap materials
Large wooden pallets often gather dust unused at the dacha or in the garage. Today, in design, this is one of the most popular types of available scrap materials. They are also used to make simple boxes with a lid to organize useful space in the kitchen, hallway, and even a nursery. You can see all the nuances of creating such a product by watching the video below:
Decorating – the most popular techniques and methods
Decorating a finished wooden blank is an exciting process that will help reveal your creative potential and realize your wildest ideas. We can only give a few directions in which a novice designer should move.
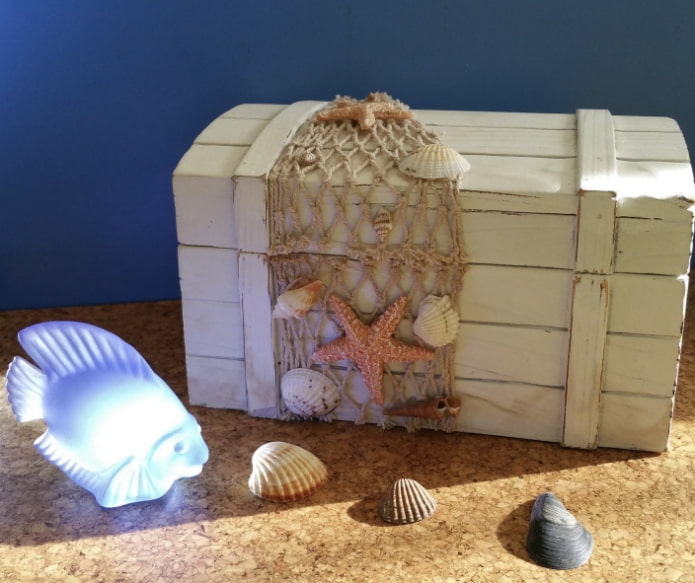
To create a chest with marine motifs, you will need shells of any shape and size and glue. They can be placed randomly or folded into a specific pattern. It is acceptable to use sand for stencil decoration. A chest with such decor will harmoniously fit into a room in Scandinavian style.
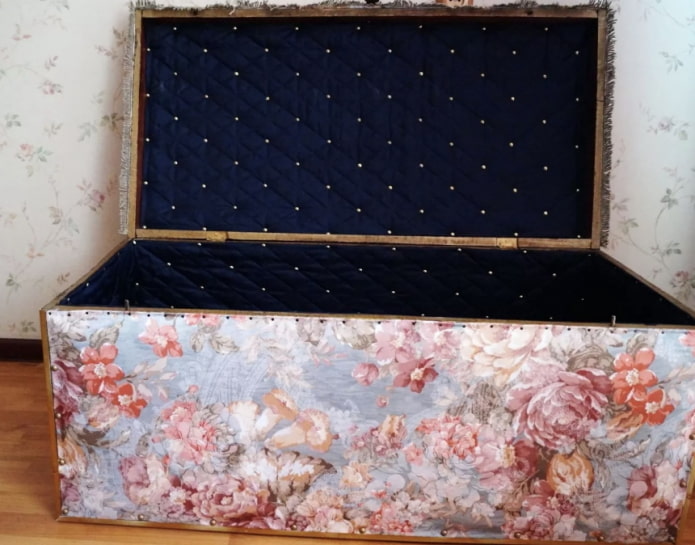
Your imagination has a lot to do with textile decoration – you can cover the lid of the chest with a checkered shirt or old jeans, and decorate its side walls with buttons, large pins, thimbles, bright scarves, laces, rope, and various textile appliqués. It turns out cheap and very original!
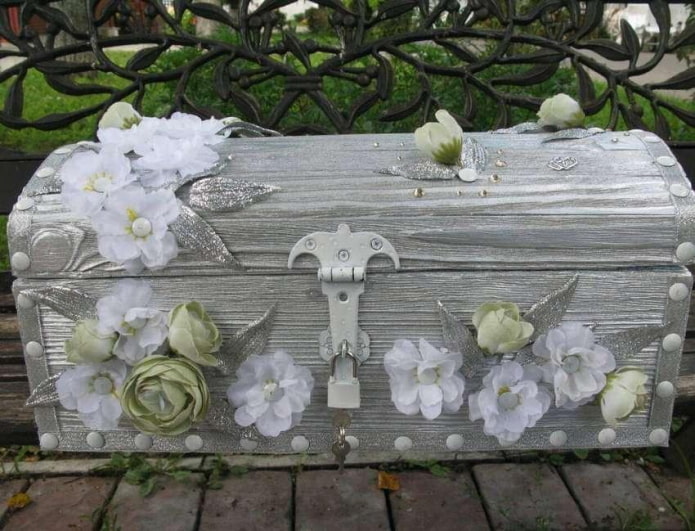
If you decorate the chest with beautiful baskets of exotic plant inflorescences, add ribbons and beads – you will get a festive option, suitable for family photo sessions. After the holiday is over, the decor can be removed and replaced with more calm elements.
Chests made in the style of past centuries, when forging was done by blacksmiths, metal elements give any product an antique effect. It is enhanced by using special techniques for applying paint to wood. You can also buy a massive lock or a piece of chain that will serve as side handles for transporting the box.
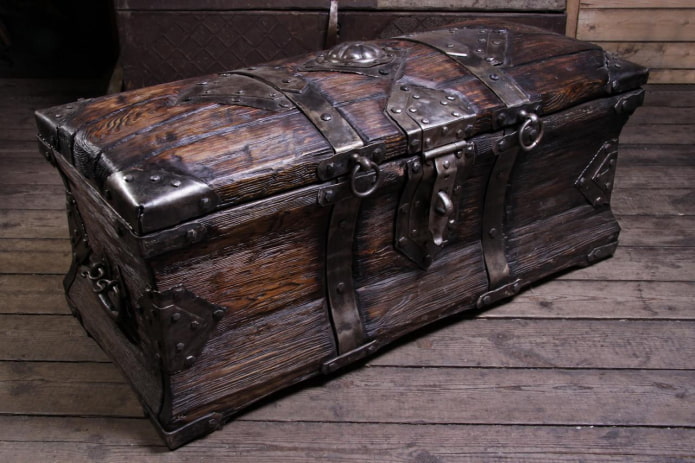
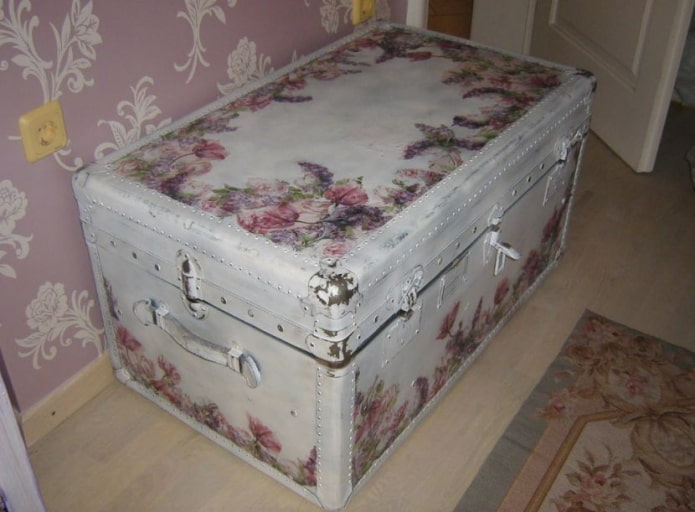
Decoupage is another interesting option for those who do not want to spend a lot of money on decorating a chest. To create a unique decor, you will need a multi-layer napkin with any pattern, PVA glue, acrylic paint, matting varnish and the desire to create something beautiful and unique. The image is applied both along the edges and in the center of the lid, on the back and side walls.
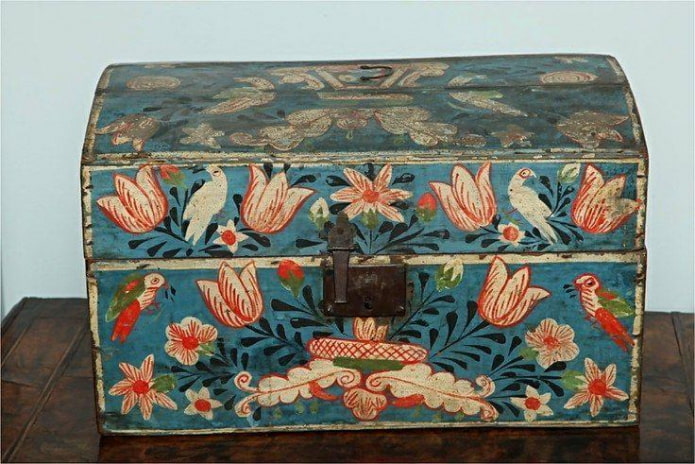
If the artist’s talent is wasted, it’s time to use it to decorate the chest. These can be any memorable inscriptions, caricatures, emoticons or images of favorite things. It is better if acrylic paints with a special composition for wooden surfaces are used in the process.
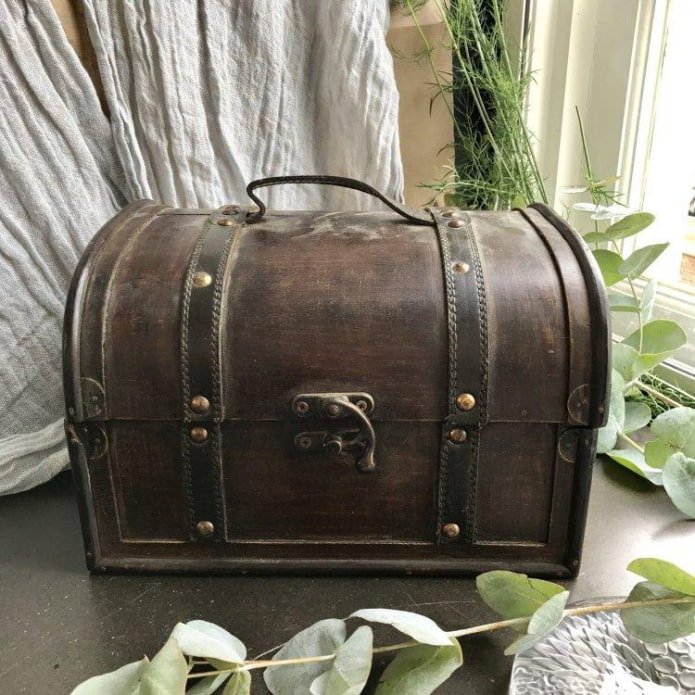
Leather laces, belts, rivets and other decorative elements will give the chest a stylish look. The main thing is not to overdo it and glue a minimum of elements to get a laconic and restrained design. The box with a lid will fit into any setting from sophisticated classics to modern minimalism.
Small elements can be combined into strict geometric patterns and figures, beautiful paintings or be part of a chaotic mosaic rain applied to a wooden surface. Such furniture is reminiscent of the history of its appearance – the first chests came for sale in Russia from eastern countries.
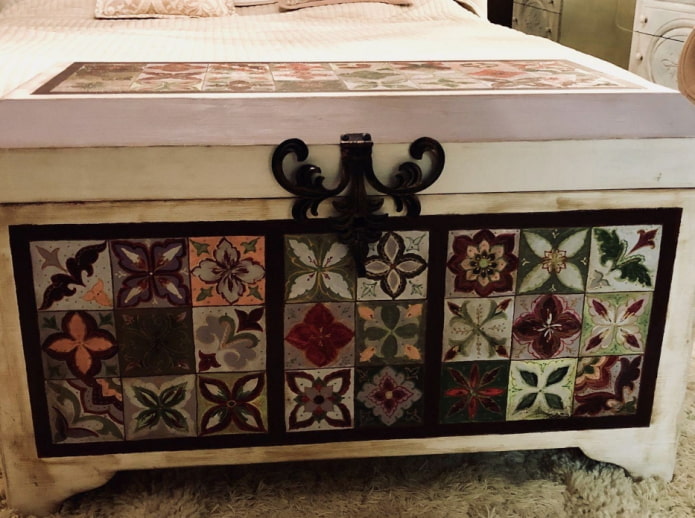
As you know, everything new is well forgotten old. However, chests, having traveled a path of tens of centuries, seem to have never left our lives. Once they were even used to transport things over long distances, were a source of pride for their owners and a secluded corner for storing important household items. Their lids served as a table and a place to sleep, and painted walls – entertainment for children. With the advent of wardrobes and chests of drawers, chests turned into dusty inhabitants of closets and pantries. Modern designers wanted to breathe life into them again and now wooden boxes with lids decorate bedrooms, kitchens and children’s rooms in houses.
It’s good if you have an old chest in your attic or summer house – you can simply restore it to your taste. If you don’t have such an exhibit, you can make a chest with your own hands. To do this, you just need to arm yourself with a drawing, wooden boards, plywood or furniture boards, as well as screws, glue and a saw. And one of the step-by-step instructions, which you can read in this article, will help you create your first design.
Now reading:
- Self-gluing non-woven wallpaper: step-by-step instructions with photos and videos
- Vinyl wallpaper for walls: how to choose, types and more than 50 interior photos
- Gray Wallpaper in the Interior: 101 Stylish Photos and Creative Design Ideas
- Sleek Kitchen Interiors: 30 Real Photos and Design Solutions
- Top 10 Garage Flooring Materials: Which One to Choose?