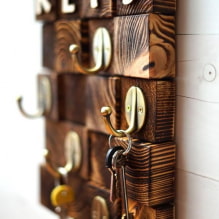
Key Holder from a Branch
Let’s start with a simple craft in the boho-chic style. Such a stylish holder is easy to make from scrap materials, which means it will not require much expense. You can make a key holder together with your child – it will be interesting and fun.
Check out an interesting selection of ideas for storage in a small hallway.

The photo shows a hand-painted key holder, the rich design of which is in perfect harmony with the laconic white background.
Tools and materials
You will need:
- thick branches;
- acrylic paints;
- hooks;
- screws for fastening to the wall;
- drill.

Step-by-step instructions
Let’s start creating the craft:
1. Find a branch of suitable thickness, wash it with soap or bleach, dry it in the sun or on a radiator. Paint the dried branch with acrylic paints.

2. Screw the hooks into the branch. If the wood is too hard, pre-drill holes of the required diameter, add glue and insert hooks.


3. We drill holes for screws, with which we attach the finished key holder to the wall.

The design of the products can be anything: the key holder will turn out original and memorable.


Lego Key Holder
The multi-colored holder looks harmonious in a modern interior and instantly attracts attention. It will be appreciated by creative individuals and fans of the legendary constructor. Making a key holder is not difficult.
See also step-by-step MK for making a bath mat.

Tools and materials
You will need:
- Lego base platform;
- Lego brick set;
- double-sided tape or screws;
- level;
- keys on a chain with a ring.

Step-by-Step Instructions
Getting Started:
1. Turn the base platform over and glue tape to the corners. If you are not sure about the reliability of the fastening, drill holes and fix the plate to the wall with screws.

2. When fastening, use a level for alignment.

3. Put a flat Lego piece on the ring.

4. Decorate the support platform as you wish and hang the keys.

Since Lego is a universal constructor, the key holder can have a wide variety of designs.

The photo shows one of the holder options, designed for a small number of keys.


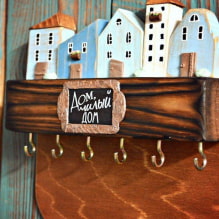
House Key Holder
You will need special tools and skills to create it, but even a beginner can handle the task. The houses look cozy and aesthetically pleasing.

Tools and materials
To create you will need:
- electric jigsaw (you can get by with a regular one);
- wood furniture board;
- sandpaper or sanding sponge;
- paper, scissors and pencil;
- acrylic paints and brushes;
- marker;
- masking tape;
- varnish;
- hooks.

Step-by-step instructions
1. Draw houses of a suitable size on paper and cut out the blank. Apply the stencil to the shield and trace it.

2. Carefully cut out the desired shape using a jigsaw.

3. Process the finished base with a sanding sponge to get rid of chips and unevenness.

4. Prime the houses with white paint diluted with water.

5. After drying, glue masking tape so that the painting is even.

6. Paint the houses with colored or hand-tinted acrylic paints.

7. Remove the tape after the paint has dried slightly.

8. Drill holes for the hooks.

9. Draw the windows with a pencil, then paint them over with a marker.

10. Screwing in the hooks.

11. We cover the product with varnish and hang it on the wall.

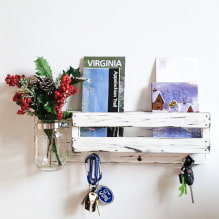
Plywood key holder with a door
Such a holder-box will be useful for those who have an impressive collection of keys, but want to place them neatly and beautifully.
See more examples of creating a crocheted basket.

Materials and tools
For manufacturing you will need:
- plywood (12 mm);
- wooden blocks;
- wood glue;
- nails;
- hooks;
- loops for fixing to the wall;
- stain, paint or varnish;
- ruler, hammer, saw, drill and screwdriver.

Step-by-step instructions
1. Cut out the blanks: two rectangles from plywood and 4 “walls” from the slats. Make holes for the future hooks. We glue the sidewalls along the edges and wait for drying according to the information on the package.

2. We turn the structure over and give the walls additional strength using nails.

3. Screw the hinges to the resulting box, then to the door.

4. Fix the handle on the door leaf.

5. Sand the product, cover with stain or paint. Using masking tape, create geometric patterns.

6. Screw the hooks inside the key holder.

7. Make holes in the back of the structure and attach it to the wall.

We recommend that you calculate in advance how much space the holder will take up and in which direction it will open.

The photo shows a finished key holder. To prevent the door from opening spontaneously, we recommend using a magnetic lock.
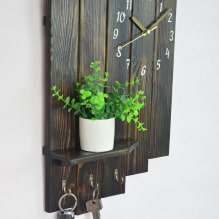
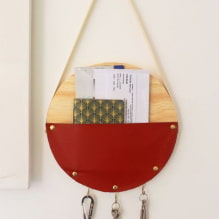
Key holder-organizer
Another simple holder that you can make yourself. Artificial faux leather was used as decoration, but anything can be used for decoration.
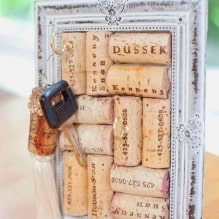
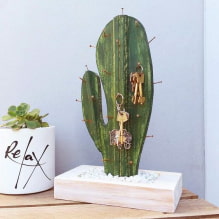
Ideas for inspiration
With simple manipulations and available materials, you can create a unique key holder for the hallway – for yourself or as a gift. We are publishing a few more photos for inspiration.
Now reading:
- Your Essential Guide to Buying a Used Renault Talisman
- 10 Effective Methods to Remove Rust from Toilets.
- Red Wallpaper: 55 Inspiring Photos for Living Rooms, Kitchens, Bedrooms and Kids Rooms.
- Purple Interior: 70 Inspiring Ideas and Photos for Your Home
- Effective Ways to Protect a Gazebo from Rain and Wind