Which lining to choose?
Wooden lining is simply necessary for lining a bathhouse. It can withstand high temperatures and creates a comfortable climate in the bathhouse, which has a positive effect on health. With good care, wooden panels are durable, but in order for them to stand the test of time, you need to approach the choice wisely.
The type of wood from which the lamellas are made is of primary importance. They must be resistant to decay, not overheat, not emit resin, and have a pleasant aroma. The most famous types of wood that are widely used for finishing bathhouses:
Linden
Linden lining is strong and durable. It looks great. It has a light appearance that remains unchanged for a long time. It does not overheat. When touching the lining, even at high temperatures, you will not get burned.
Due to the low heat capacity of linden, the bathhouse warms up quickly. Linden panels are resistant to high temperatures, high humidity, do not shrink or crack. Linden creates a cozy atmosphere in the bathhouse.
Aspen
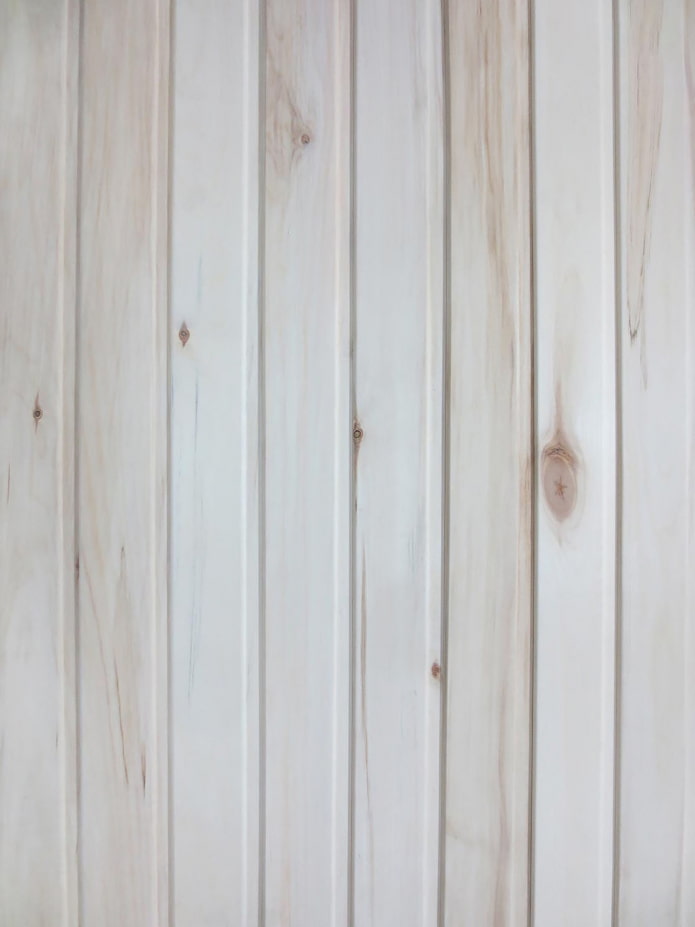
Aspen panels have many advantages: they do not emit resin, have low thermal conductivity, do not form splinters, do not crack, and have few knots. They are well suited for bathhouses. They do not deform under the influence of high temperatures. Light, almost white shade, smooth texture give a beautiful appearance.
Cedar
Cedar lining is widely used for interior decoration of bathhouses. It does not emit resin, is resistant to fungus and rot, which is an important indicator for damp rooms. It does not deform under temperature changes, does not overheat. Cedar panels smell great and have a naturally attractive appearance.
Alder
Alder panels are water-repellent, durable, and do not overheat. This makes the paneling durable. The pleasant texture and reddish tint give the finished bath a chic look. Alder does not emit resin, but it becomes darker over time. It can be used for finishing a steam room.
Oak
Oak paneling is expensive. It is wear-resistant and durable. The lamellas are resistant to decay, provided that they are made from the middle part of the tree, excluding the sapwood.
Pine
Pine paneling is the most budget-friendly option for finishing a bath. It smells delicious and has a light shade. The annual rings are clearly visible on pine. It is prone to knots, which can fall out and leave holes. Pine has resin passages. When heated, the resin begins to stand out. Therefore, it is better to choose another material for finishing the steam room.
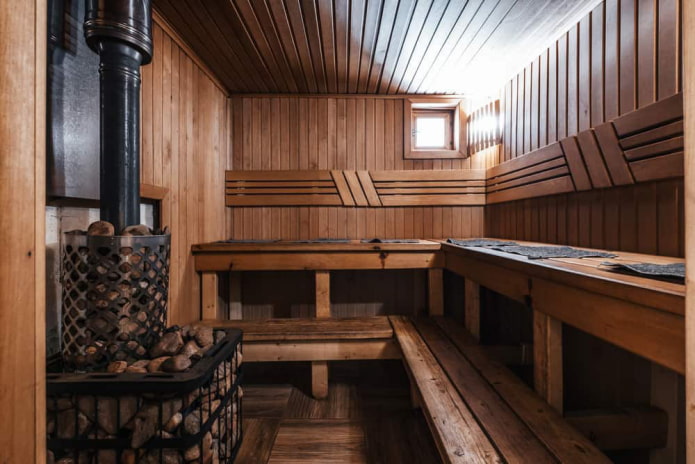
To avoid mistakes when choosing a wood species, use the rule. In the steam room and in places of high temperatures, sheathe with deciduous lining. The washroom, dressing room, and rest room can be finished with coniferous wood.
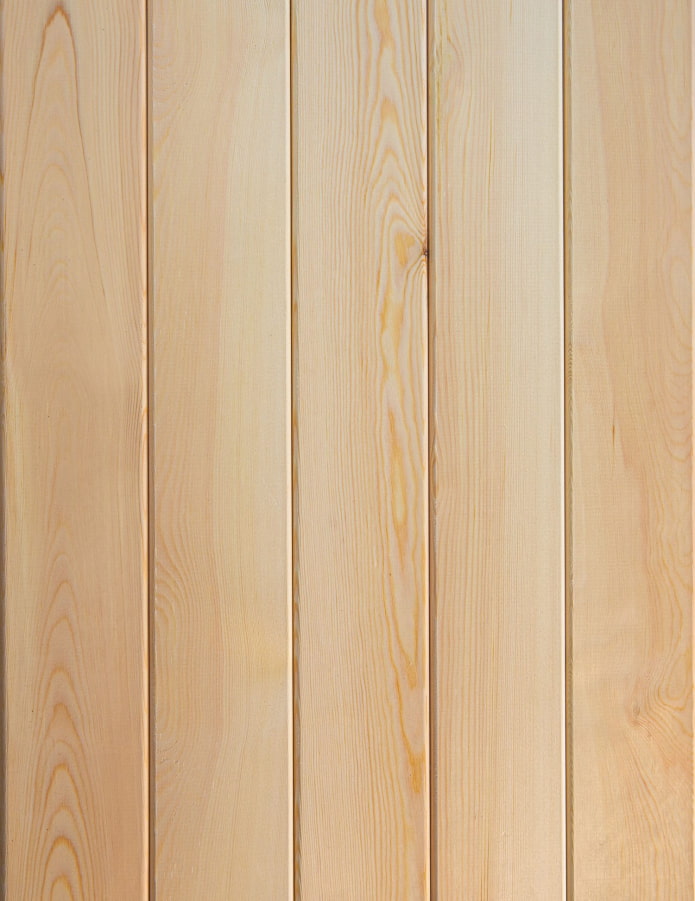
Having decided on the wood species, pay attention to the appearance of the lamellas, which depends on the variety. According to GOST, there are three main grades of Euro lining: A, B and C.
- Grade A is of high quality. The lining is smooth, without visible defects or knots. Its cost is higher than other grades.
- Grade B. It has visible defects, such as fallen knots and minor damage.
- Grade C. Allows large holes from knots, as well as cracks and roughness. This is low-quality lining.
Before purchasing, it is recommended to compare and study the samples presented at the factory. Make a decision based on a visual inspection.
What kind of fastening is suitable?
Wooden lining must be securely fastened so that it does not fall off during operation. Craftsmen use different methods to fasten the lining:
- Self-tapping screws. Fastening with self-tapping screws is reliable, but labor-intensive. To do it well, it is recommended to drill all the holes for the screws in advance. This is necessary to prevent the lining from cracking. Buy yellow screws. Avoid black screws, as they may cause rusty streaks. The screws should not be too long or thick. Focus on the thickness of the lamellas. A length of 25 mm and a diameter of 3.5 mm is considered optimal.
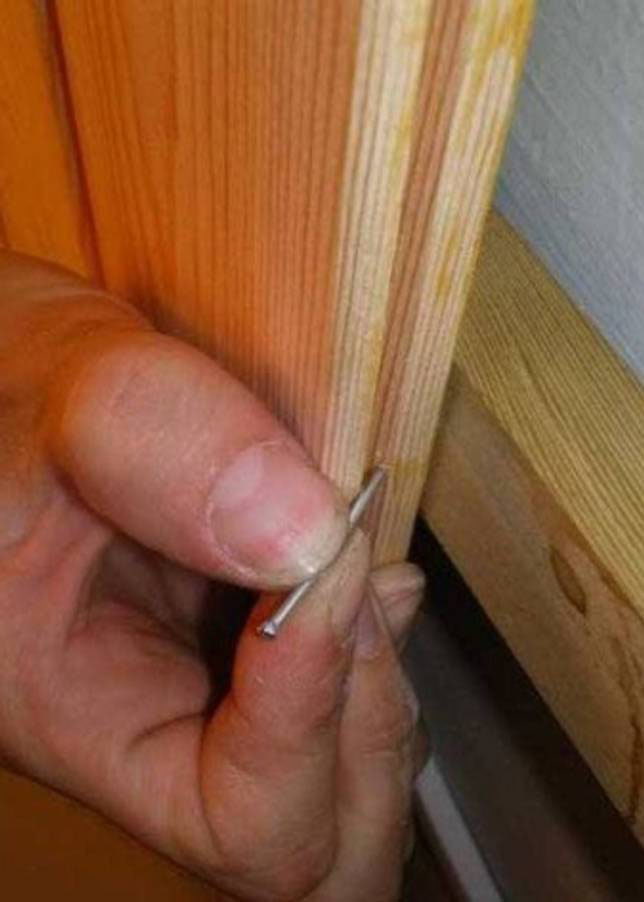
- Finishing nails. You should only buy nails made of stainless steel. They are durable. Regular nails will first rust from water, which will lead to unsightly streaks. Then they will rot and stop performing their function. Nails must be driven in correctly, at a slight angle, so that there is no cracking. To make the task of driving nails easier and speed up the work process, you can purchase a nailer. The optimal length of nails is 40 mm with a cap.
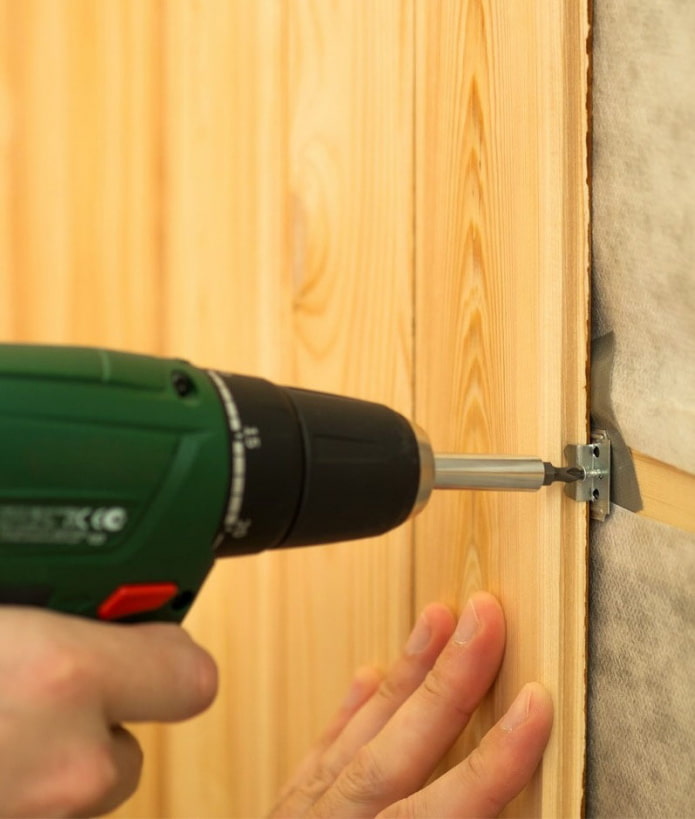
- Clamps. Special hidden fasteners that are designed to securely fasten the lining. One part clings to the tongue of the lining, the other is attached to the lathing. In this case, the lining itself remains intact, only the clamps are fixed. This is done with screws, nails or construction staples. The work is long and painstaking. Choose clamps made of strong, hard metal so that the connection is strong. Lining fixed to flimsy clamps can easily be squeezed out of the wall due to temperature differences.
If everything is done correctly, then any of these methods can be used to fasten the lining well. The choice depends on personal preference.
How much material will you need?
In any project, it is important to calculate the amount of material. This helps to predict the cash costs and not buy unnecessary things.
Wooden lining is sold in stores individually. Less often, the price is written per square or linear meter. When it comes to finishing, measuring in square meters will allow you to get the required number of panels.
To calculate, follow these steps:
- Find out how many square meters one paneling takes up. To do this, multiply the length by the width. Write down this value. For example, a panel measuring 2000 * 92 mm (2 by 0.092 m) has an area of 0.184 m2.
- Measure the height and width of each side of the room (walls, ceiling) that you plan to cover. Then multiply the height by the width of each side. Get the square meters of the sides. Write them down.
- To get the total number of squares for paneling, add up all the values found in point 2.
- Measure the height and width of windows, doors and all other areas that you do not plan to cover with paneling. Having calculated the area of each open area separately, find their total.
- Subtract the area of open areas from the total number of squares for cladding. As a result, we will get the square meters needed for finishing.
- Divide the number obtained in point 5 by the value calculated in the first point. Then add another 10% to this amount. Anything can happen during the work. The material can be damaged, and it is always better to have a reserve. This will be exactly the number of pieces of clapboard needed to order.
Preparatory work
You can’t just start cladding the walls of a bathhouse with wooden clapboard without preparation. In order for the Russian bath to serve for a long time and be comfortable to use, it is necessary to follow the process technology. The stages of preparatory work before cladding will be as follows:
Ventilation
For the bath to breathe and for mold and mildew to not form on the walls, good ventilation is necessary. Mark the locations of the ventilation holes and cut them out before starting further actions. For air inflow, one hole is made at the bottom, near the stove, at a short distance from the floor. For outflow, the second hole is made on the opposite wall, at the very top under the ceiling.
Insulation
To retain heat, the bath must be insulated. Mineral wool is a suitable material for thermal insulation. It is non-flammable and is widely used in places with high temperatures. It is convenient to insulate with slabs. Make sure that the packaging with the insulation says that it is suitable for baths and saunas.
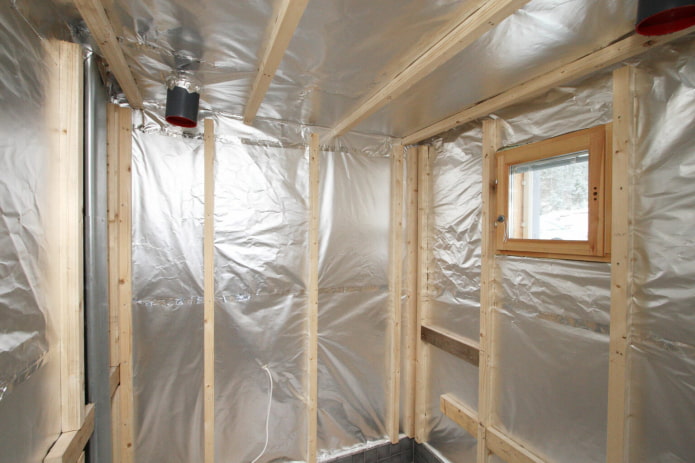
A lathing is installed under the insulation on the walls and ceiling. The lathing is made of dry wooden bars 50×50 mm, which must be impregnated with fire-bioprotection. They can be made of any wood. The lathing step is slightly less than the width of the insulation, so that the slab can be laid without trimming. If the walls of the bathhouse are made of brick or blocks, then dowels must be used to fasten the lathing.
You can fasten the bars for the insulation to the log house horizontally or vertically. The chosen method depends on the direction of laying the finishing lining. Therefore, at this stage, it is necessary to clearly determine whether it will be laid horizontally or vertically.
Subsequently, a bathhouse, the frame of which is prepared for horizontal installation, cannot be replaced with a vertical one. Therefore, please note: if the boards are laid horizontally, then the bars are also laid horizontally. If vertically, then the bars are fixed vertically.
Vapor and waterproofing
The insulation is covered with foil vapor barrier or foil on top. Its purpose is to prevent moisture from getting into the insulation. The foil should be located with the front side inside the bathhouse. It is fixed to the bars with staples or a construction stapler. The fewer seams, the better. If a seam is inevitable, then an overlap of 10 cm is made and the seam is carefully glued with aluminum tape. It is impossible to use ordinary polyethylene film in the bathhouse.
Counter lathing
When the vapor barrier work is completed, they proceed to the counter lathing. It creates a gap for ventilation between the finishing and the vapor barrier. It is made from 20×40 mm bars. This is enough for air to circulate freely between the sheathing. The bars are attached to the sheathing posts perpendicularly. The optimal distance between the bars is 40-50 cm.
Step-by-step installation instructions
When the preparatory work is complete. You can start covering the bathhouse with clapboard. The step-by-step installation instructions for the clapboard look like this:
Step 1. Ceiling
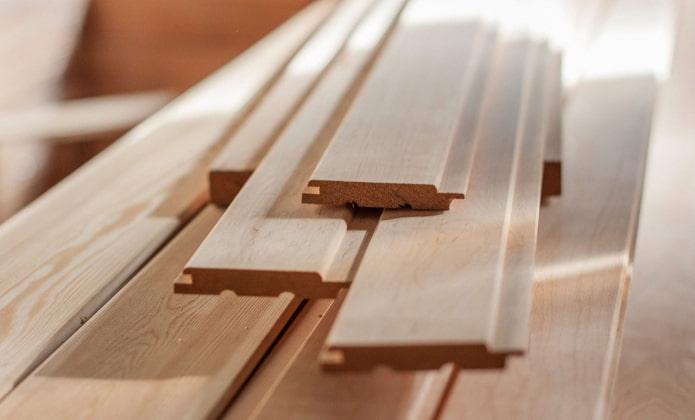
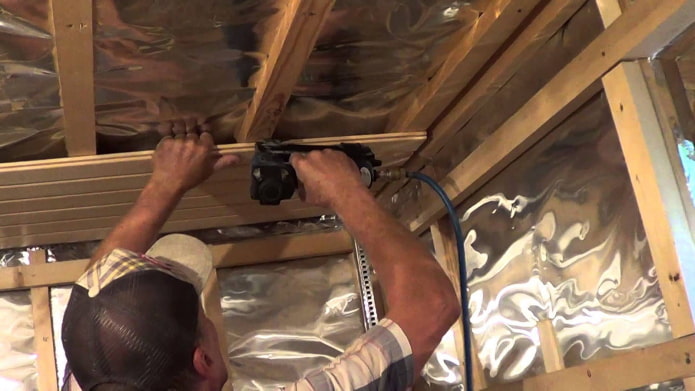
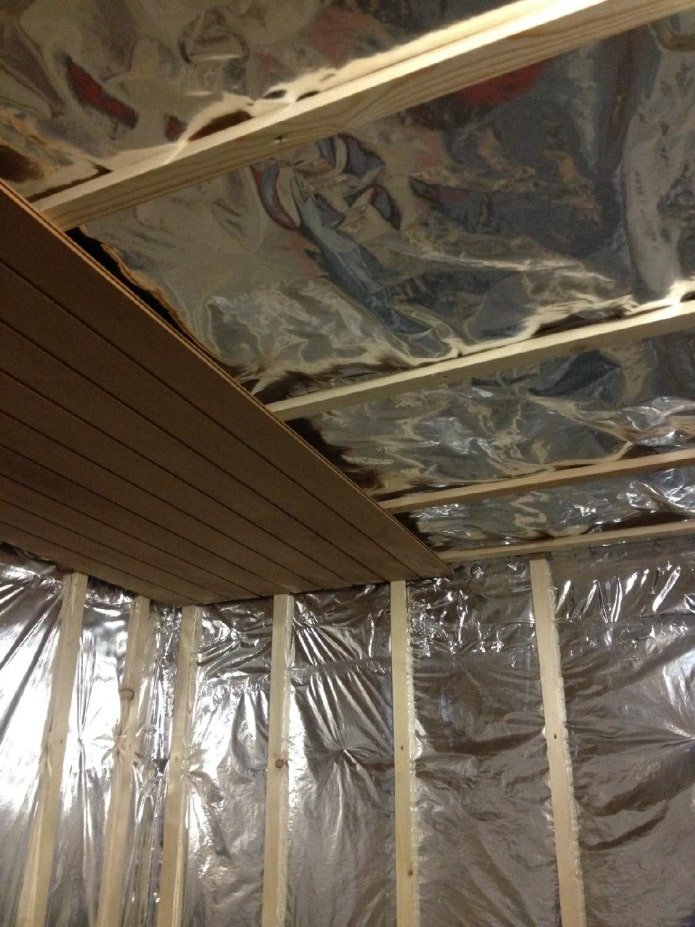
Installation of the clapboard always starts from the ceiling. They move from the side of the entrance door to the back wall. The panels must be nailed at right angles to the ceiling slats of the sheathing. The first board is located with the groove to the wall, the tenon (tongue) forward. It can be nailed with nails, which should be no more than 15 mm from the wall. In this case, the wall panels will hide the nails and they will not be visible. You may need to pre-drill the holes before hammering in the nails.
Continue laying the remaining boards, hammering nails through the groove at an angle of 45 degrees into each lining. Or use another selected fixing method. Remember that all fasteners (screws, nails, staples) must be made of stainless metal.
Make sure that all joints fit tightly together. The width of the last board will have to be cut to fit. Just like the first board, fix it with nails no more than 15 mm from the wall.
The ends of the lining on the ceiling cannot fit tightly against the walls. An air gap of at least 10-20 mm is required on each side. Keep this in mind when cutting the length of the lining.
Step 2. Back wall
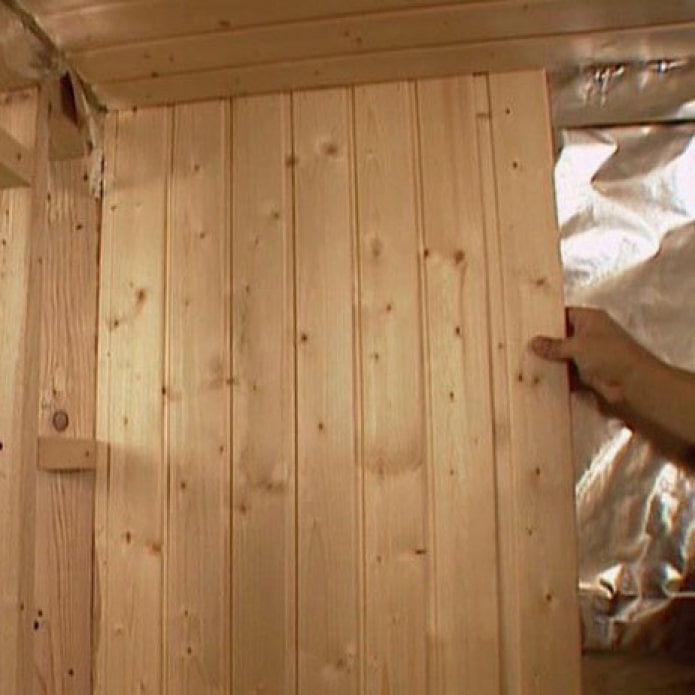
Installation of the lining on the walls begins with the back wall. If you have chosen horizontal application, then start from the top and go down to the floor. The lining is nailed perpendicular to the lathing. The tongue is facing down, the groove is facing up.
The first board is nailed from the front side with nails. Do not worry about the gaps near the ceiling, the finish will hide everything. Use a level to make sure that the first board is attached evenly. To perform high-quality lining of the bathhouse, it is recommended to periodically check the evenness of the installation. For example, every fourth row.
All the boards are nailed to the counter-lattice. The last board is cut and nailed from the front side.
If applied vertically, install the first board. The tongue is directed into the room, the groove faces the corner of the wall. Make sure that the lamella is aligned and nail it. Continue laying the lining, attaching it with the chosen fastening method.
When you reach the end of the wall, when the full width board cannot be used. Measure the distance, cut the board and install it in the gap. Nail it from the front side.
Step 3. Side walls
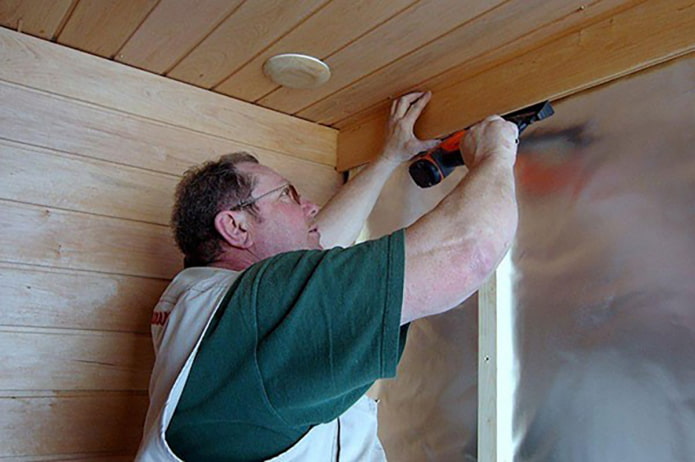
The lining is installed on both side walls of the bathhouse using the same method as the back wall.
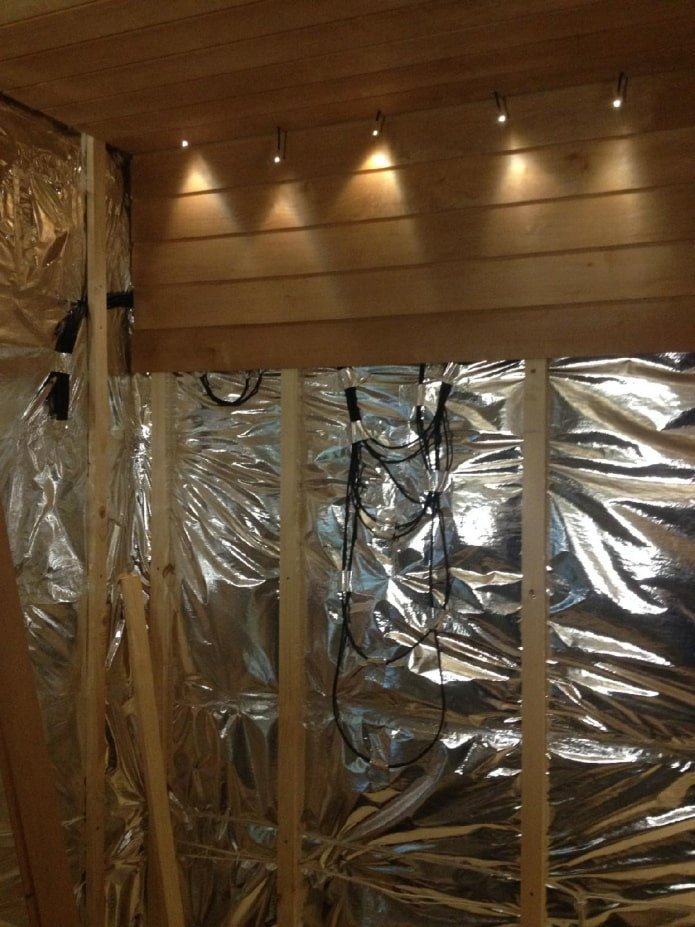
Step 4. Front wall
Horizontal installation:
- Start installing the lining from the top, going down. The tongue and groove also point down, and the groove up. The top one or two panels (depending on the height of the bathhouse ceiling) will be the entire width of the front wall.
- Align the first board with a level and nail it in place. Do the same with the second board.
- If you have already reached the doorway, then, holding the lining in place, mark a cutout for it on it.
- Cut a recess for the top of the doorway and attach the board with nails.
The next panels are installed on both sides of the doorway to the floor. All actions are similar.
Vertical installation:
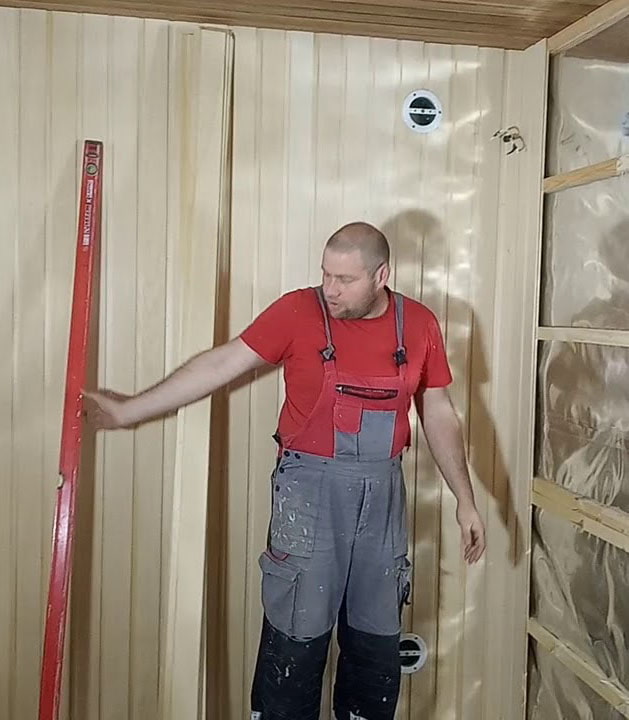
Finishing the bathhouse with lining in a vertical way begins from any corner.
- The first lining is installed so that the tongue is directed inside the bathhouse, and the groove looks into the corner. Use a level to align the board and nail it in place.
- Continue moving along the front wall, securing each panel.
- When you reach the doorway, hold the board in place and use a pencil to mark the door cutout.
- Cut it out and install the paneling in place.
- At the top of the doorway, install short panels until you reach the other side of the doorway. Make sure all vertical panels are nailed straight.
- In the same way, mark the next board in place with a pencil and cut it out.
- Continue moving to the end of the wall.
- The last board will have to be adjusted to the width and nailed from the front side.
Cover the joints between the floor and the walls with baseboards. This will give the interior decoration of the bathhouse a finished look.
To keep the wood new as long as possible, the panels can be treated with a special oil. Choose a harmless oil suitable for baths and saunas.
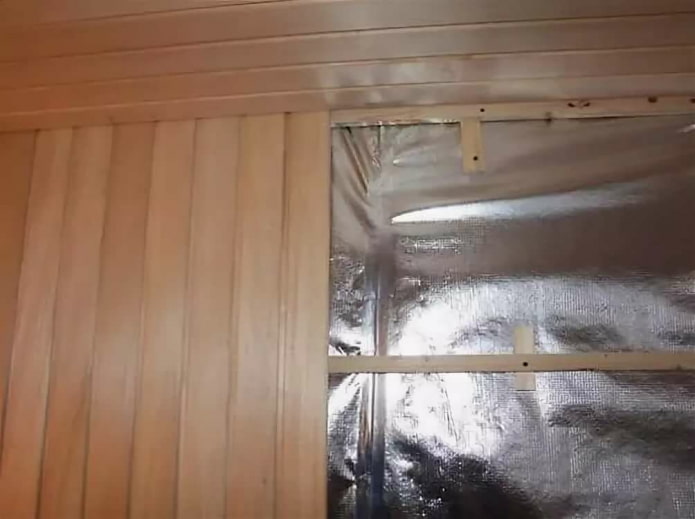
Beautiful examples of finishing
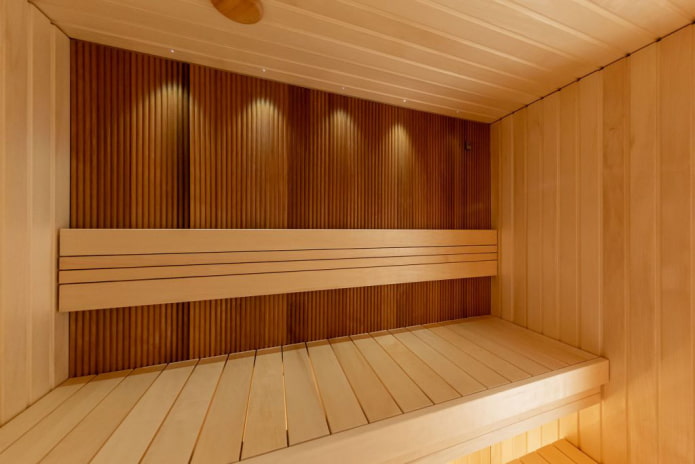
Finishing materials for the bathhouse can be grouped. The possibilities are endless and depend on your imagination. The accent wall technique can be used not only in an apartment, but also in a bathhouse. Highlight one wall with dark alder panels, and cover the rest with light aspen ones. This combination looks great. (photo 1)
Today, bathhouse owners want to see their bathhouses with an attractive interior design. A wide range of materials gives many opportunities for this. To visually make a small bathhouse larger and create the effect of expanding the space, light wood was used. Dark wood makes the space seem smaller than it is. To expand, narrow panels were used, installed horizontally rather than vertically. The beauty of wide panels can only be appreciated in a large bathhouse.
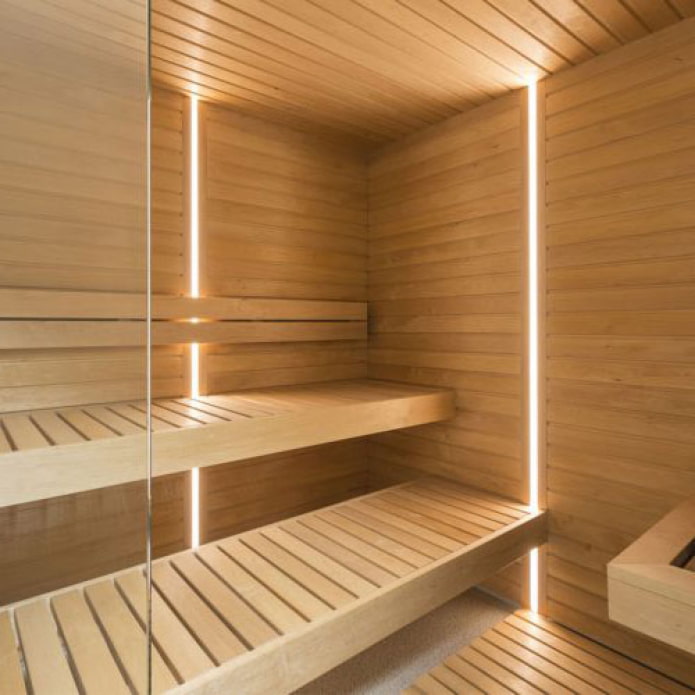
Lighting is an effective way to add coziness to the bathhouse. The photo below shows a bathhouse created using standard materials. However, thanks to vertical lighting, which is flush with the wall, a special atmosphere is created in the bathhouse.
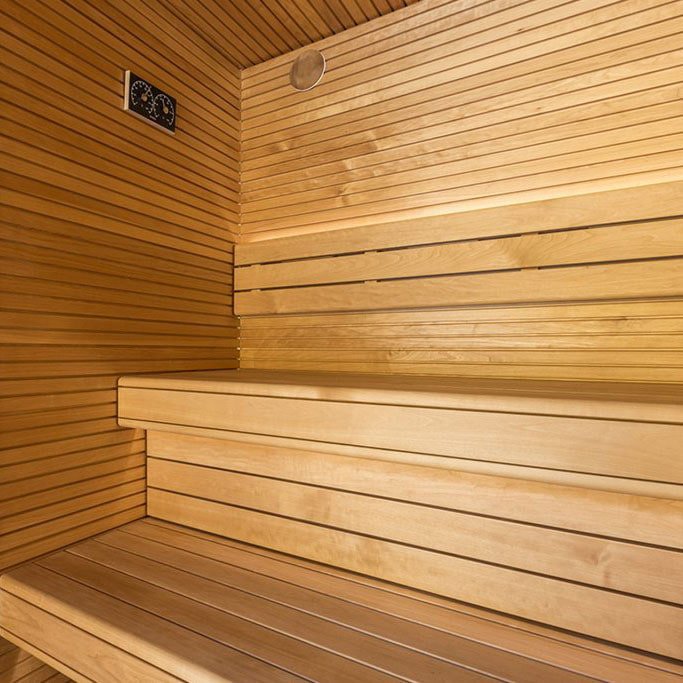
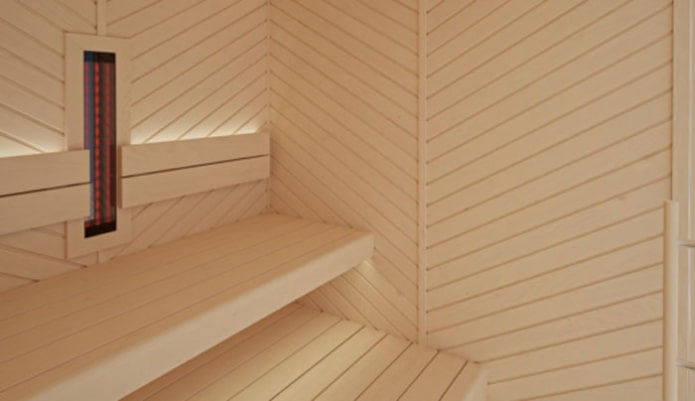
We are used to the fact that the walls of a bathhouse are mainly laid horizontally or vertically. However, shortened panels can be used to create various unusual patterns. In the example shown, the walls of the bathhouse are decorated with a herringbone pattern. This gives the bathhouse an unusual look.
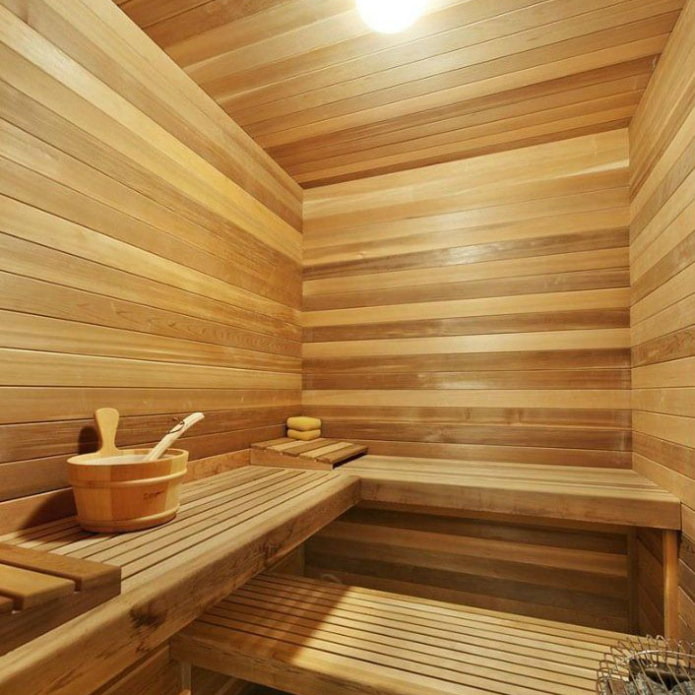
The walls of this small bathhouse are decorated using light and dark materials. The photo shows how the dark and light panels alternate. This combination of colors makes the bathhouse original.
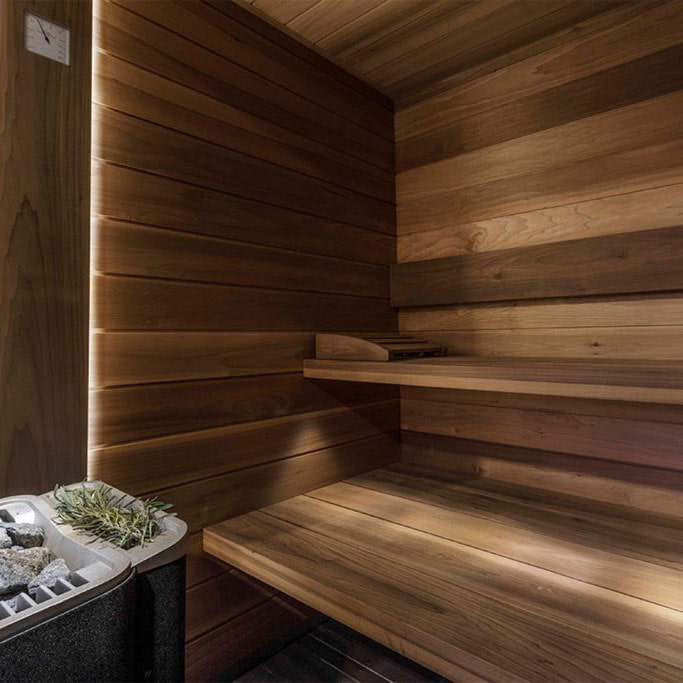
Wide boards are in fashion now. They help to emphasize the unique type of wood. The photo shows a luxurious bathhouse finish using wide dark panels. It is both beautiful and practical. Cleverly hidden lighting behind a wide panel disguises the joint of the lining.
Any craftsman can install a bathhouse using lining. The information above will help you do the job efficiently and quickly.
Now reading:
- Floor tiles: more than 70 photos and ideas for the kitchen, bathroom, and other rooms.
- Figured ceilings: more than 70 photos and ideas for two- and multi-level solutions.
- Ways to improve your apartment according to Feng Shui: tips and recommendations.
- Unique Epoxy Resin Table – Fashion Trend 2020. Complete Guide with Video.
- 10 Ways to Dry Clothes in an Apartment Without a Balcony: 10 Effective Methods