Rules for pasting vinyl wallpaper
To ensure that the wall remains beautiful after pasting and that the vinyl covering holds firmly, you must adhere to simple rules:
- An important nuance of vinyl wallpaper with a rapport is that they should be pasted end to end, forming a pattern. You need to paste straight if the marking on the packaging contains arrows located opposite each other. Otherwise, pasting with an offset is assumed. The distance in centimeters by which the contacting strips must be shifted is indicated on the packaging.
- Before pasting, you need to choose the right glue. This can be a special composition for vinyl wallpaper if the base is non-woven fabric. For a paper base, ordinary adhesive mass is sufficient. The main thing is that it has a sufficiently viscous consistency.
- The sheets are glued to the wall from top to bottom. First, the area is pressed along the longitudinal axis. Then you need to expel excess glue and air to the sides. For this, use a roller or a dry, clean rag.
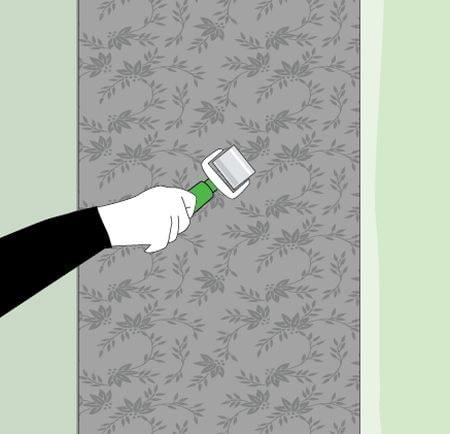
- The edges are coated especially carefully. High-quality counter-jointing assumes that the joints are rolled with a special narrow rubber roller or pressed with rags. Removing the glue means ridding the walls of stains.
In addition to the general rules, the type of base of vinyl wallpaper affects how to glue. It can be paper or non-woven. And if in the first case the canvas is lighter, then vinyl wallpaper on non-woven, which has a foamed relief coating, is heavy, thick, and this must be taken into account.
Features depending on the base
What is the best way to glue vinyl wallpaper?
The choice depends on the type of material that forms the base of the vinyl sheets. If it is paper, you can use PVA glue, but it is difficult to achieve quality, since the stripes will slowly slide off under their own weight. Using paste is also not recommended, since a substance made of flour and starch is a suitable environment for the life of microorganisms. So how to glue wallpaper so that it does not come off the wall?
On a non-woven base
Specialized mixtures are used, which include modified starch. And to prevent mold from appearing, components are used that, in addition to the antiseptic effect, increase viscosity and adhesive capacity.
On a paper base
The use of adhesives for paper wallpaper is allowed. But this is when there are no foamed relief elements on the surface of the canvas that make the wallpaper heavier. If painting is planned, this method will not work. But when it comes to a surface with a colored pattern, glue for paper wallpaper can be used.
IMPORTANT! The consumption of glue is usually indicated on the packaging of the glue. But it depends on the type of surface and the base of the wallpaper. On average, the consumption is 180 g of dry substance for 4-5 rolls.
Tools
To perform all the necessary actions, you need to have on hand:
- dishes for preparing glue;
- rollers for squeezing out excess glue and air;
- polyethylene film to cover the floor;
- dry rags to ensure cleanliness;
- narrow rollers for rolling the counter joint;
- wallpaper knife, pencil or ballpoint pen;
- measuring ruler and guide for cutting strips;
- wide spatula, which will be useful for fitting the canvas;
- special corner rubber roller for rolling internal corners.
All this must be prepared before gluing vinyl wallpaper, regardless of the type of base.

Preparation
Before performing the final interior finishing, you must do the following:
- Decide on the selection of vinyl wallpaper and glue.
- Prepare the surfaces.
- Remove all the consequences of the repair.
- Cover the floor with polyethylene.
- Turn off the electricity.
- Remove the covers of sockets and switches.
- Buy the necessary tool.
In addition, before gluing the wallpaper, you need to familiarize yourself with the recommendations for diluting the glue and preparing the wall surfaces.


How to properly dilute the glue?
Dry granules are poured into water. The solution is constantly stirred manually or using a special attachment on a drill or screwdriver. Recommendations for preparation are on the packaging. The main thing is not to mix the entire pack. Enough quantity – for three or four stripes.

Preparing the surface

You cannot glue vinyl wallpaper over paint, old wallpaper, or polystyrene foam. The canvas will not stick to OSB, ceramic tiles and laminated panels. Concrete walls are suitable, but if they are uneven, the defects are eliminated with putty. The strips are glued to plasterboard structures without preliminary preparation, if the surface is clean. Before gluing, you need to remove the remains of:
- old wallpaper;
- lime;
- paint or whitewash;
- oil stains and dirt;
- anything unnecessary.
You need to clean as thoroughly as possible, right up to removing the plaster and applying a new layer. The surface must be covered with a primer.
Technology of gluing to walls
When cutting the strips, you need to take into account the presence of a pattern. If it is necessary to glue with an offset, a reserve is taken into account, which is laid in order to fit the pattern. The strips are glued end to end without overlapping. If the base is non-woven, the strips do not need to be coated. The sequence of actions is reduced to four stages.
- Stage 1: diagram and marking of the walls.
You need to glue from the window. To do this, measure the width of the strip and draw a vertical line using a level or plumb line. The entire wall is marked out, which gives an idea of how many strips need to be prepared.

- Stage 2: preparing the wallpaper.
The strips are spread out on the floor. The pattern is adjusted. The length is made 3-5 cm longer than the height of the ceilings or the width of the room (if the ceiling is being papered). Prepare enough strips so that all the ready-made glue is used up.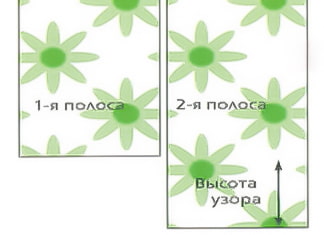

- Step 3: gluing.
The top of the strip is applied to the coated wall. The central part is pressed with a roller or cloth along the longitudinal axis to the very bottom. In the same way, the remaining air and excess glue are driven out from the middle to the edges.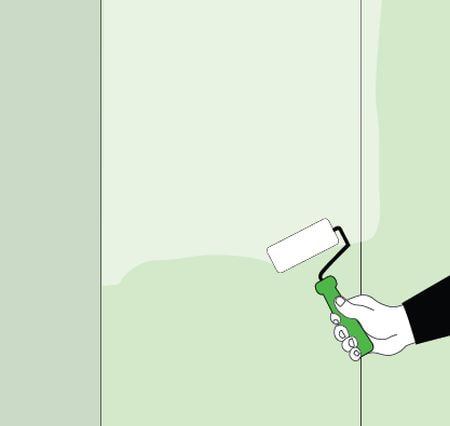
- The joints, upper and lower ends are rolled with a narrow roller, the protruding glue is removed with a rag.
- Stage 4: final.
The excess is cut off with a wallpaper knife along the attached wide metal spatula.
The strips are laid out on the floor. The pattern is adjusted. The length is made 3-5 cm longer than the height of the ceilings or the width of the room (if the ceiling is being papered). Prepare such a number of strips that all the ready-made glue is used up.
The top of the strip is applied to the coated wall. The central part is pressed with a roller or cloth along the longitudinal axis to the very bottom. In the same way, the remaining air and excess glue are driven out from the middle to the edges.
Extra is cut off with a wallpaper knife along the attached wide metal spatula.
What to do with hard-to-reach places?
The technology of pasting external and internal corners is a specific process that involves the use of special tools. When wallpapering walls around window (door) openings and behind radiators, you need to measure and cut out the necessary pieces in advance.
The photo shows a diagram of gluing wallpaper around sockets and switches:

The photo shows a diagram of gluing wallpaper behind a radiator:

Step-by-step instructions for pasting the ceiling
Strips of vinyl wallpaper are pasted from the window to the entrance. Direction – across the length of the room. The technology is similar, but has a number of features.


Step-by-step video guide
For clarity, it makes sense to watch a specially filmed video, which explains in detail how to glue vinyl wallpaper to the wall and ceiling.
How long does vinyl wallpaper dry?
The room should remain closed for 24 hours. A draft leads to overdrying. Forced heating is also undesirable, and the use of heaters is prohibited. In just one day, you can open the windows and doors. But if it is cold outside and the room is not heated, you will have to wait 2-3 days.

Having done everything as described above, anyone can paste vinyl wallpaper with their own hands and save money.